Today, I wanted to pop on here and post about some of the recent updates that I have made to my website's storefront. I have already posted some information inside my portfolio, but I have made a lot of exciting improvements that I wanted to give some attention to!
A majority of the updates were inside of my admin dashboard, but I have also vastly expanded the user dashboard, my store's front page, and more! I believe that documenting these tasks is important because it helps demonstrate my current capabilities and growth over time.
Buckle up, because there have been a lot of updates! So many, in fact, that this will have to be a multi-part post.
The updates that I will cover in this post are as follows:
- Fully integrating Stripe payments inside my store with a comprehensive webhook that handles user product entitlement, email/receipt delivery, and taking payments safely and securely.
- Created two separate checkout flows dependent on product type. A user's experience on their dashboard after a successful checkout is now dependent on the type of product that they purchased. If they purchase a digital download or product that uses am embedded iFrame, the files and code snippets are delivered directly using a link inside the "Products" section of their dashboard. If they purchase a digital service that requires setting an appointment, they are instead allowed to set their own appointment.
Stripe Webhook
It was very important to me during the setup of my custom e-commerce storefront that payment information was not stored by me, and that I was handling all payments in the most modern, up-to-date, and safe way. The only way to do this is by using a trusted third party. My storefront uses Stripe.
When a user checks out on my website, the "enter credit card" part of the purchase is handled completely by them, so it is safe and secure. Although it may look completely integrated into my own storefront, payment processing is actually being completed off-site.
While this is the gold standard for security, it leaves a small problem in its wake. Since the payment occurs off-site, my website has no way of knowing if a user has successfully completed their purchase or not. Because the website doesn't know when a successful transaction has been made, it is unable to deliver products to users. Not only do we want the website to know when a customer has made a purchase, we want to know what the purchase was for, so that we can act accordingly.
This is where the webhook comes in.
To put it simply, a webhook is a document of code that allows other websites to send messages to my website once something has happened. The "something that happens" here is when a user makes a purchase on my website, but through Stripe's payment API. Now, when somebody makes a purchase, Stripe delivers the message back to my website, tells it what kind of product the user purchased, and my website is able to manage fulfillment and entitlement.
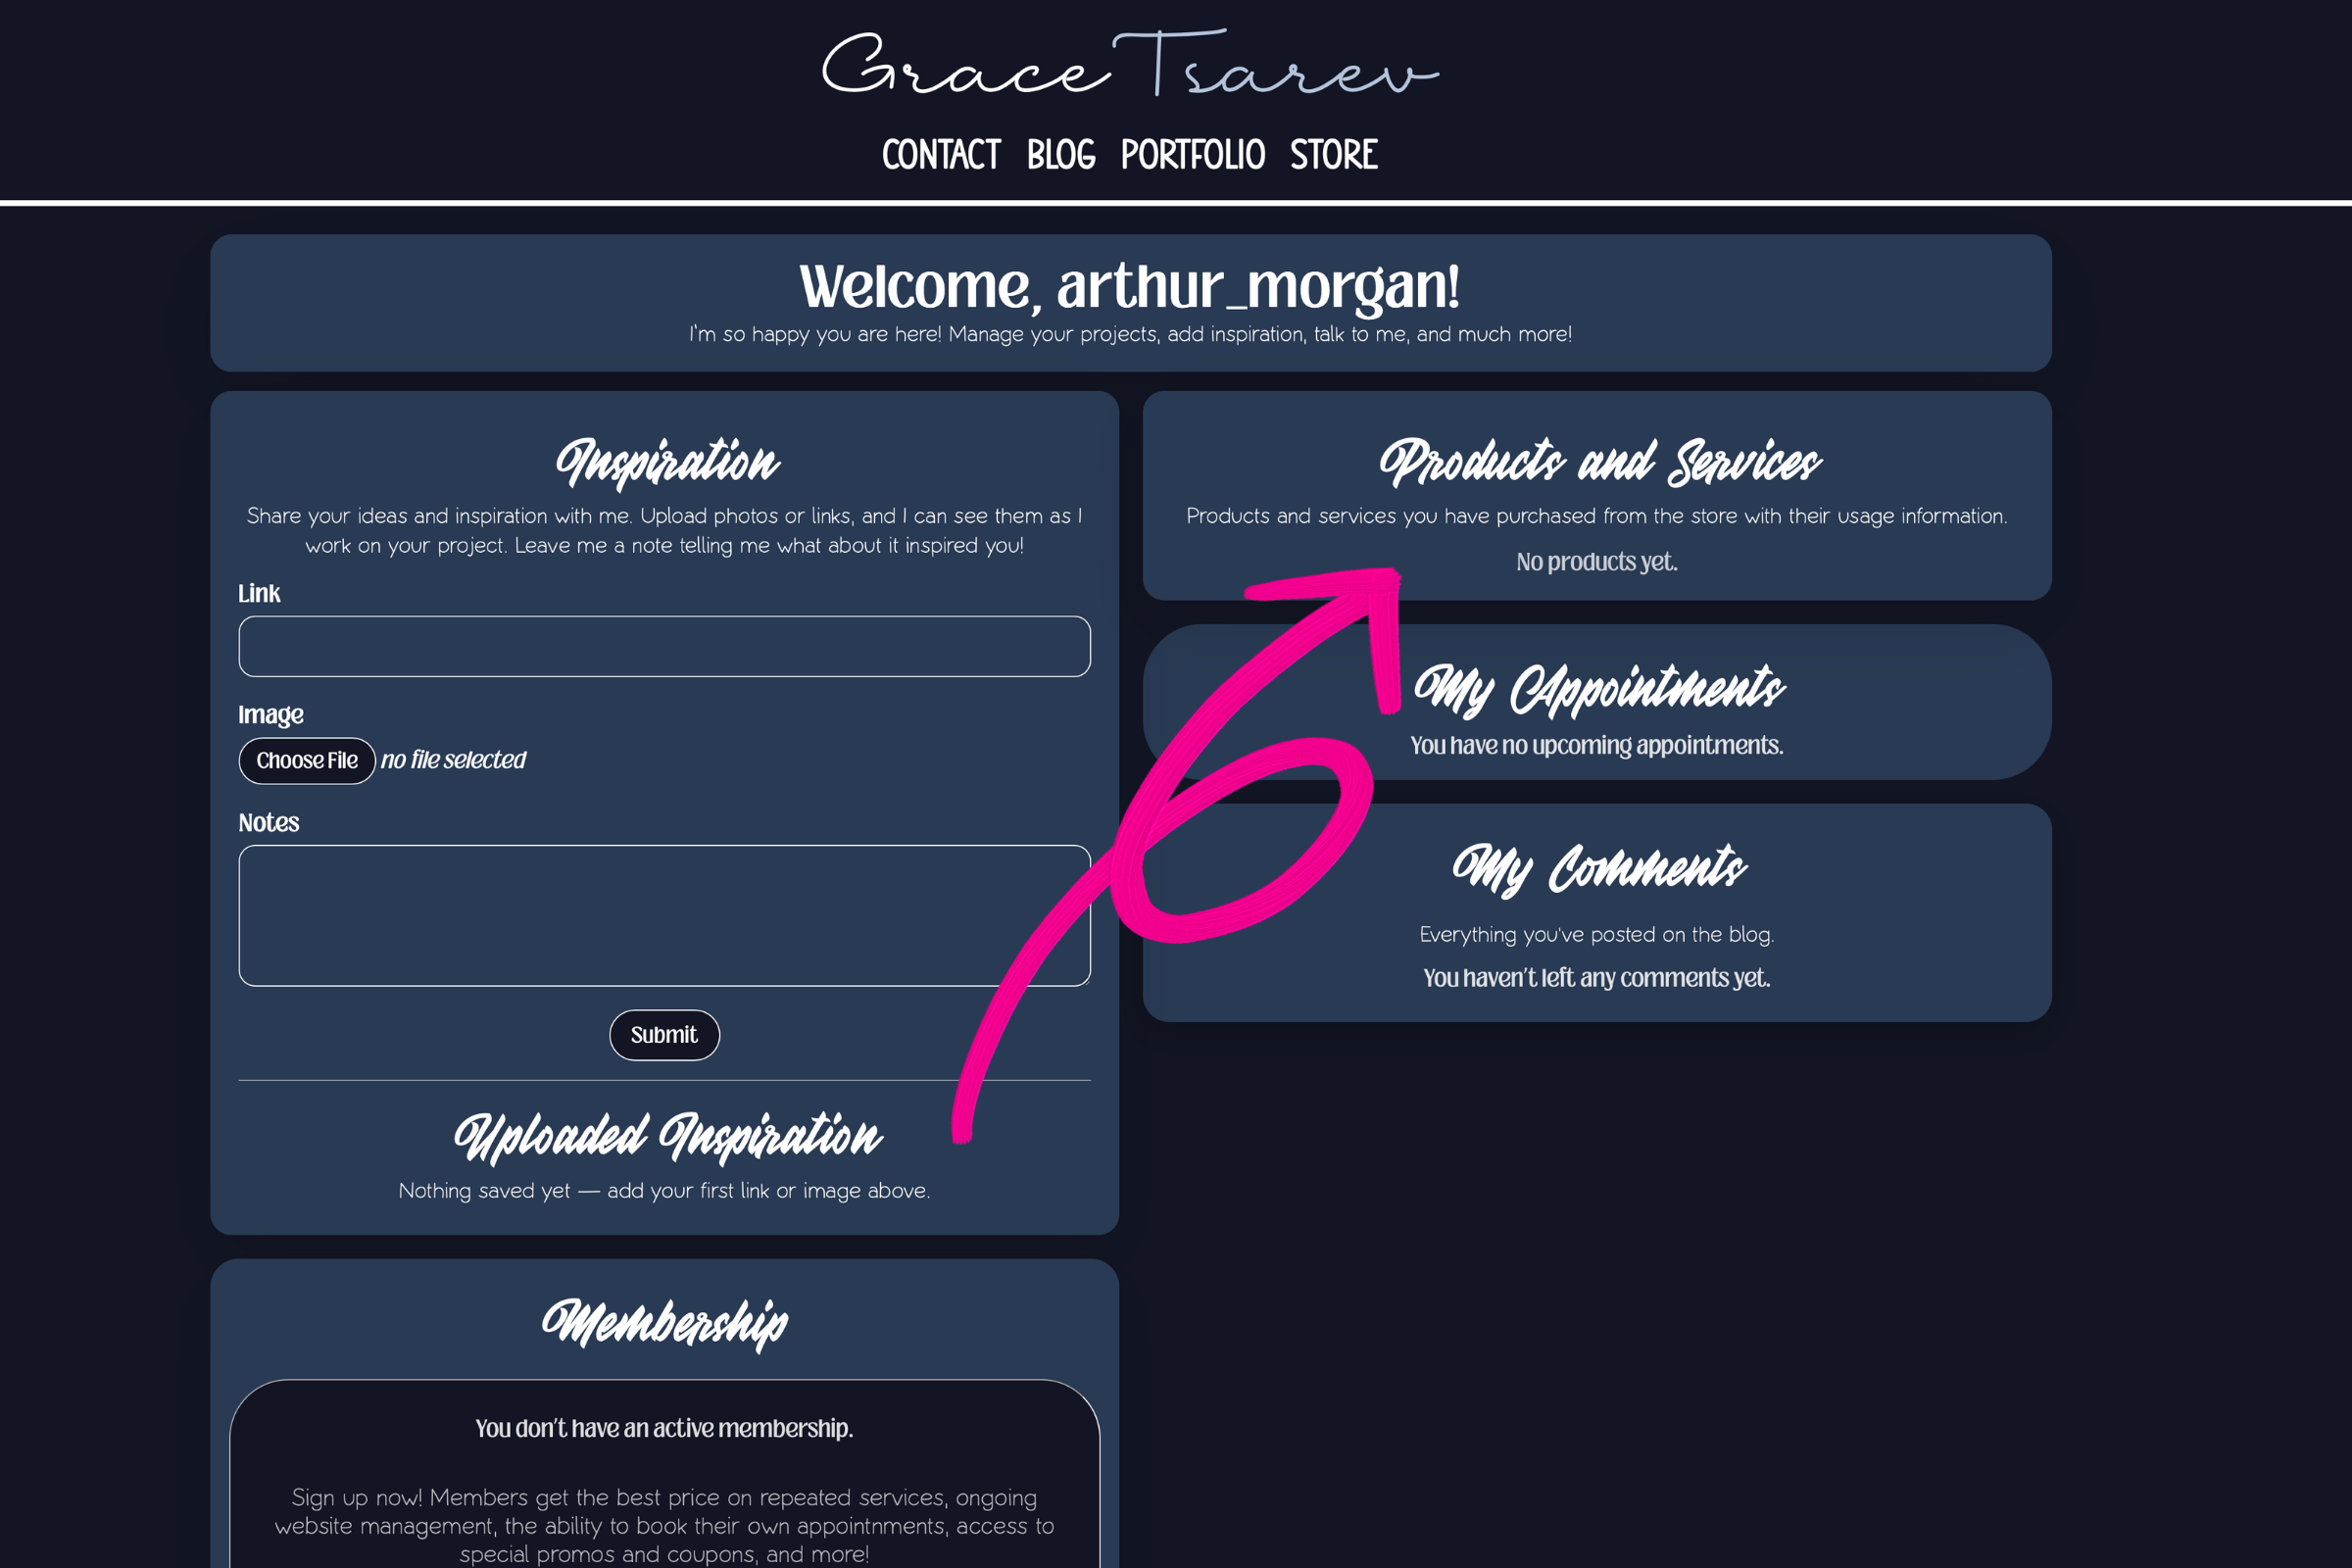
In the image below, you can see the message that appears inside a registered user's dashboard when they have not purchased anything from my store before. The user inside the example has never made a purchase, and does not have a subscription membership.
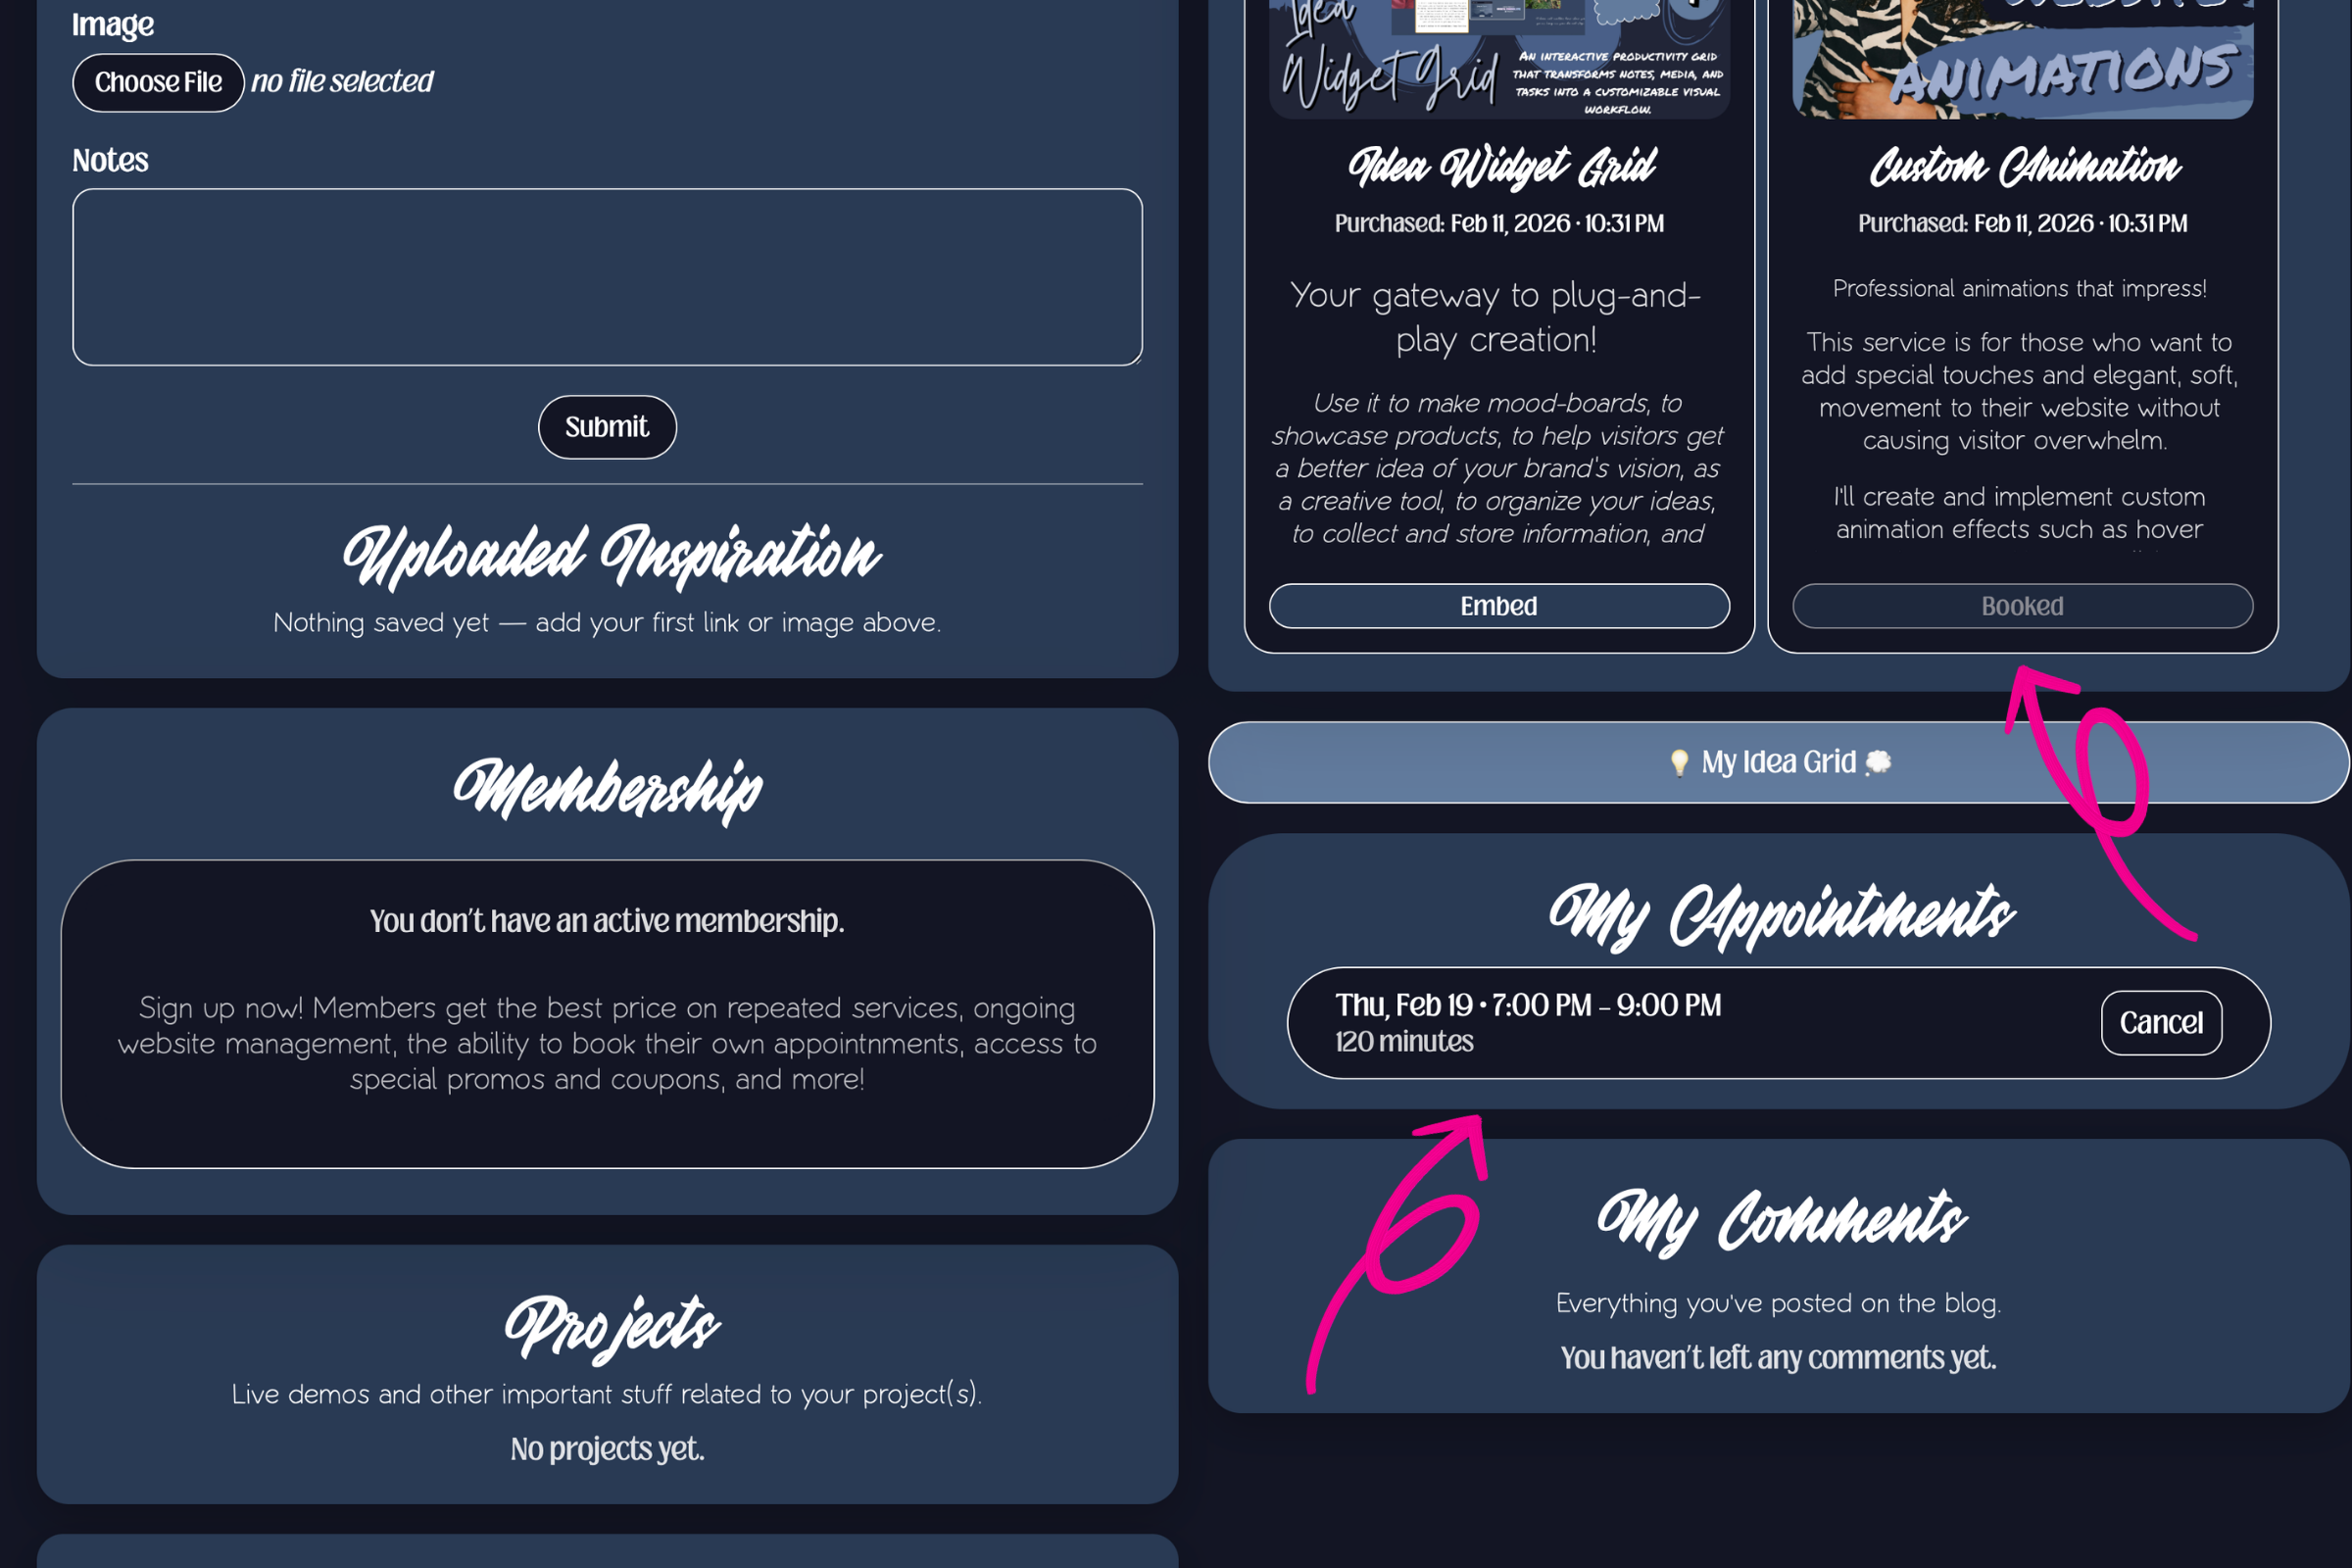
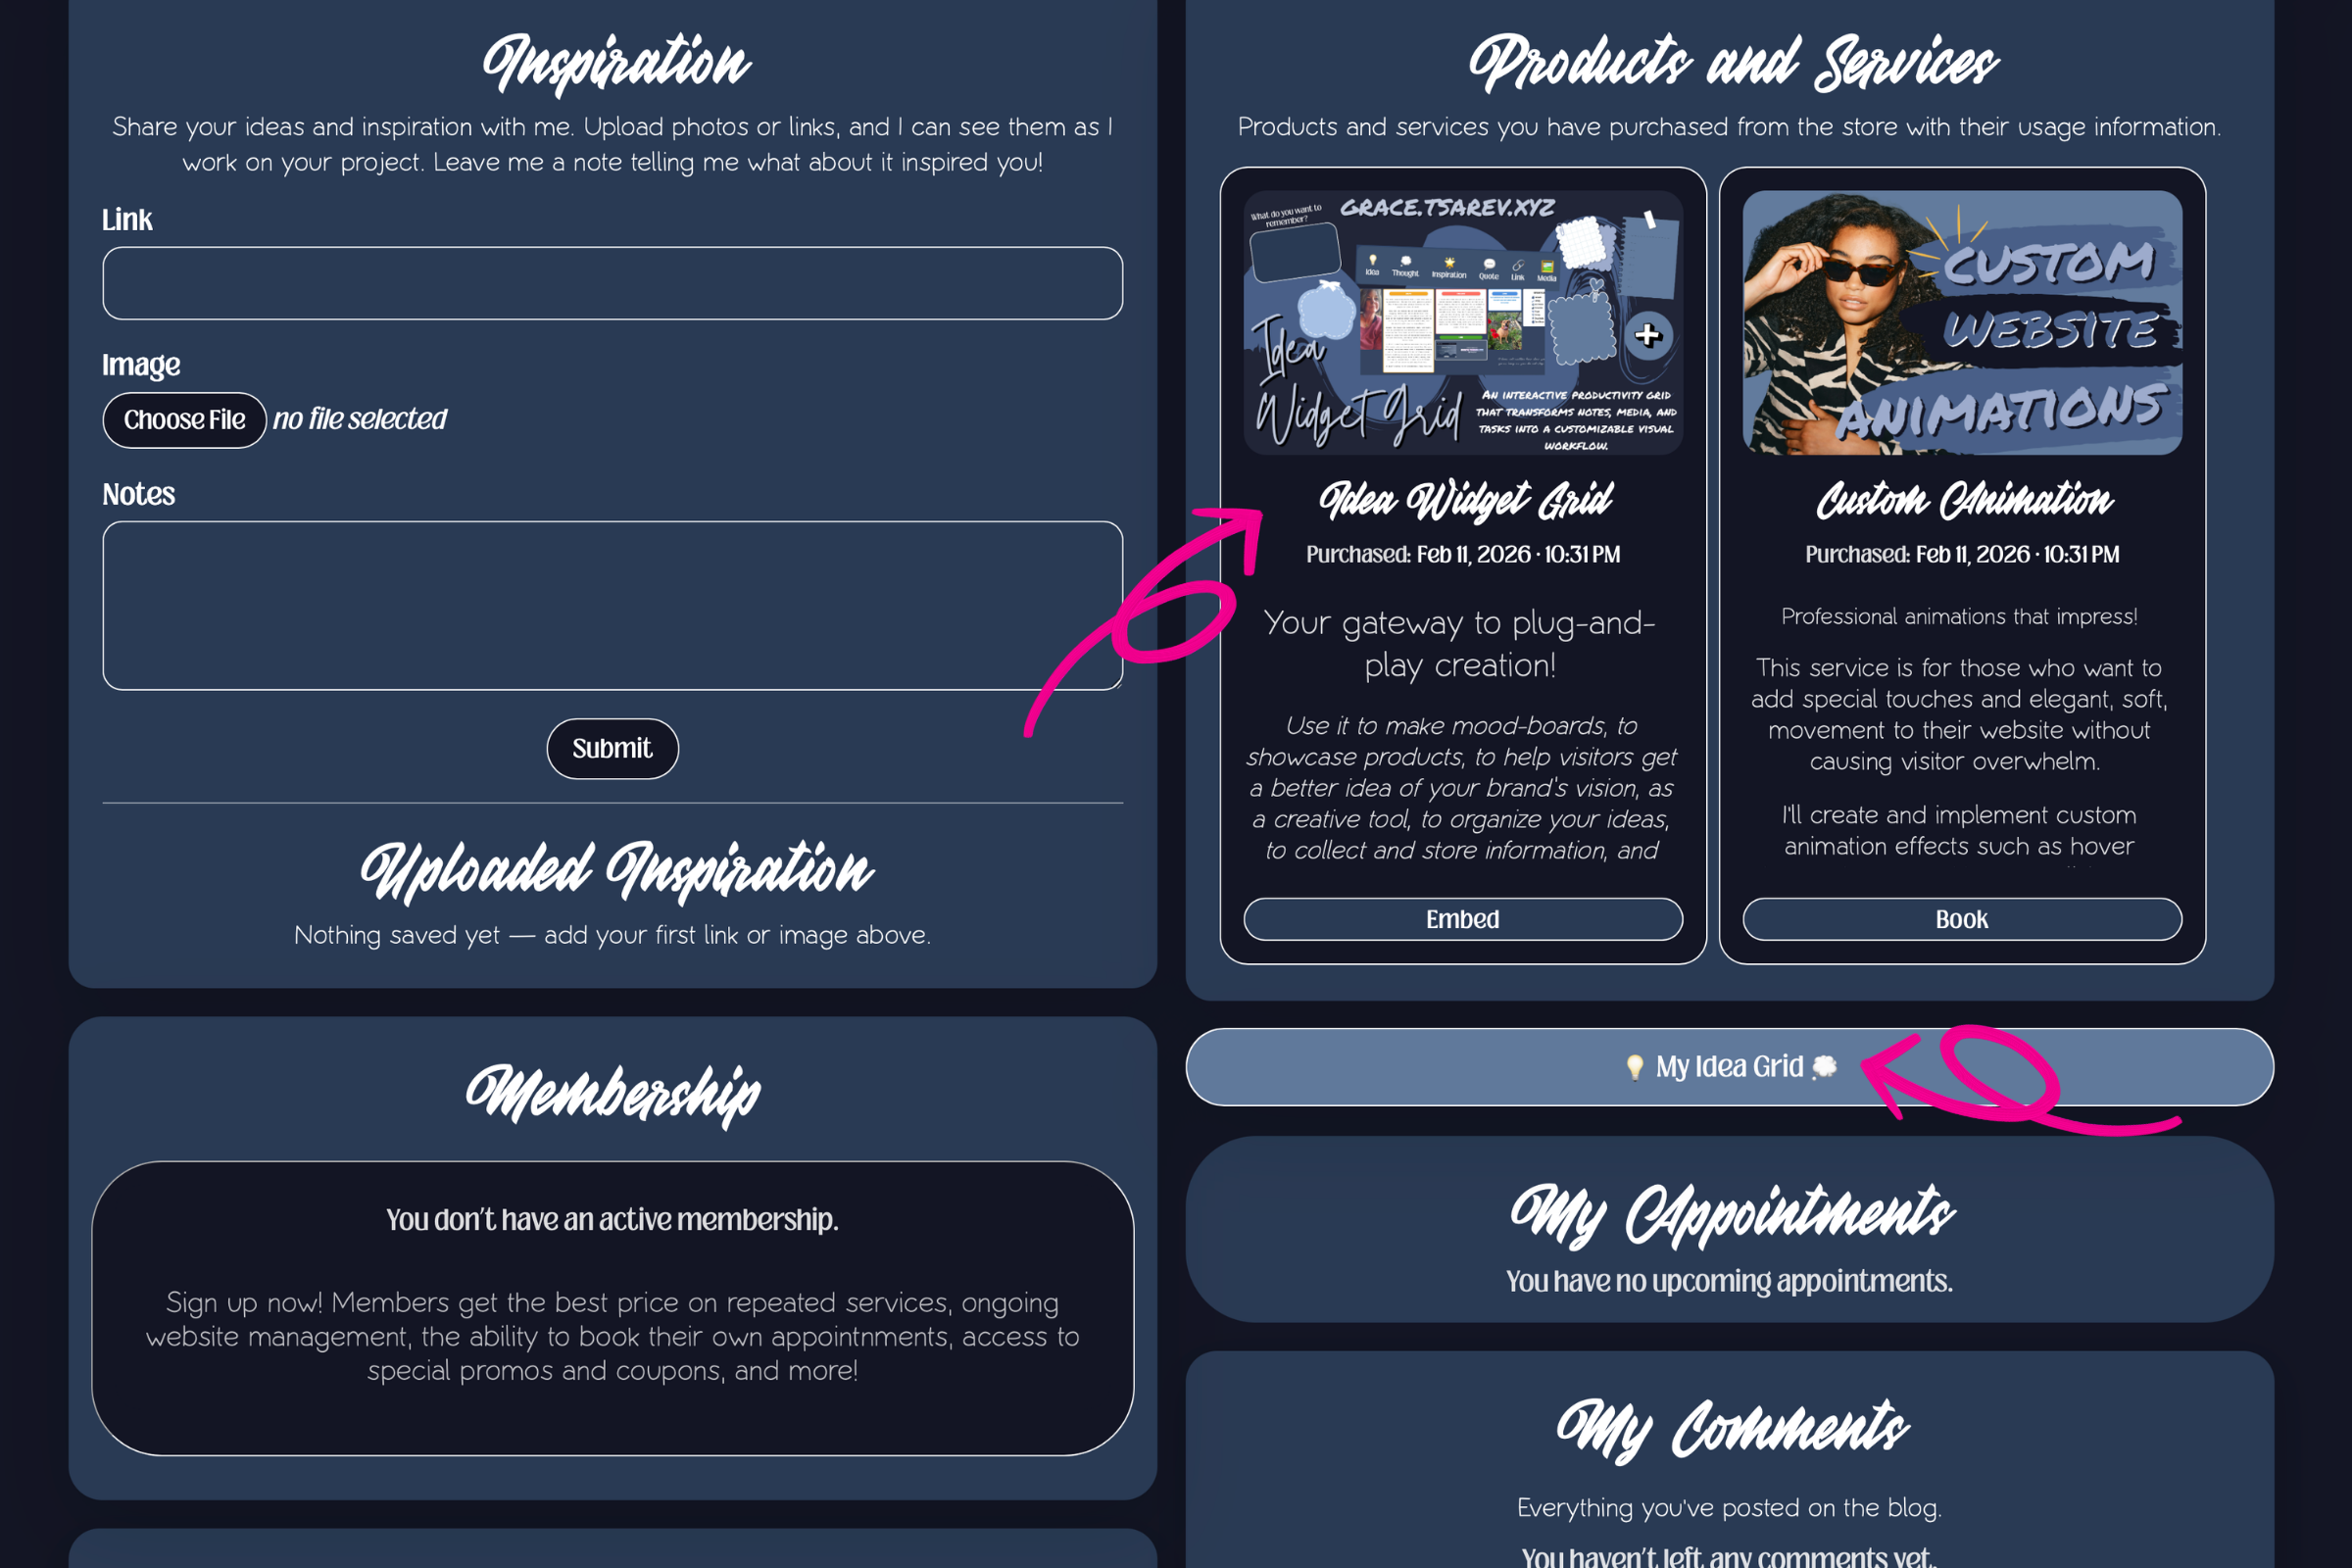
Next, I am going to show you how his dashboard changes once he makes a successful purchase in my storefront. In the following image, you can see I have purchased two different products and they have been added to the account. Thank you, webhook!
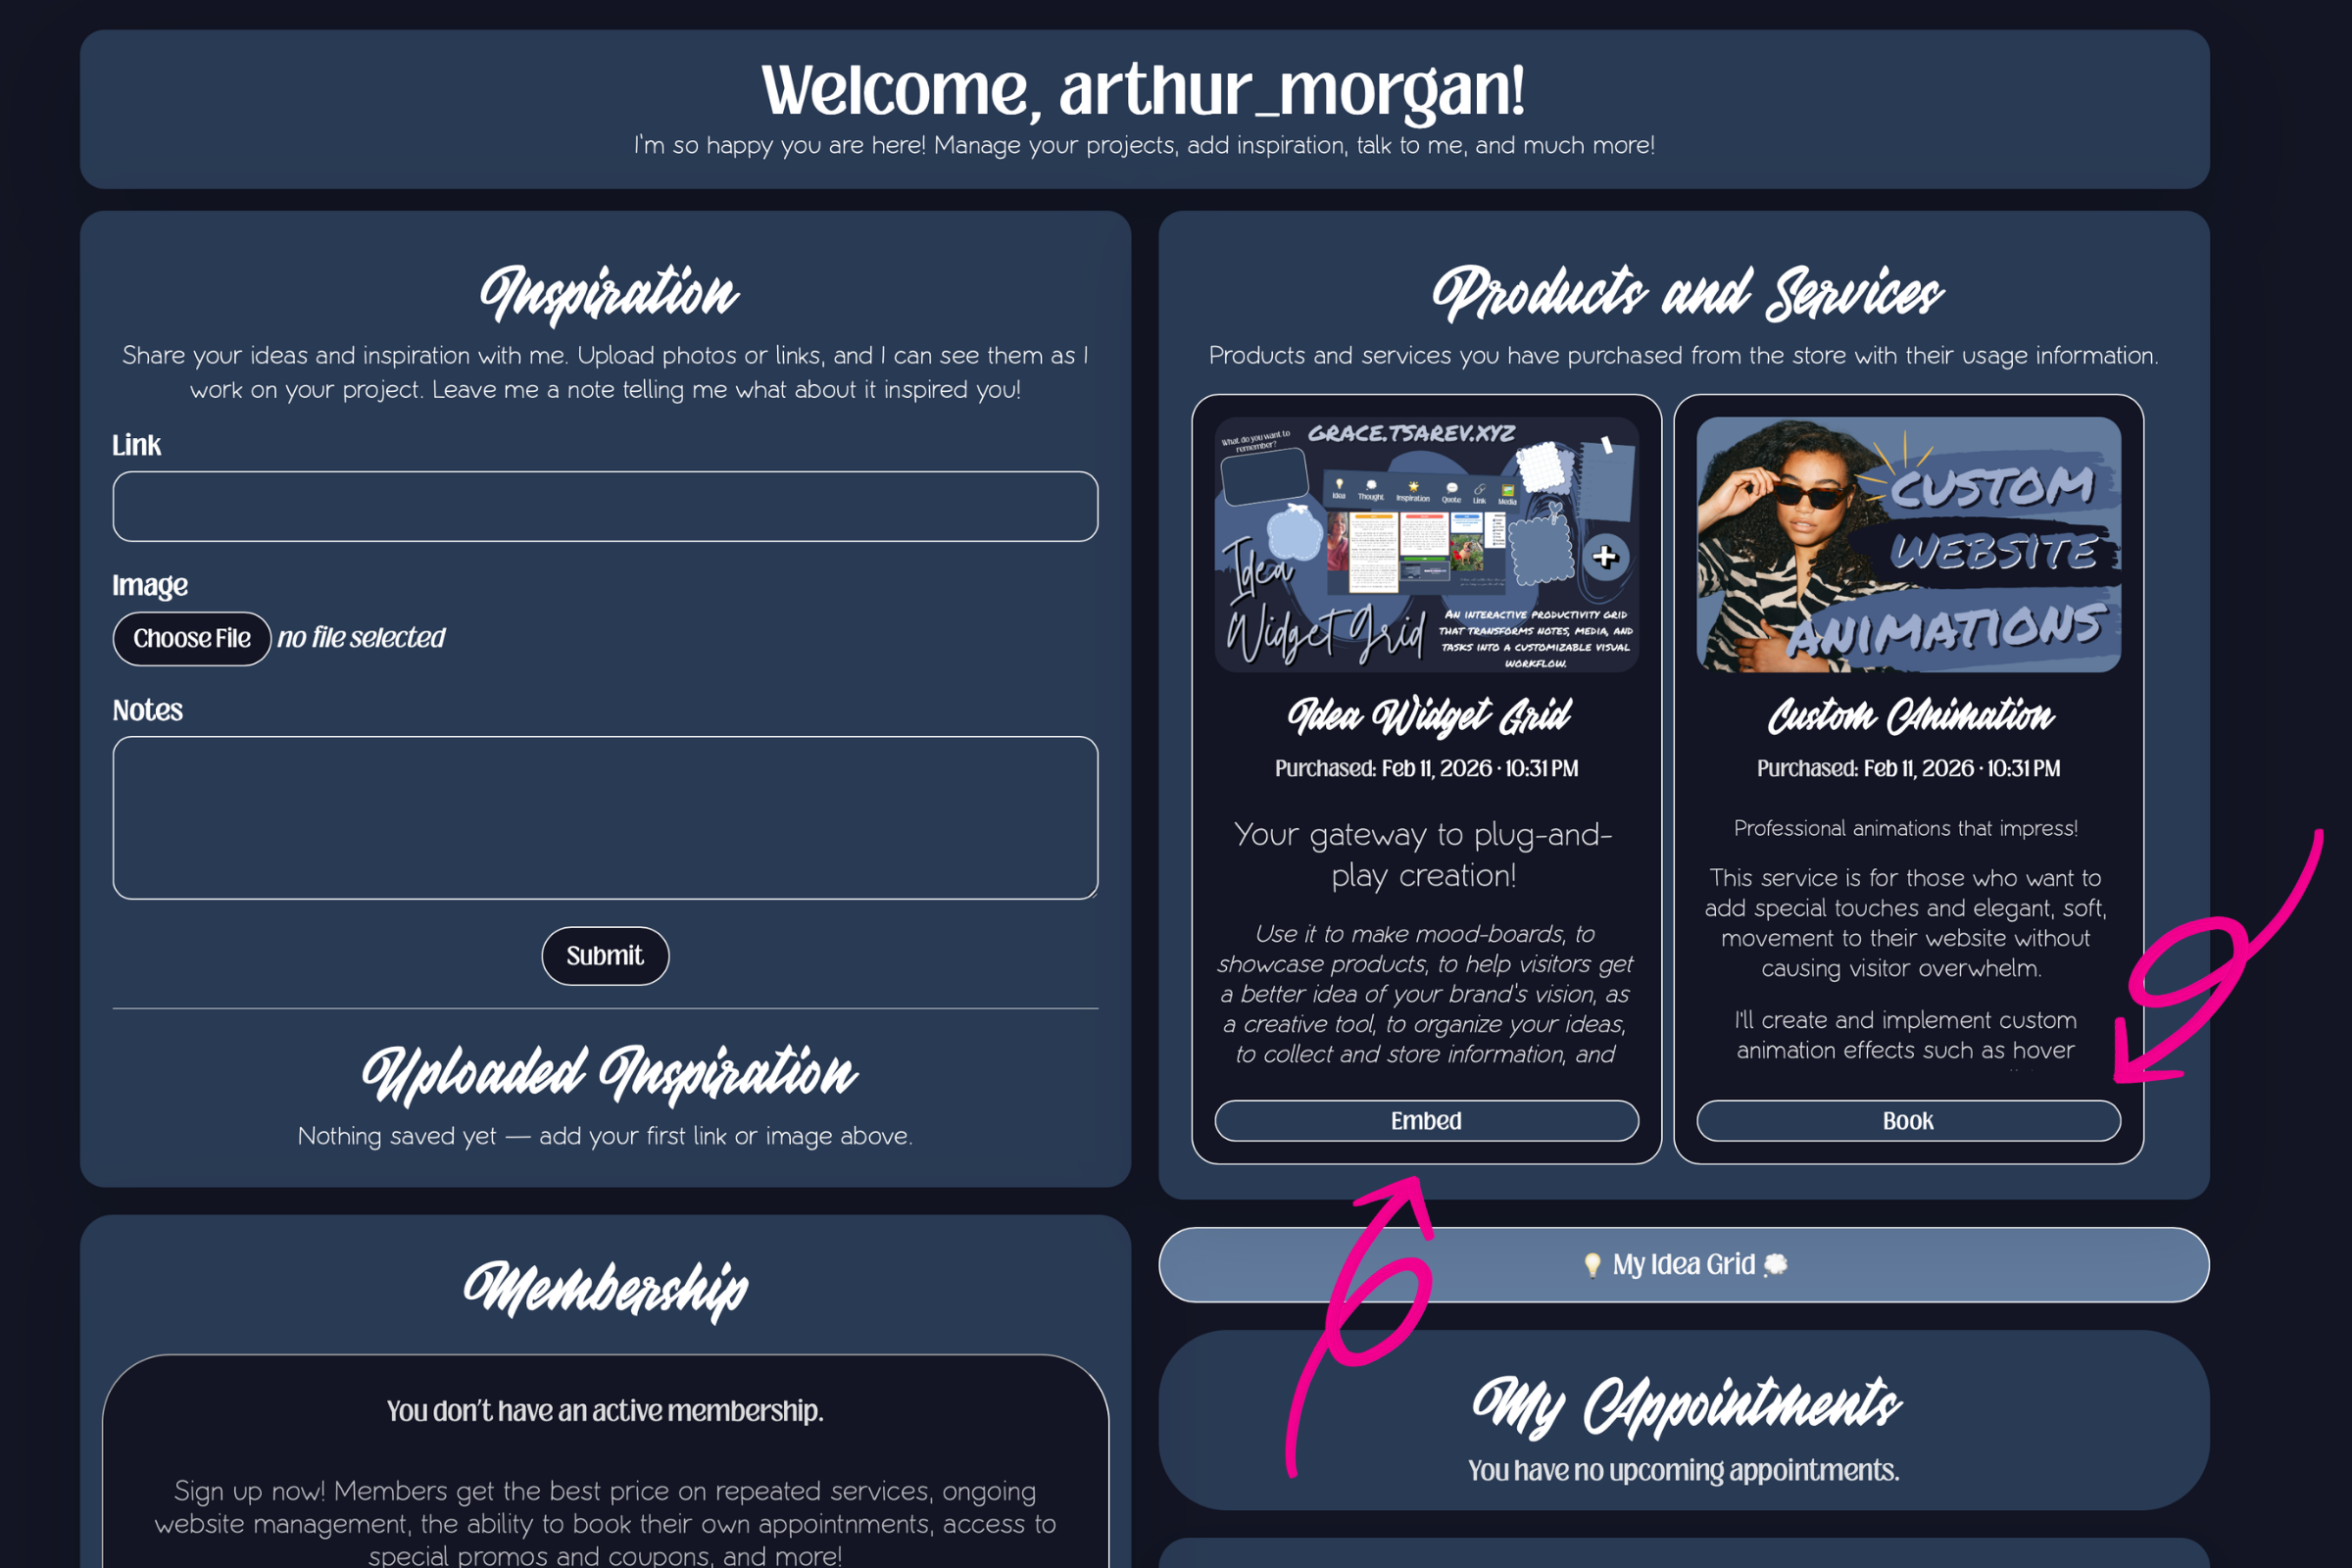
Product Entitlement
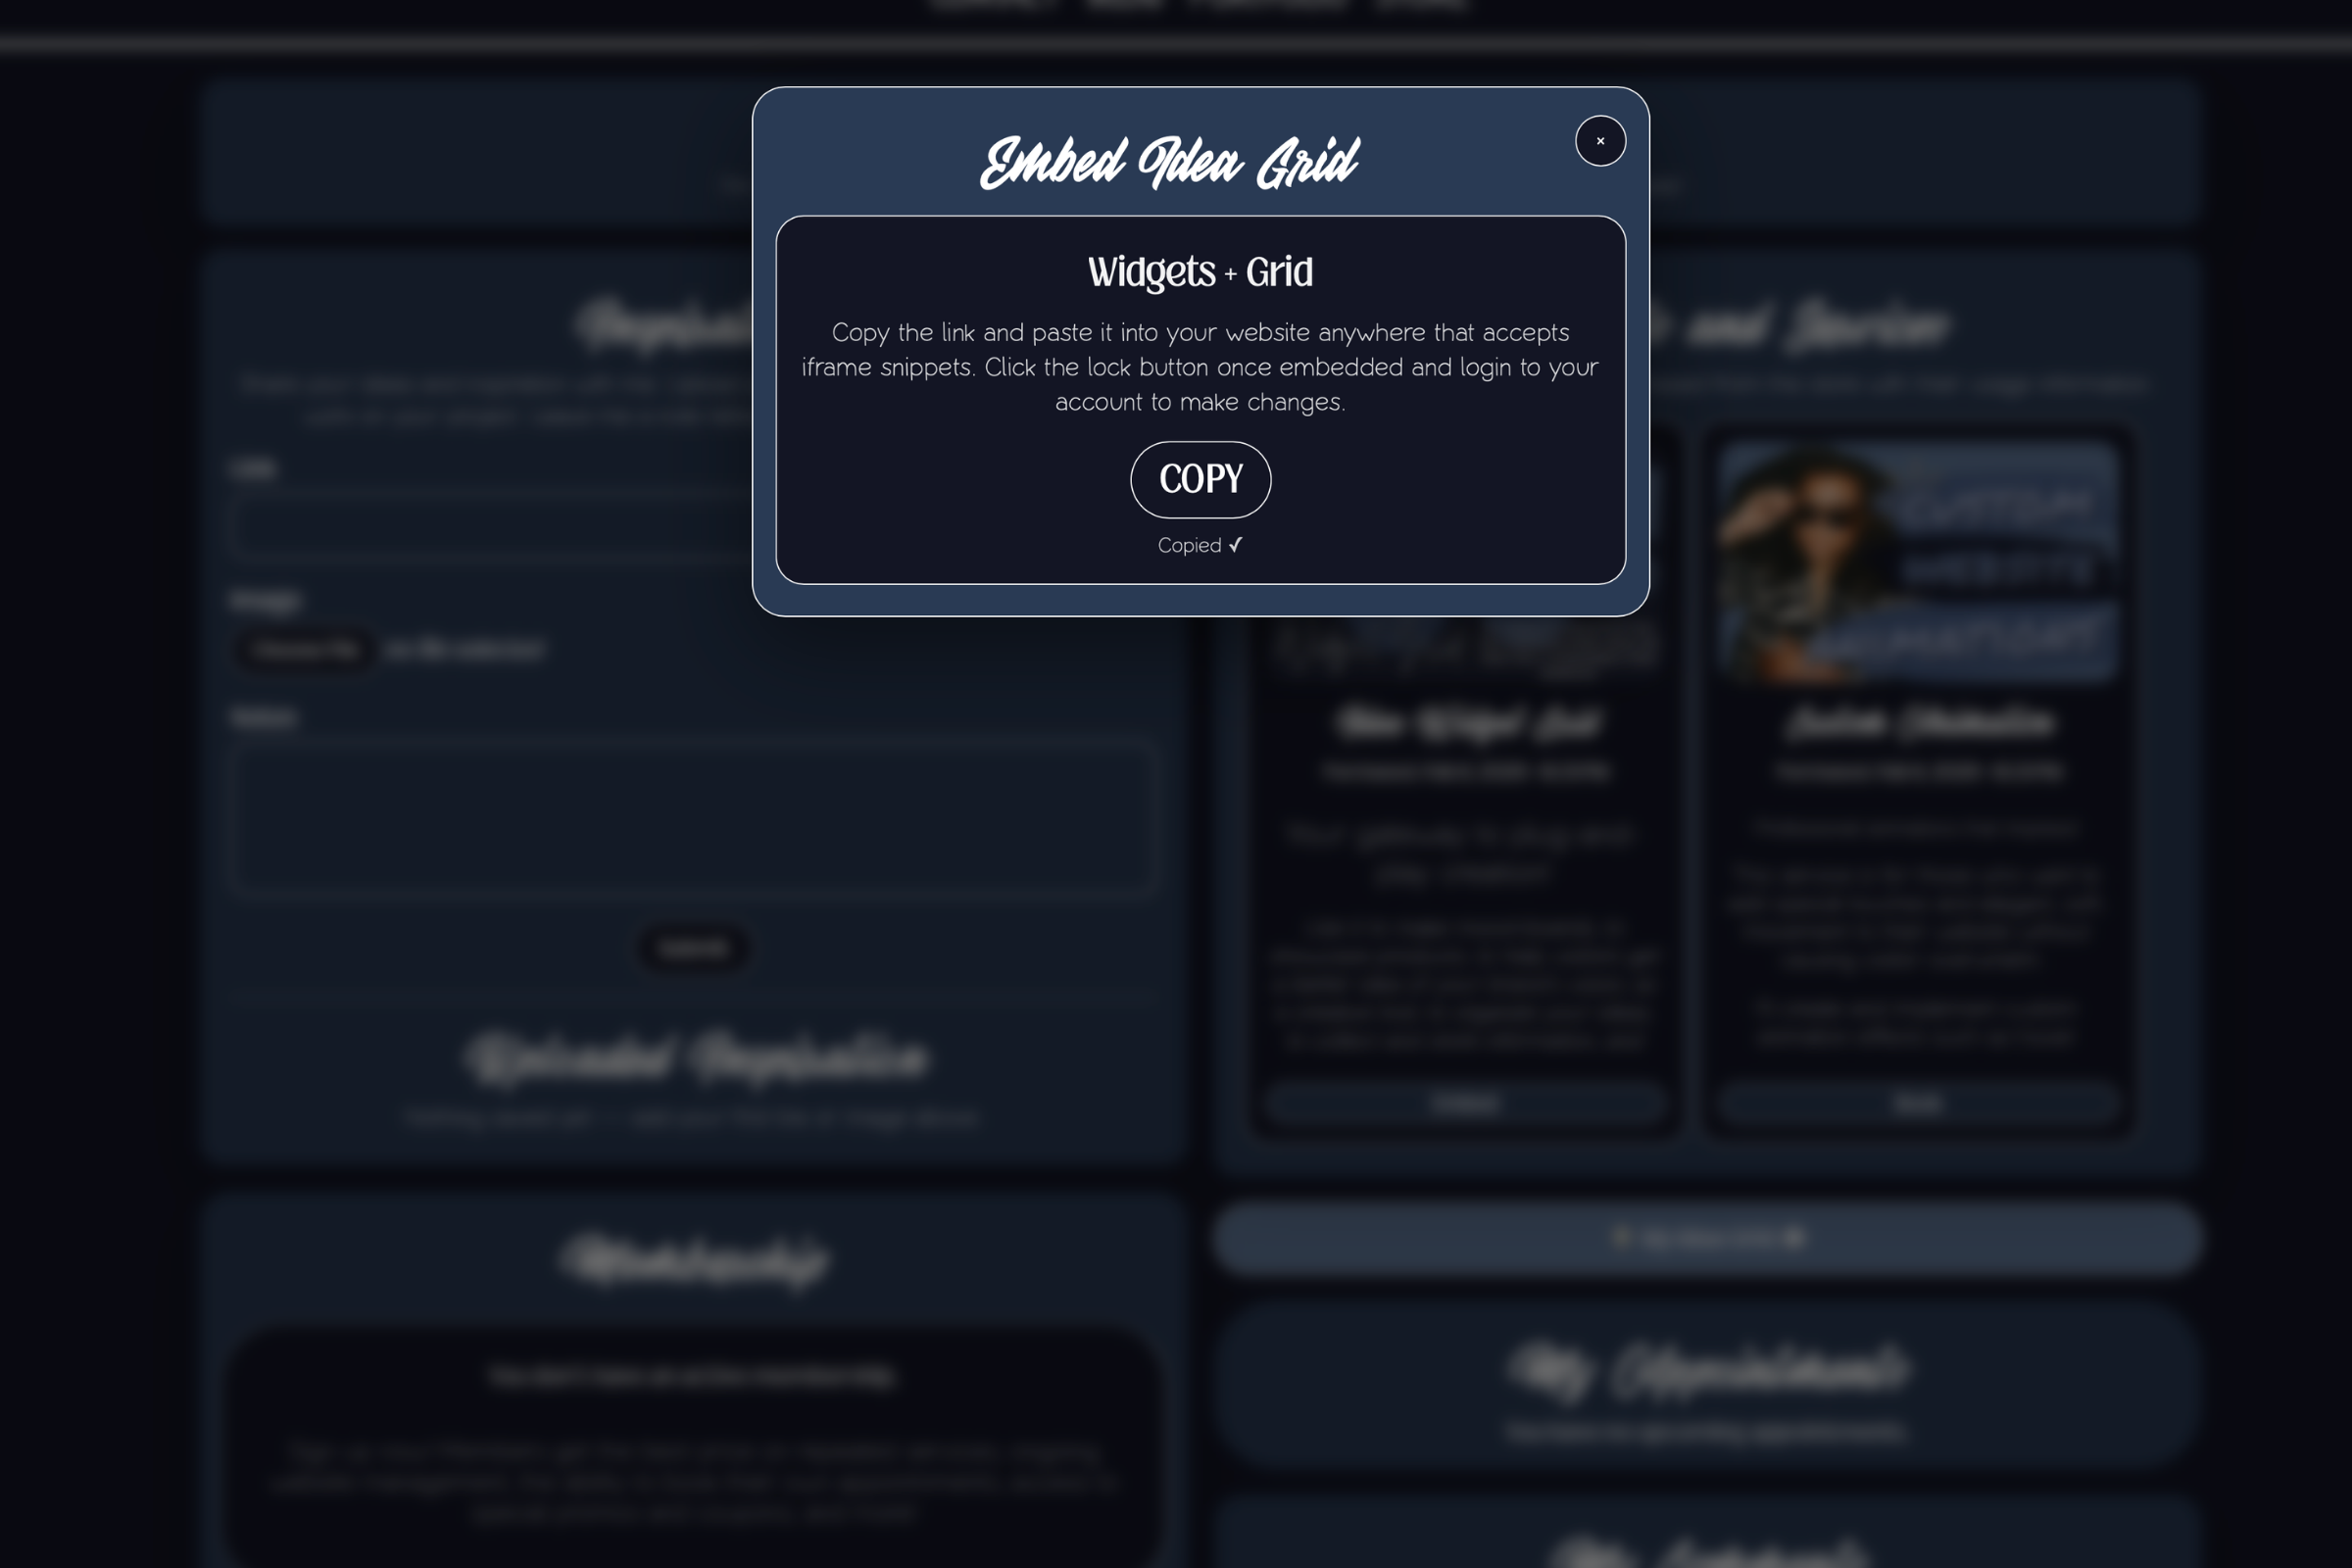
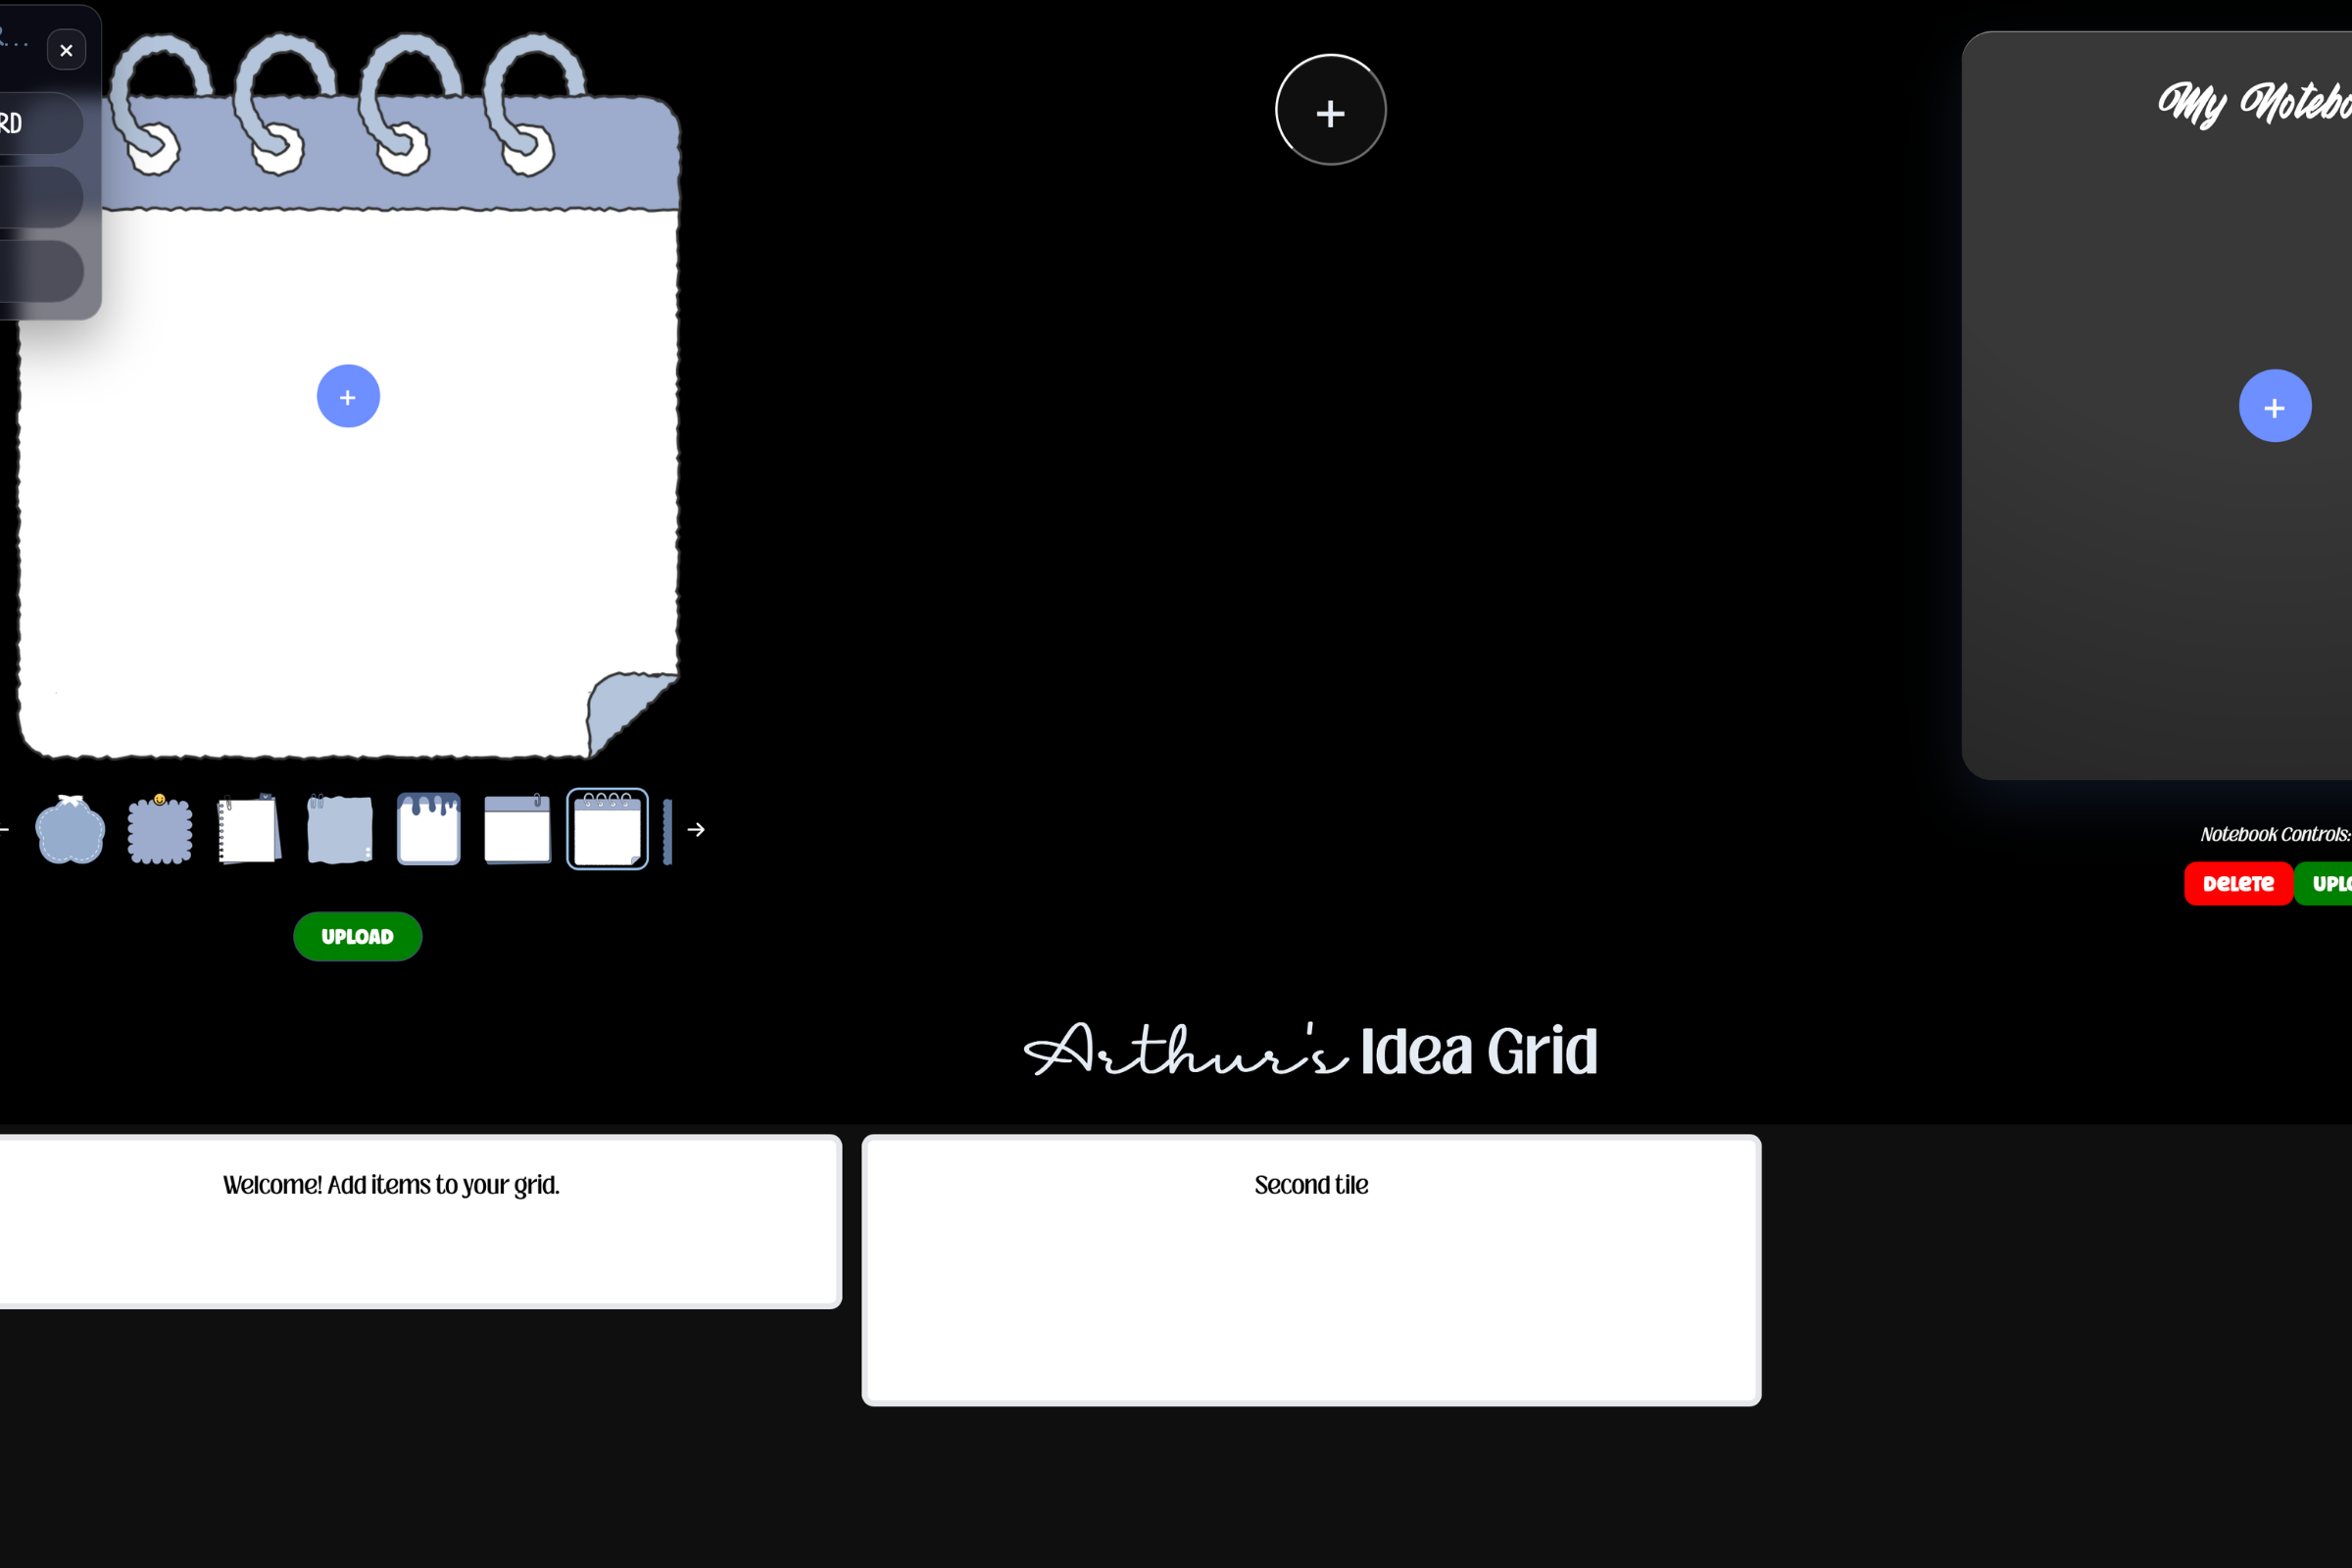
Notice how the two products have two different links at the bottom of them? This is because in my example, the user purchased two different kinds of products. One is an instantly deliverable digital product. The purchaser is granted immediate access to the product and are given an "embed" button inside the product card. The other is a service that cannot be delivered instantly. Instead, the user is given a "book" button that, when pressed, allows them to book their own appointment with me so that I can fulfill the requested service at a time that works for them.
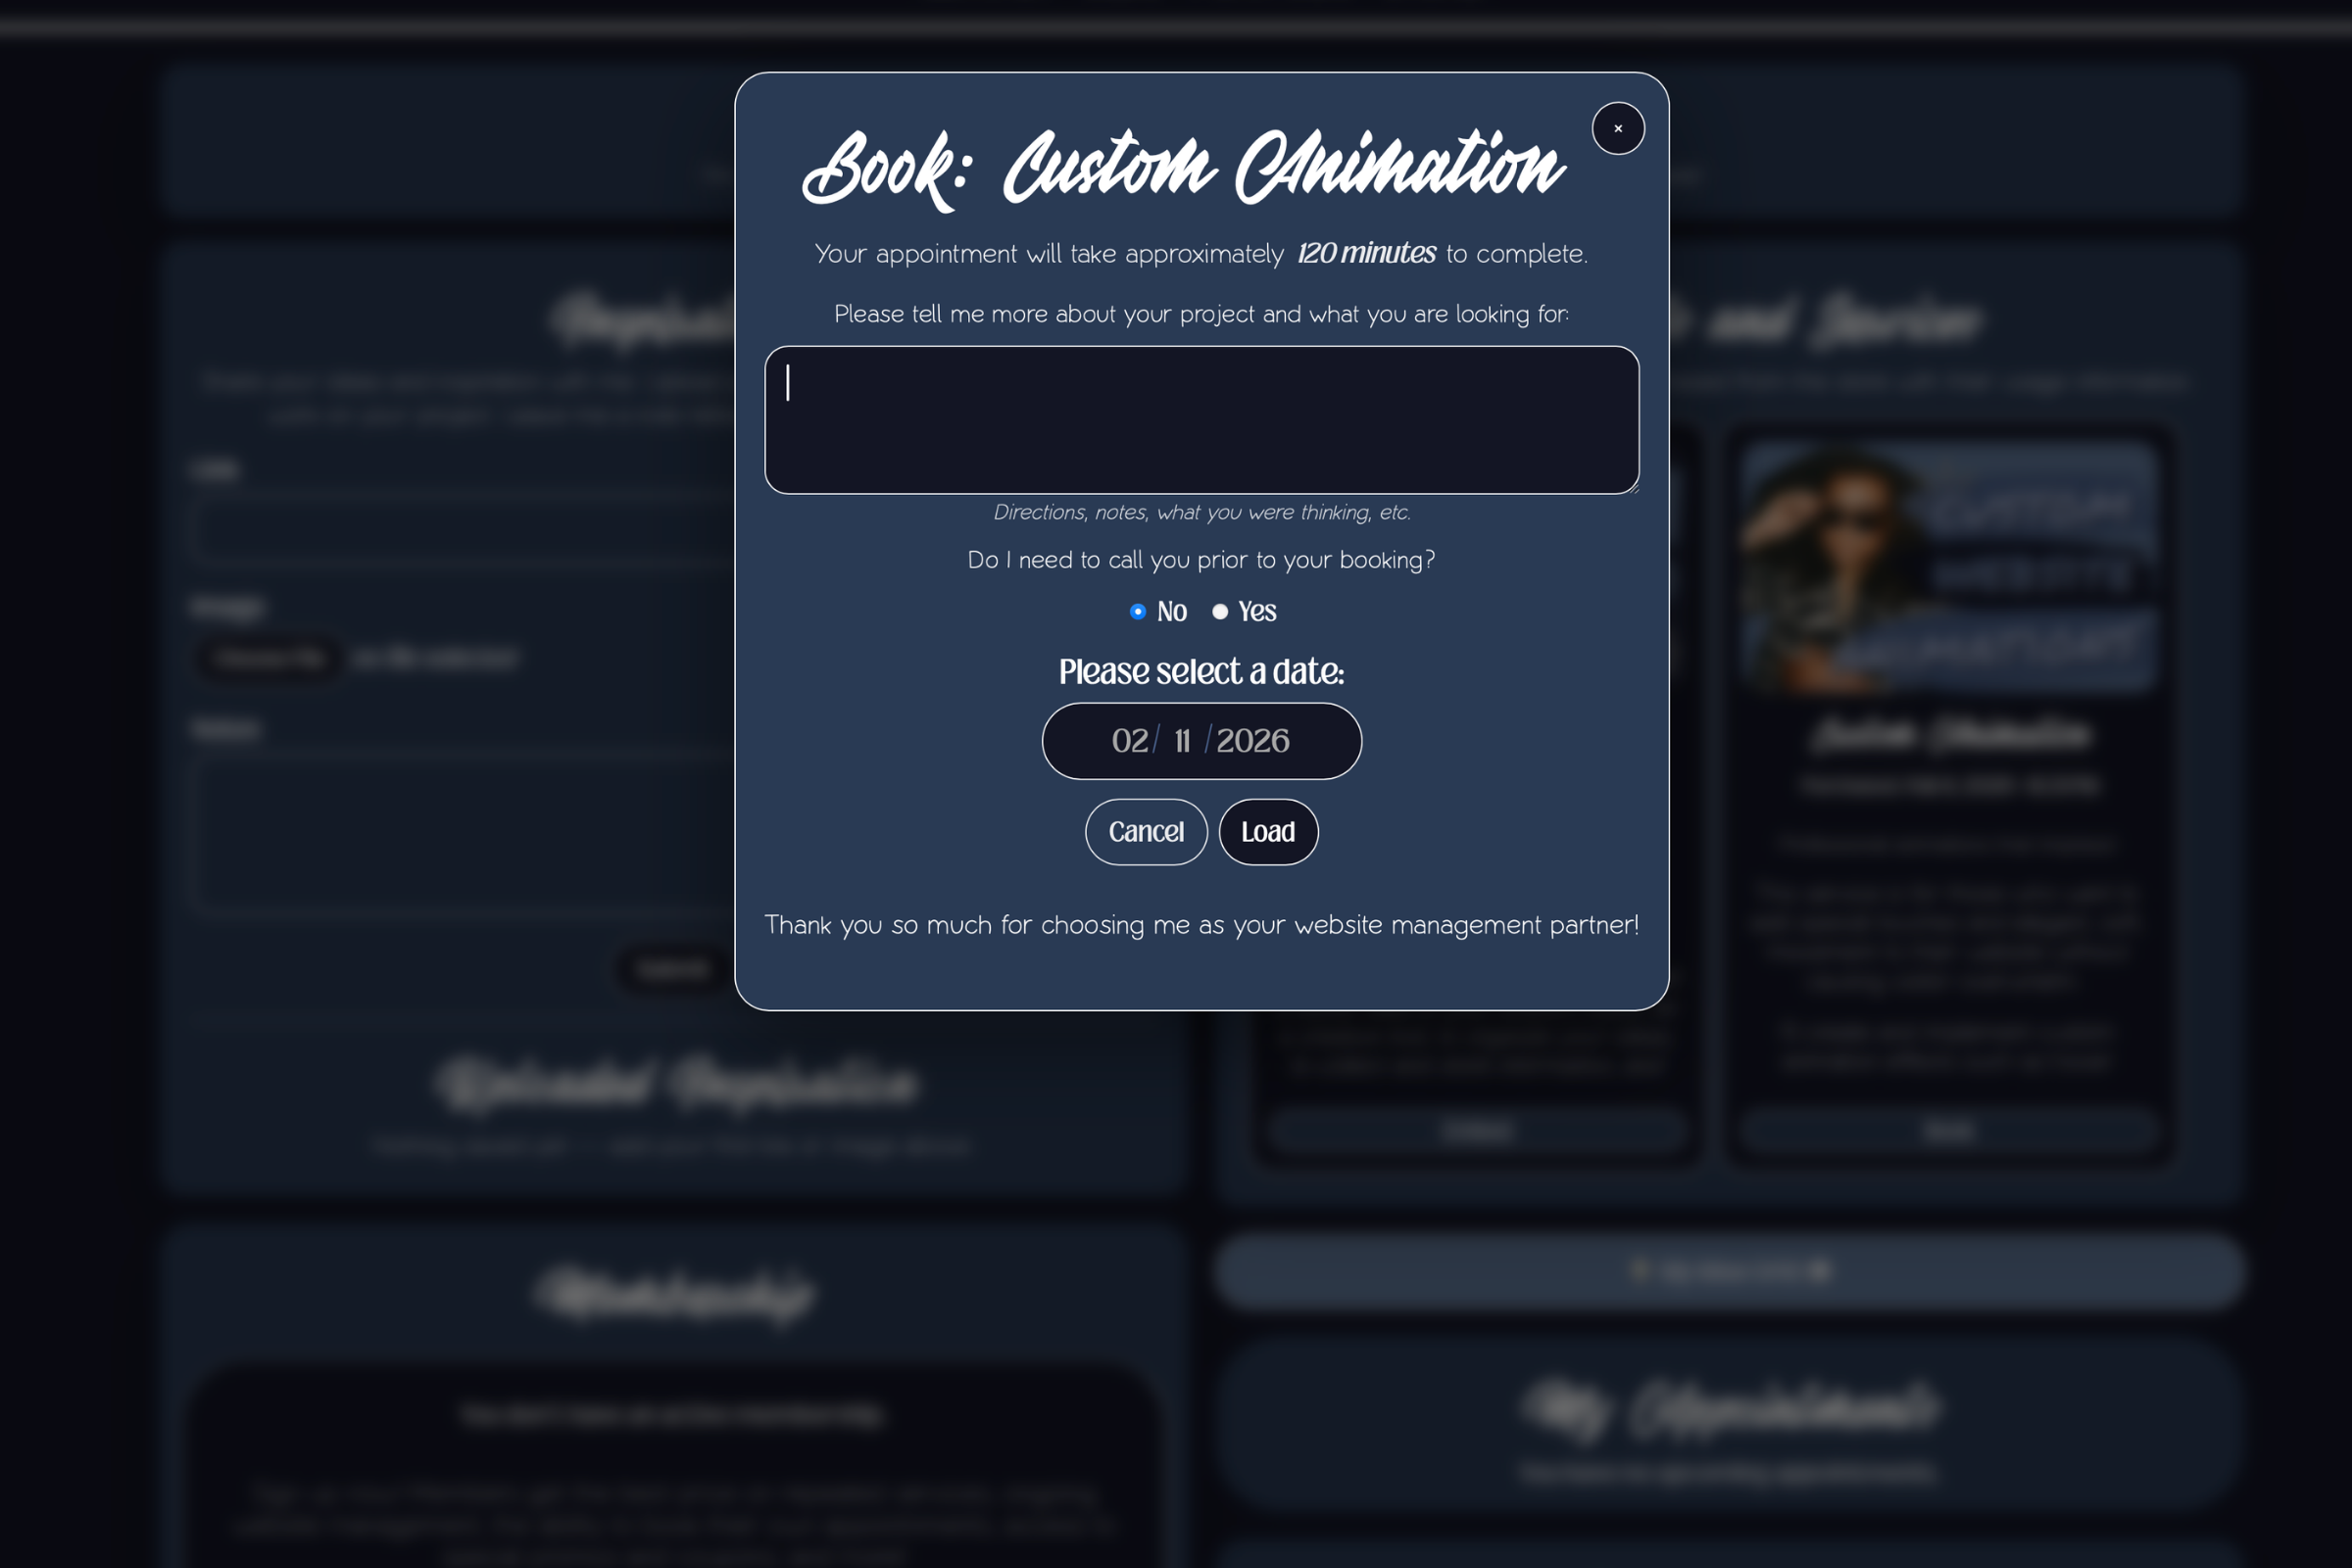
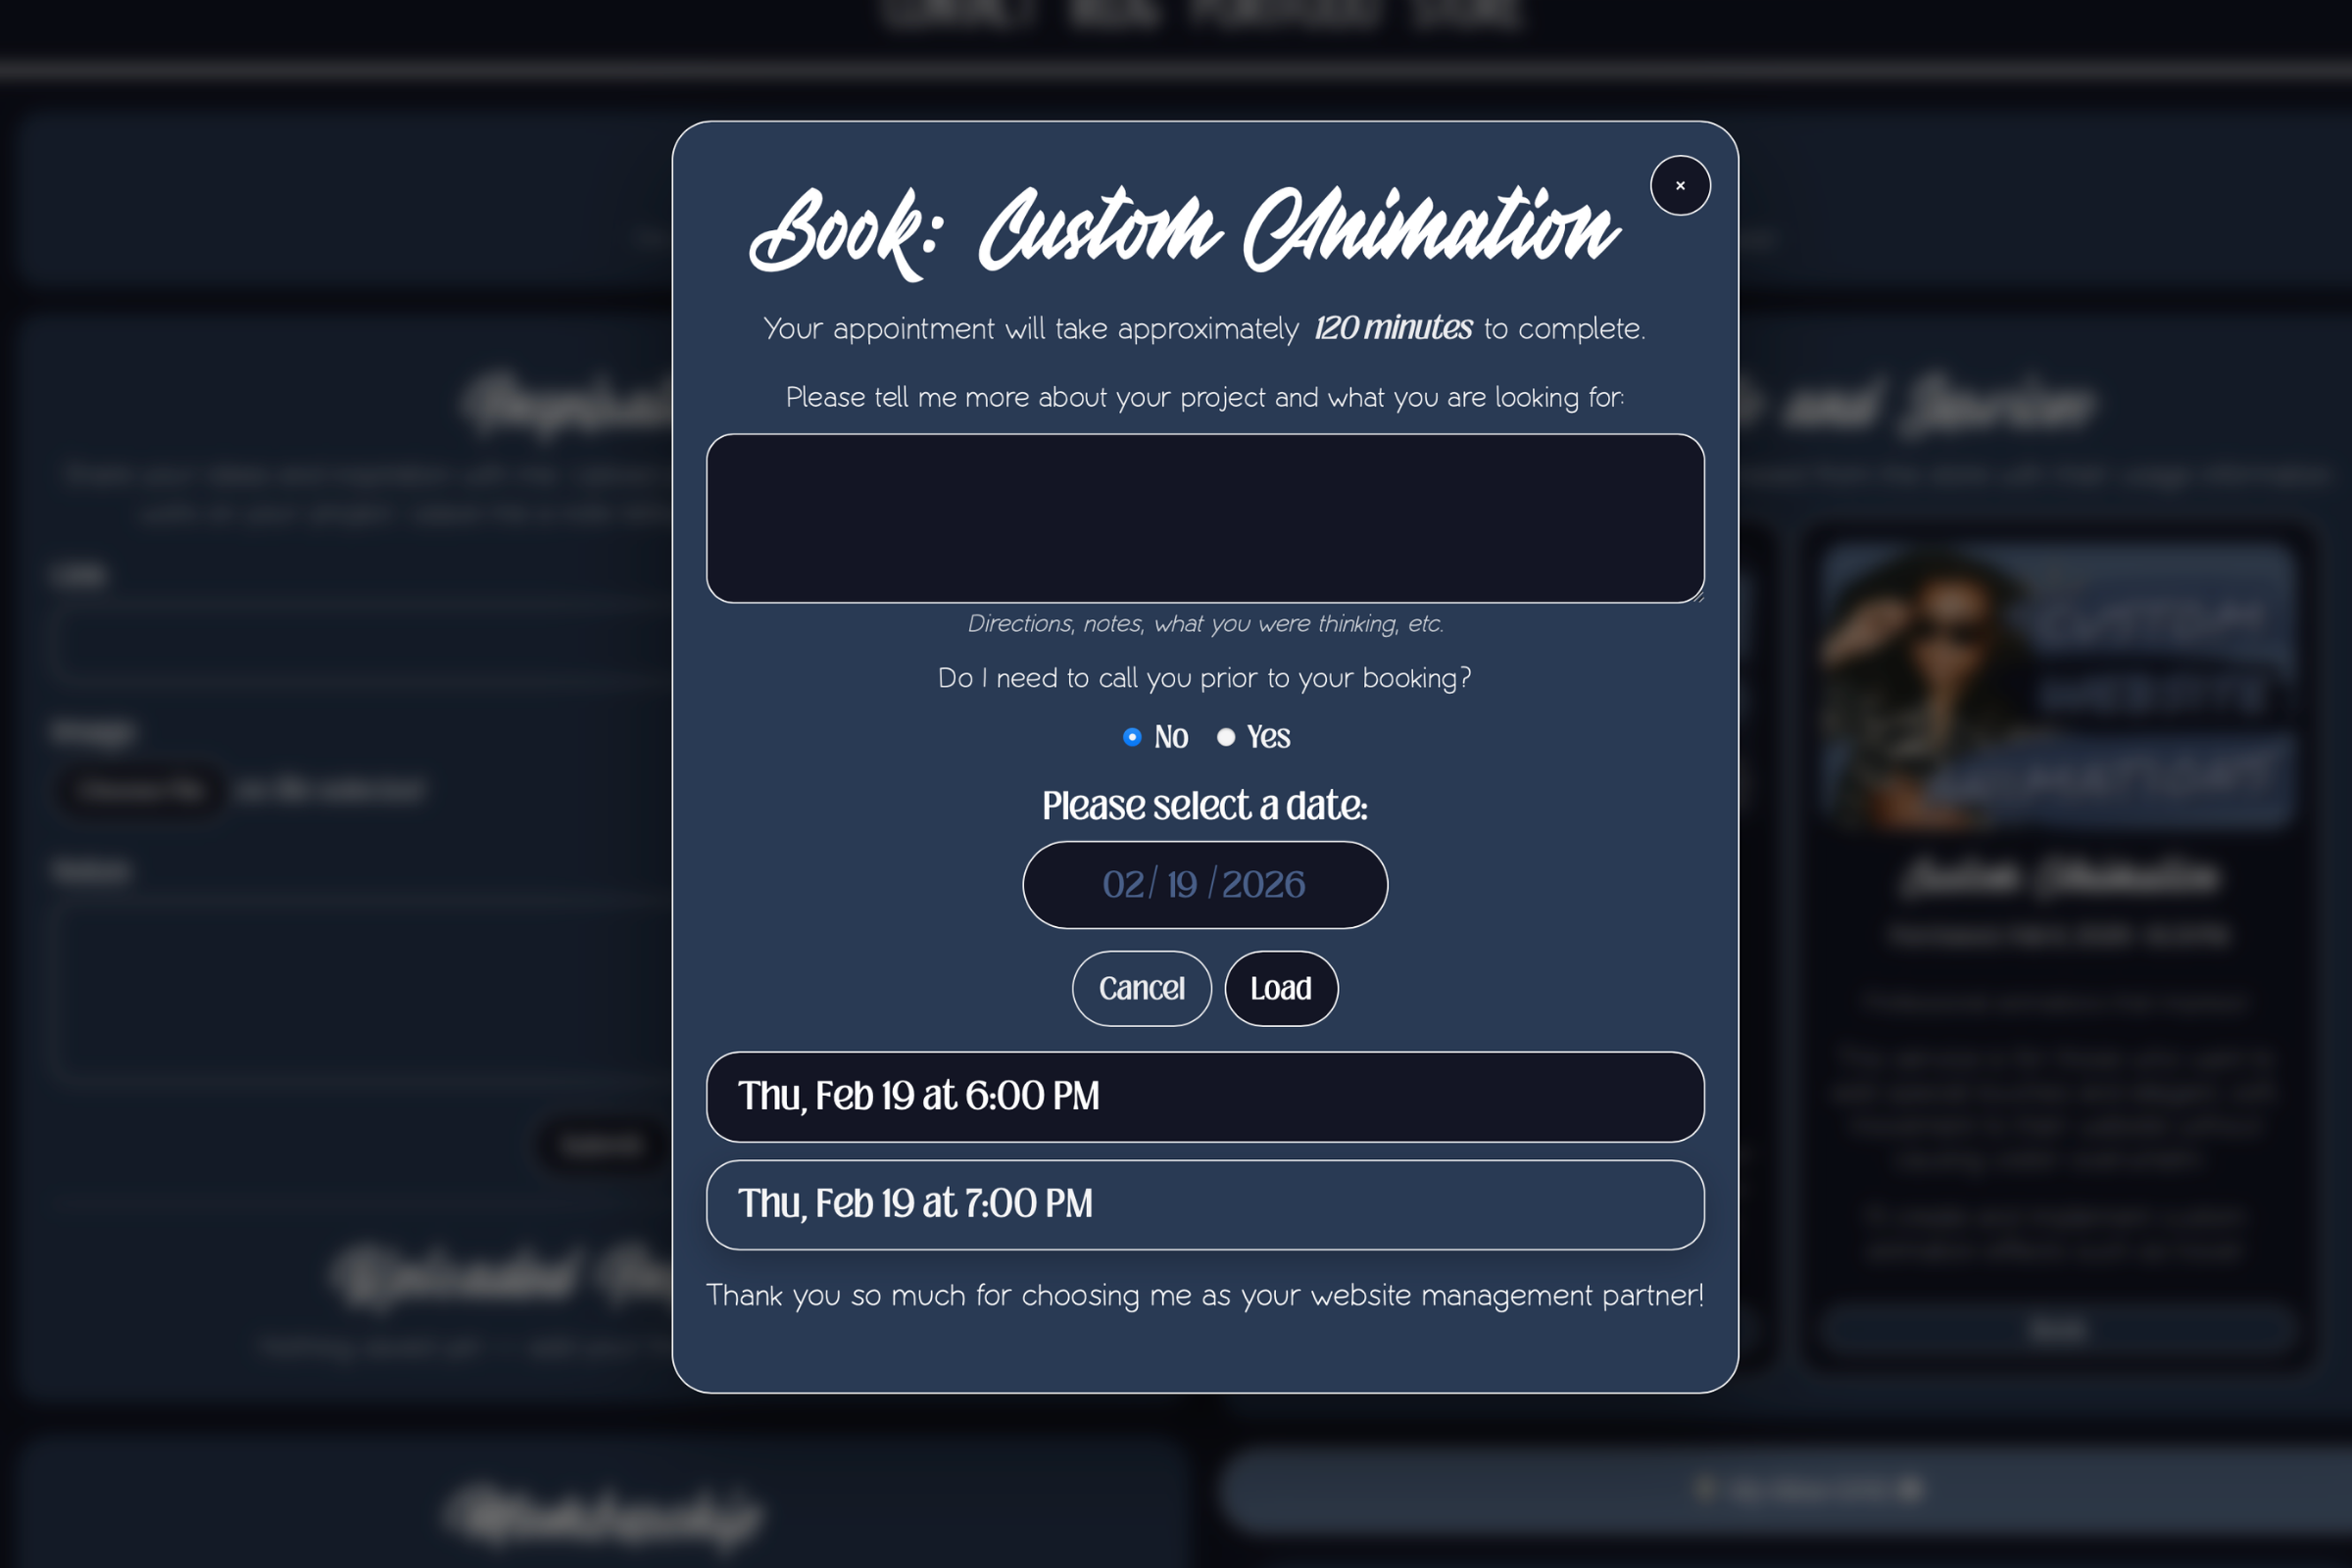
On the screen above, you can see what happens when the user clicks the "book" button. They are prompted to provide information about the assignment, and asked to choose a date that works best for them. When they choose a date, a screen loads showing available time slots for that particular day. The time slots are controlled by my calendar and set availability (more on that later).
Created a calendar system to set availability, make appointments, and view details about existing appointments. Fully built-out subscription plan options, and designed a token system that tracks user's "spent" tokens and compares it to the total amount allotted for their subscription tier. This allows clients to book and cancel their own appointments while maintaining the integrity of their subscription benefits. Updated my chatbot so that when I am online, it connects the user directly to me and allows us to chat in real time. When I am offline, it goes into "chatbot" mode, and acts as a virtual assistant that talks to the user and delivers their message to me through email Built custom tools in my admin panel that allow me to create projects for clients, bill invoices, view information provided by clients, and seewhen somebody has posted a review or commented. Created a dedicated account settings page with the option to change account details, set an avatar, and cancel subscriptions.