Welcome back! Recently, I have made a lot of really cool updates to my website that I am excited to share about! Keeping a record helps me understand how my skills progress over time, and it also helps website guests (like you, hello!) get to know me better. I hope you enjoy!
Today, I want to talk about:
My calendar system build that allows me to set availability, make appointments, and view details about existing appointments. It also gives clients the ability to cancel and set their own appointments, provide details, and request phone calls.
How I structured my subscription plans and designed a token system that tracks user's "spent" tokens and compares it to the total amount allotted for their subscription tier.
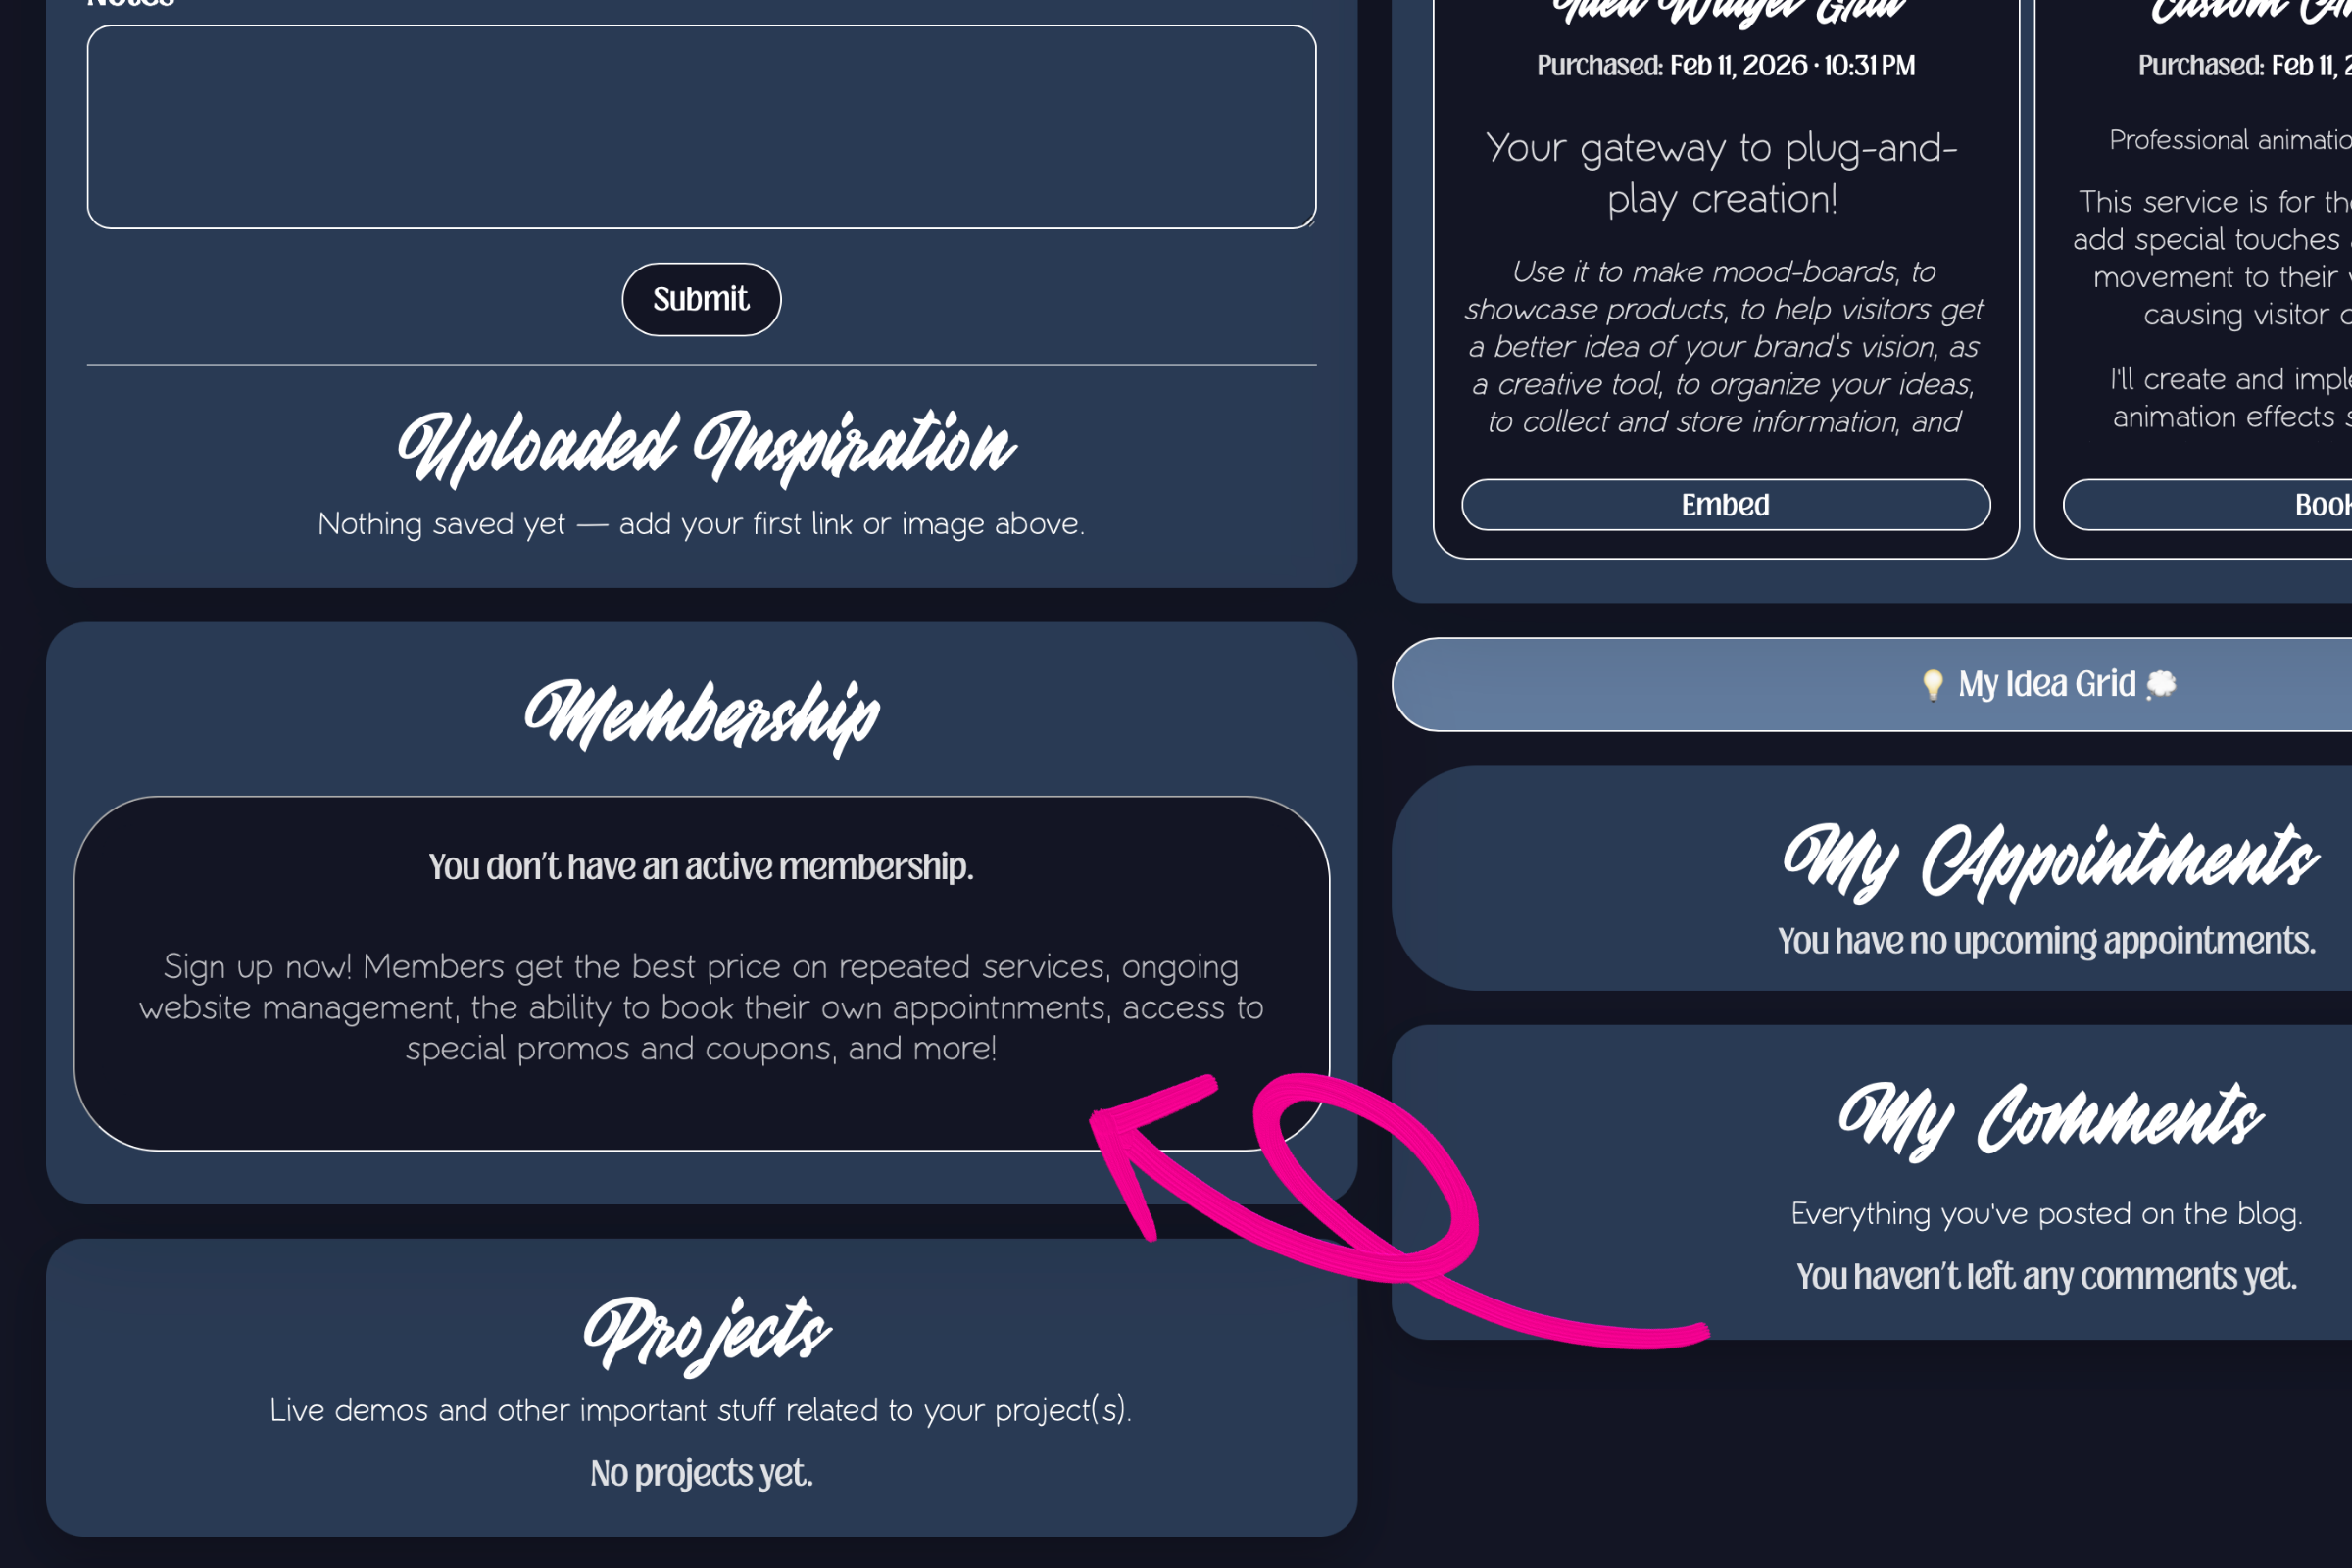
In part one, we talked about payment security and product entitlement inside my custom e-commerce storefront. I explained that a user's experience inside their dashboard will depend on what type of product they purchased, whether it be a digital download, or a service requiring an appointment. I am going to build off that a little bit more today and explain what happens when somebody purchases a membership through my storefront! Subscription MembershipsFirst, I want to say that this was an extremely cool project for me because I believe there are many practical uses for these types of systems. It seems like everybody is offering subscription services now, so knowing how to integrate one directly into a website is certainly useful! The goal was to allow visitors to purchase a subscription membership and setup recurring payments through my custom e-commerce platform, and then provide access to the subscription's benefits through the user's dashboard. The user needed to be able to utilize their benefits immediately, cancel at any point, and provide details to me so that I could successfully compleNote: In my storefront, I sell website design services. Because I am selling services, I needed to build this specifically to meet those needs. However, I believe this system could easily be converted and adapted to fit any subscription, no matter what is being sold.I began by branching my Stripe webhook so that it could handle subscription payments. I did this by assigning a subscription id number to all products that are subscriptions, and having Stripe compare the id to a list of subscription products I set up on their website. When a subscription is purchased, Stripe looks for the id, and if it finds it, it matches it with the correct subscription and establishes a reoccurring payment. Then, Stripe sends a message to my website that tells it to assign the subscription benefits to the user. In the image below, you can see what it looks like in the user dashboard when the user has no subscription.
Before a user can purchase a subscription, they must first register an account. This allows me to properly pair the benefits with the correct user. If the user attempts to purchase a subscription without being logged in, the website will prompt them to either login or register for an account. If they do not have an account already, the registration handler will save the subscription id of the subscription they were looking at, and then once they make their account, it will return them back to the page displaying the subscription's information so they can continue checkout. After checkout, they are given the following message:
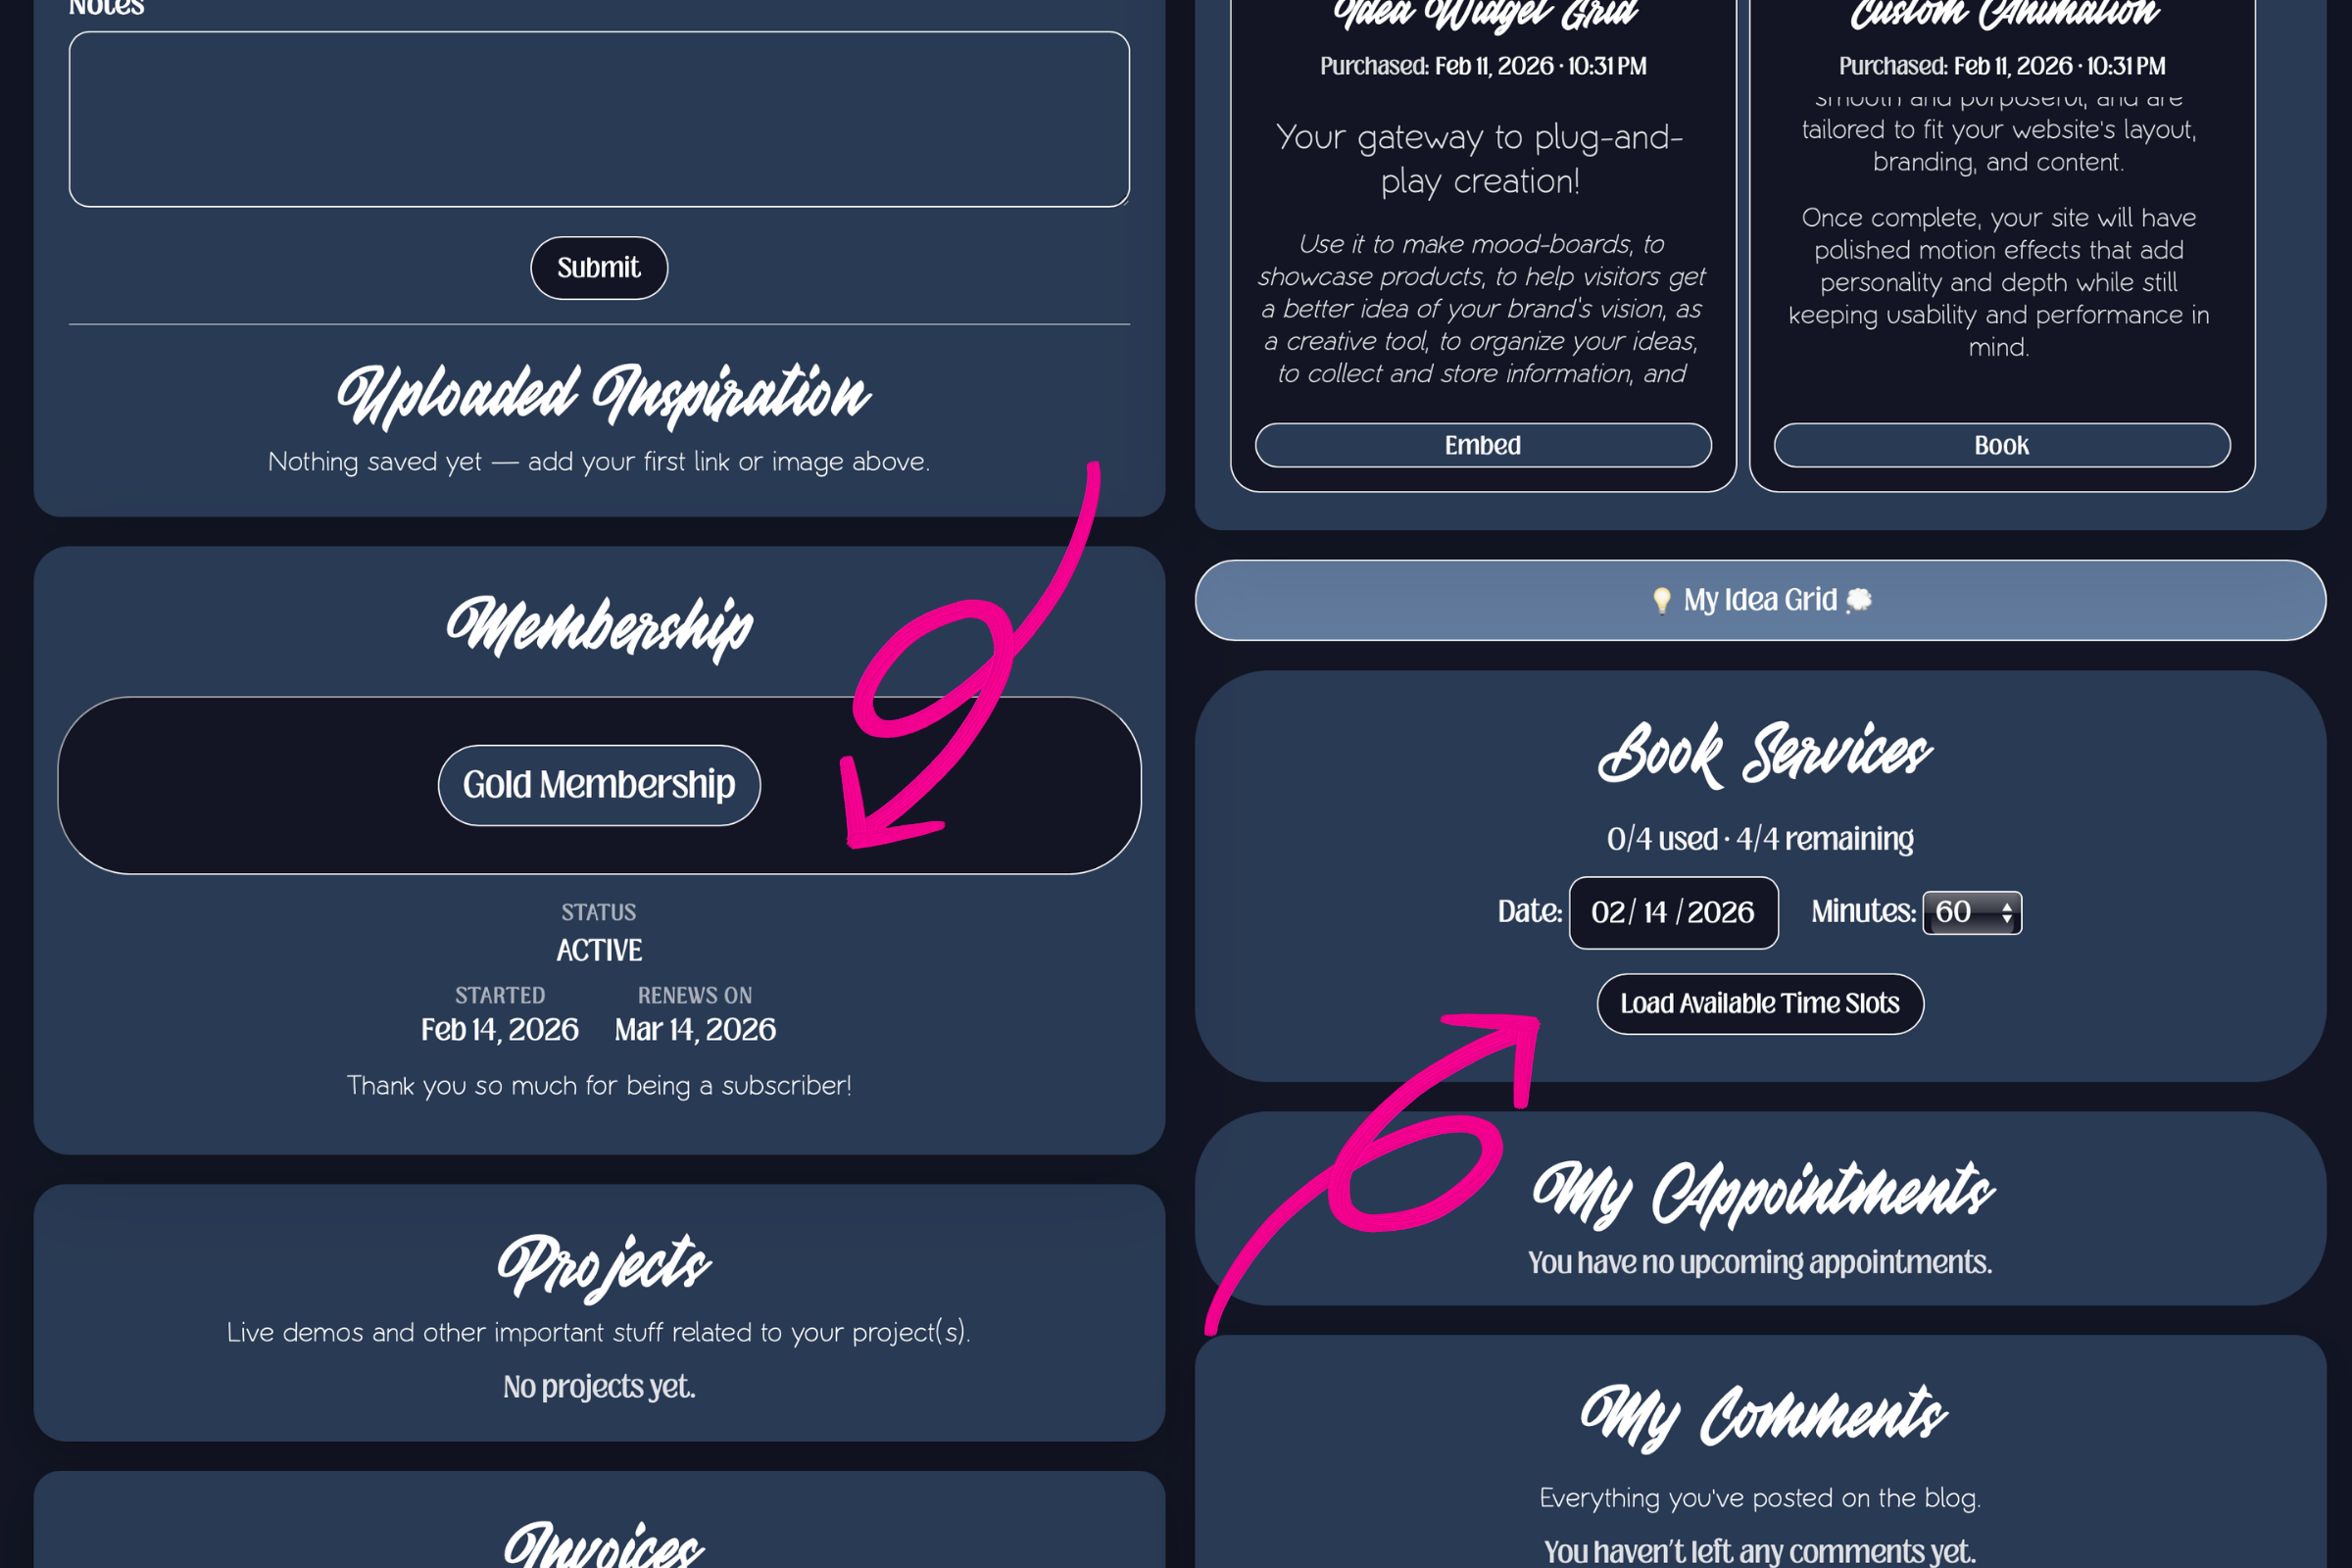
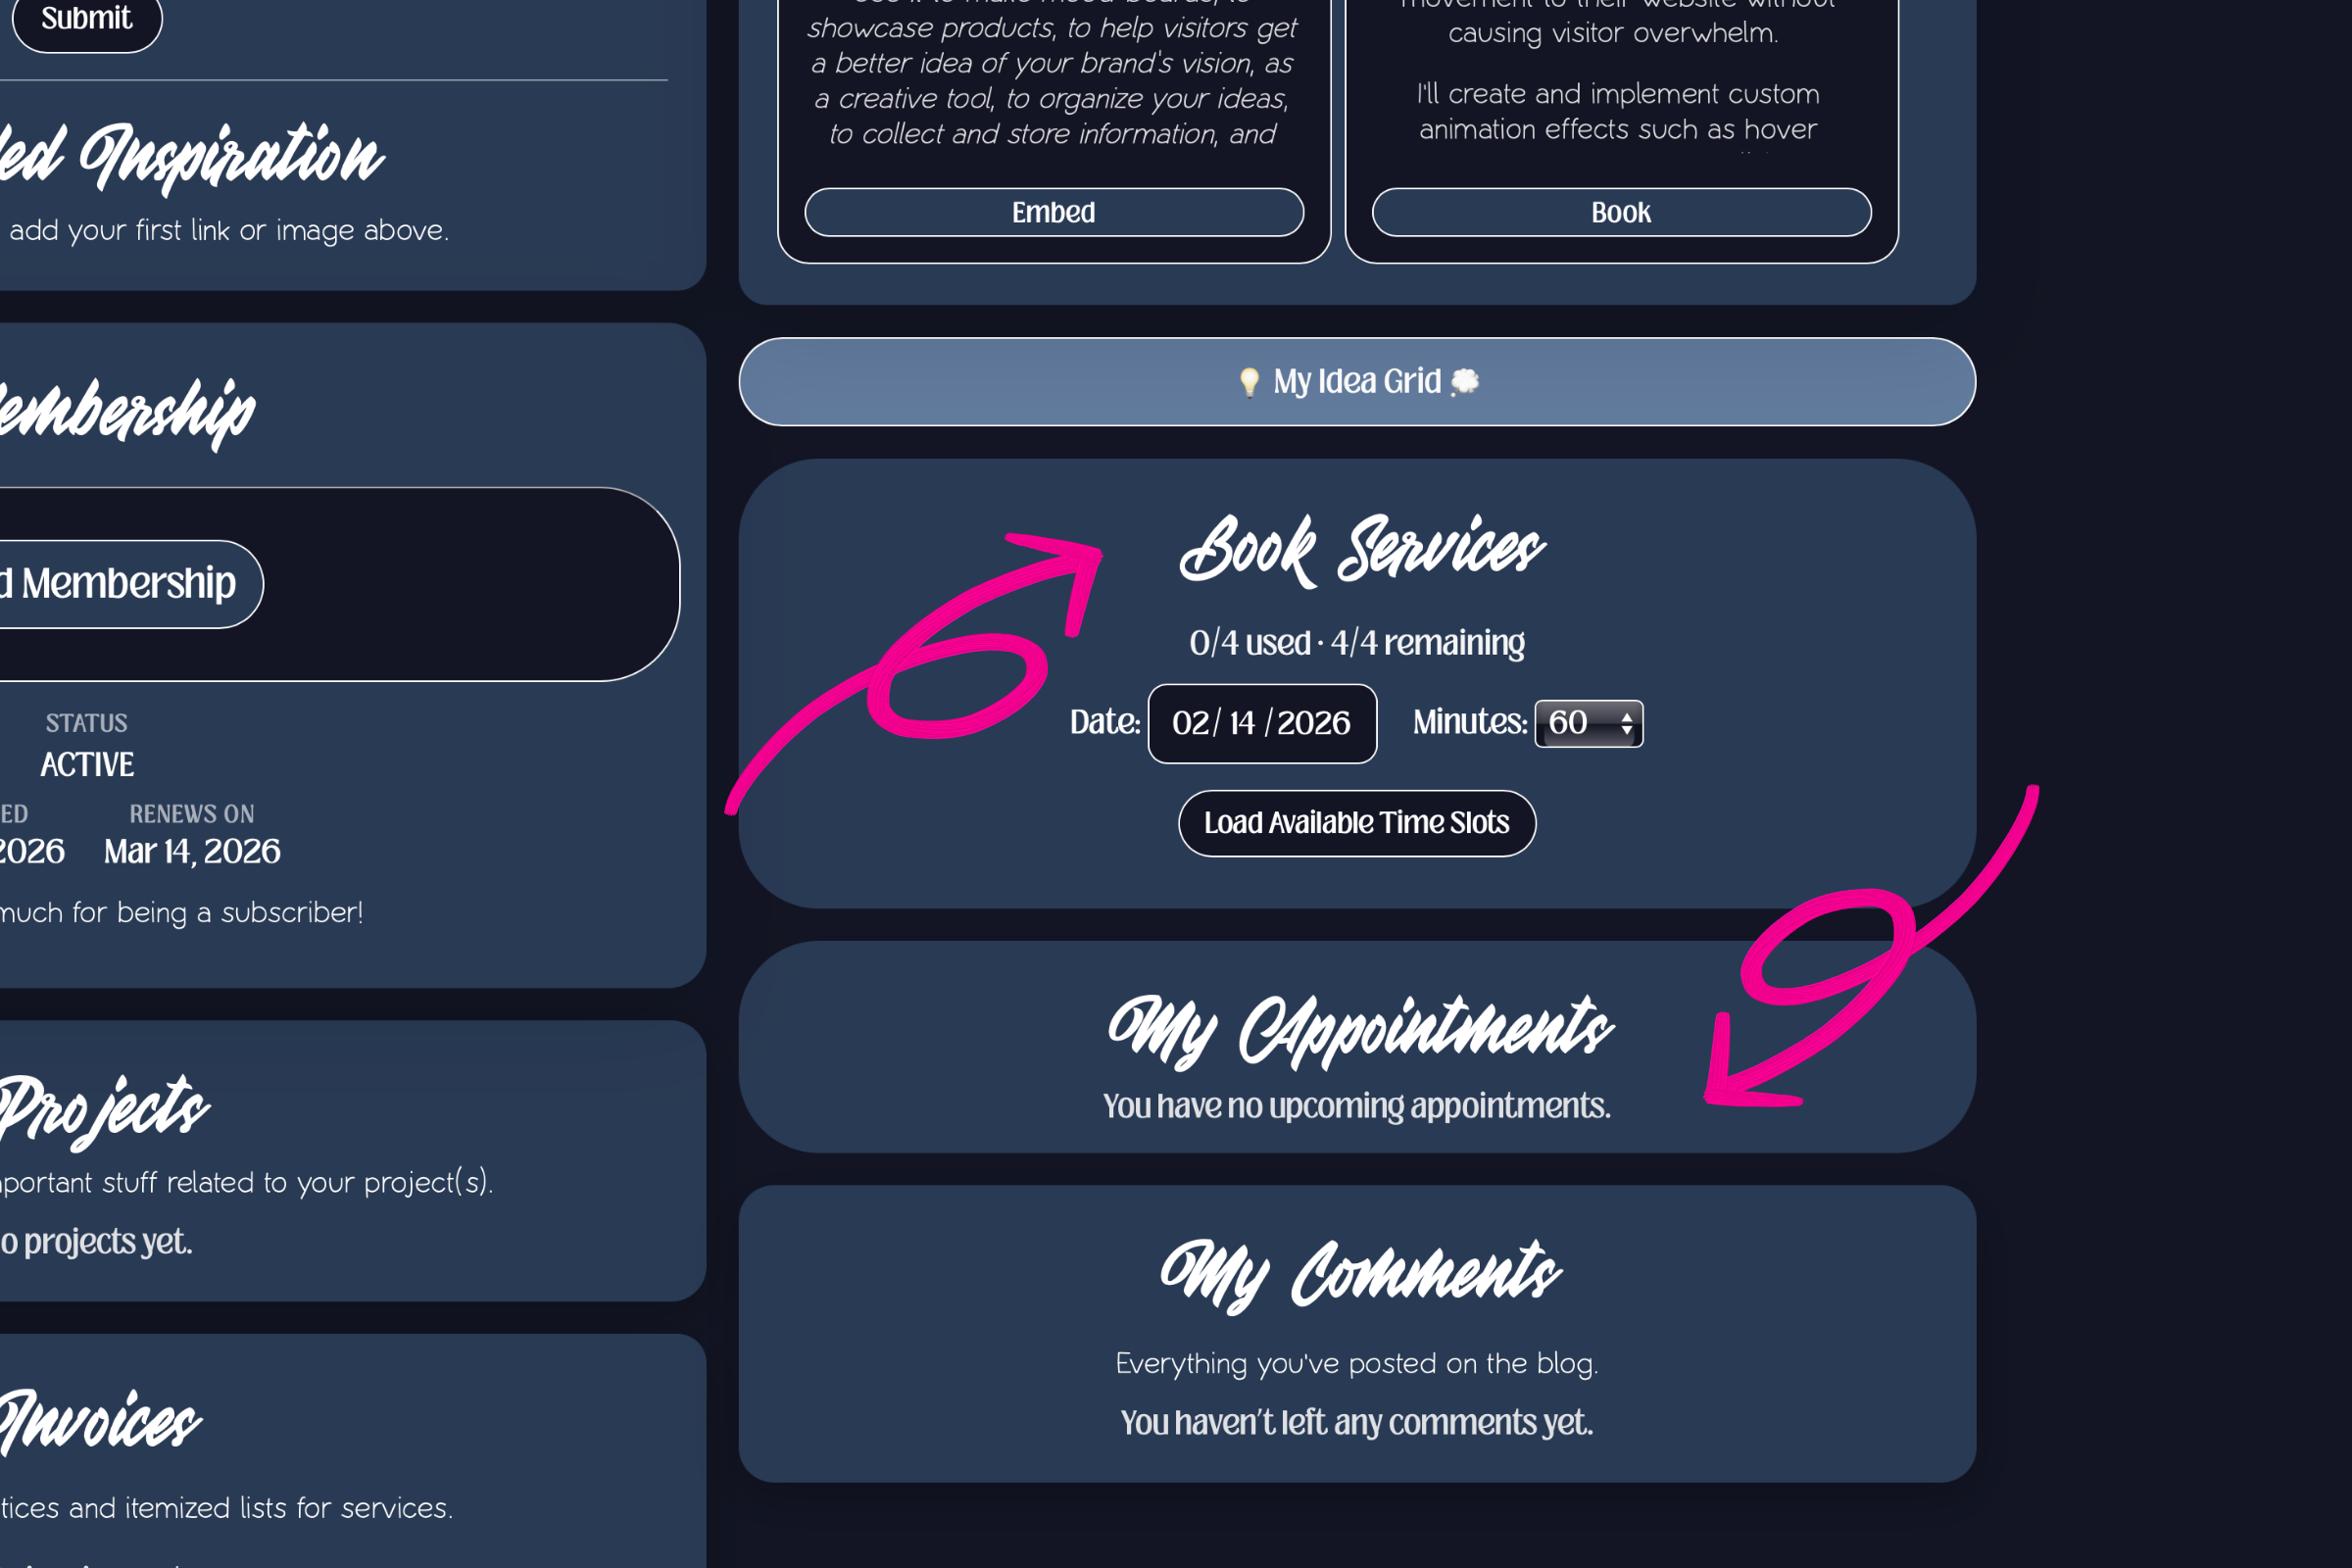
Once we return to the user dashboard, we will now see that membership section has been updated. Not only does it now show that the user has an active subscription, the dashboard has also expanded to include a new section that allows the user to book services.
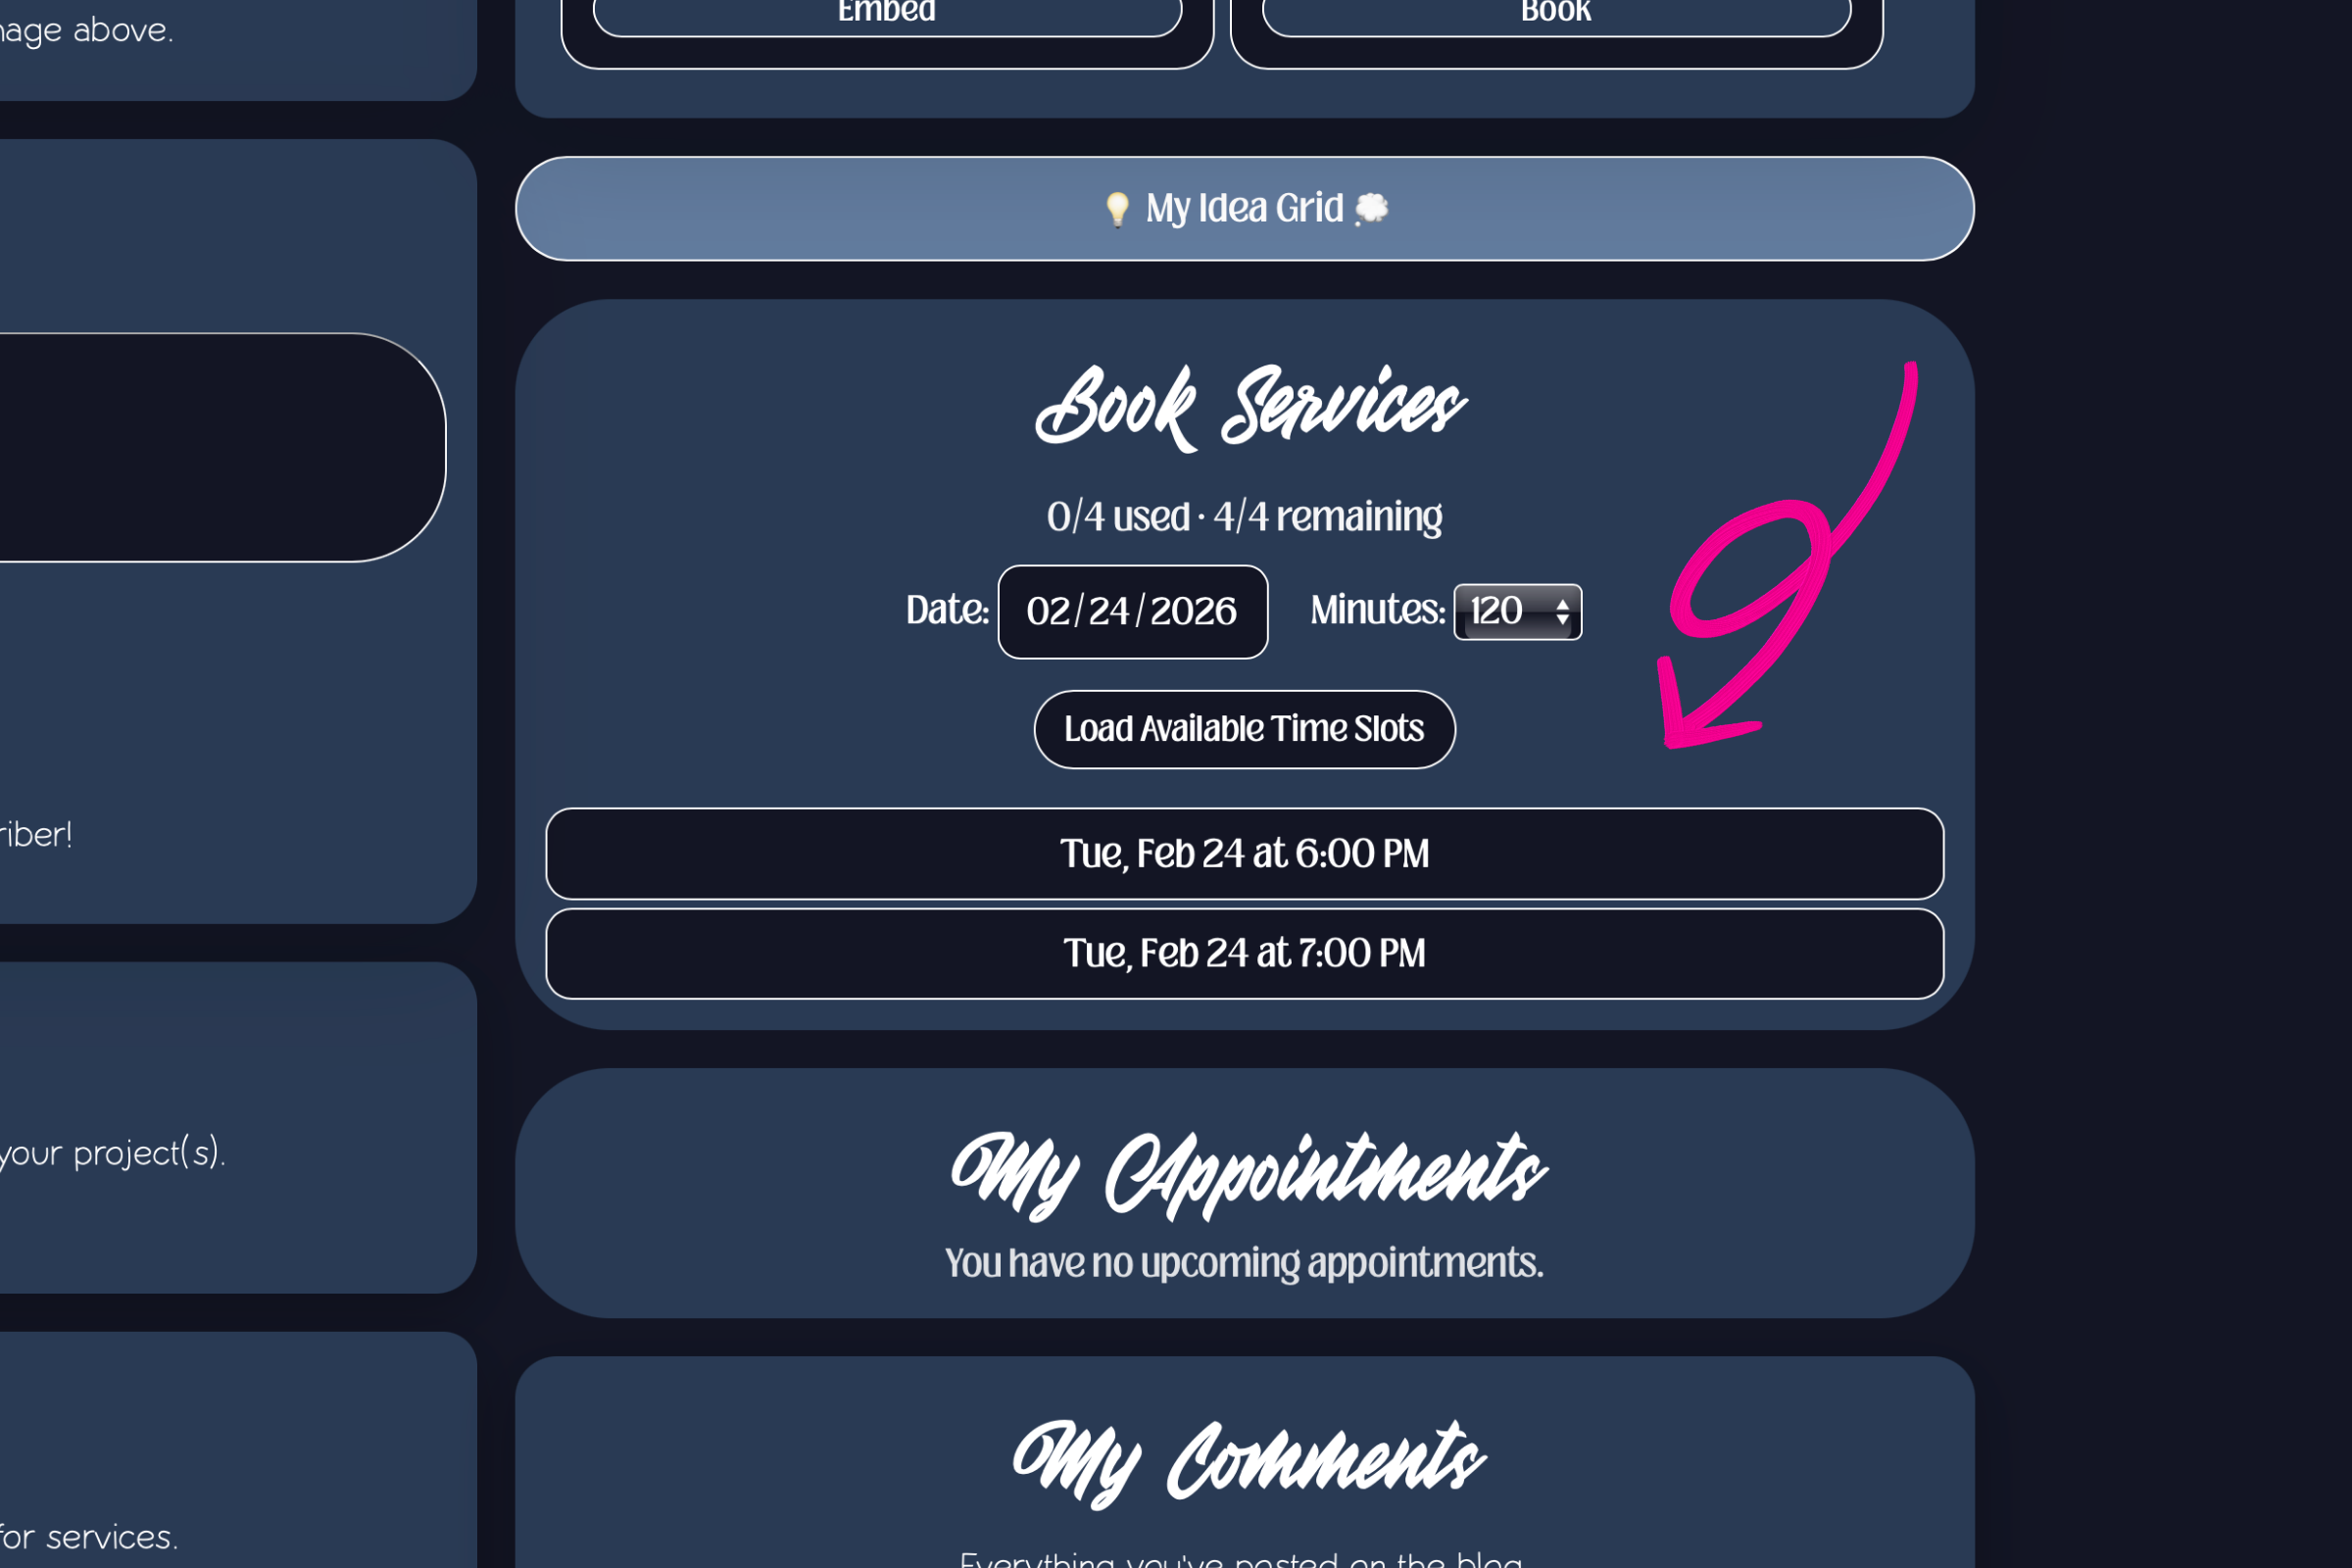
It was very important to me that the user was able to immediately use their subscription benefits. I believe that in the modern world, the expectation is that things will be fast and seamless. I wanted to provide that experience for my clients and I believe that it sets me apart. Because I sell website services, I needed to develop a system that would let the user set their appointment immediately and manage it from their dashboard. So, I created a token system and tied it to my calendar. In the image above, notice that the user is able to see the date their subscription started and the day it renews. Also notice that in the "book services" section there is now a meter displaying 0/4 used and 4/4 remaining. This denominator represents the total number of booking credits that the subscription entitles the user to. In the "book services" section, they are also given a similar interface to one that was discussed in part one. It is almost identical to the flow that occurs after somebody purchases a digital service. The only difference is that in this one, the user is asked to provide the length of their appointment in addition to providing a date that works for them. Once those details are added, the dashboard pulls up a list of available time slots for that day.
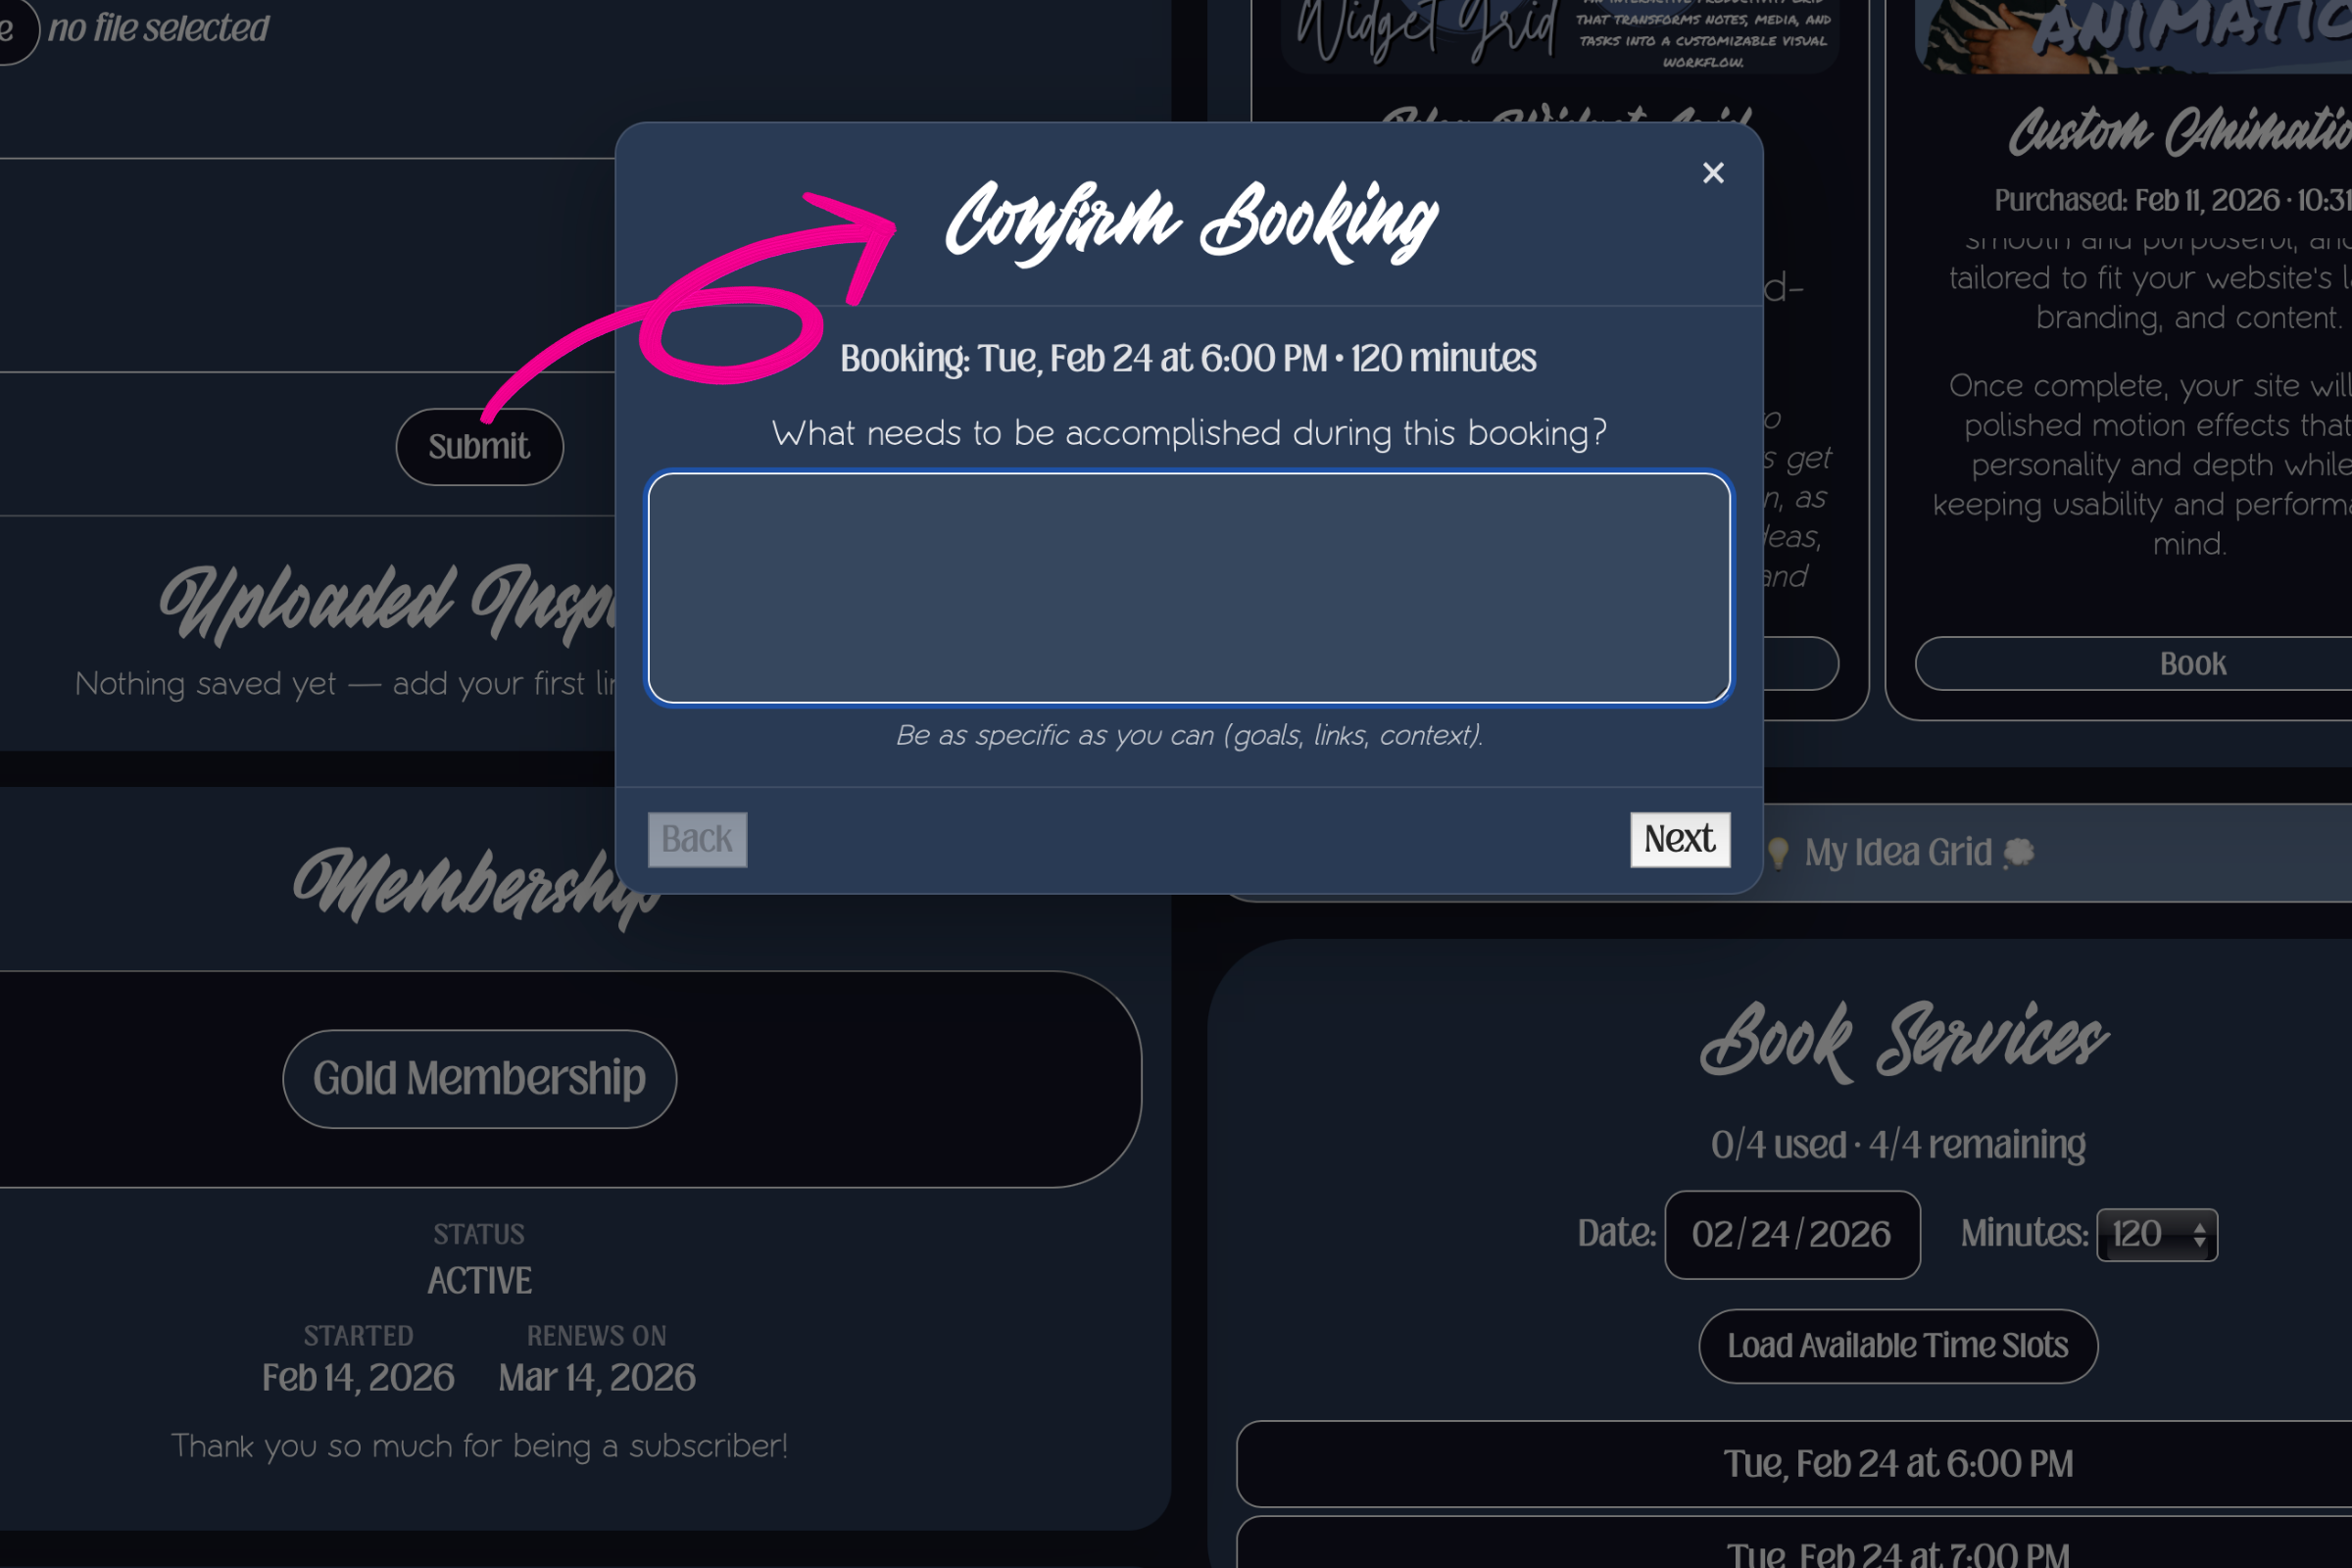
When the user chooses a date, they are asked to provide details about the appointment they are setting up:
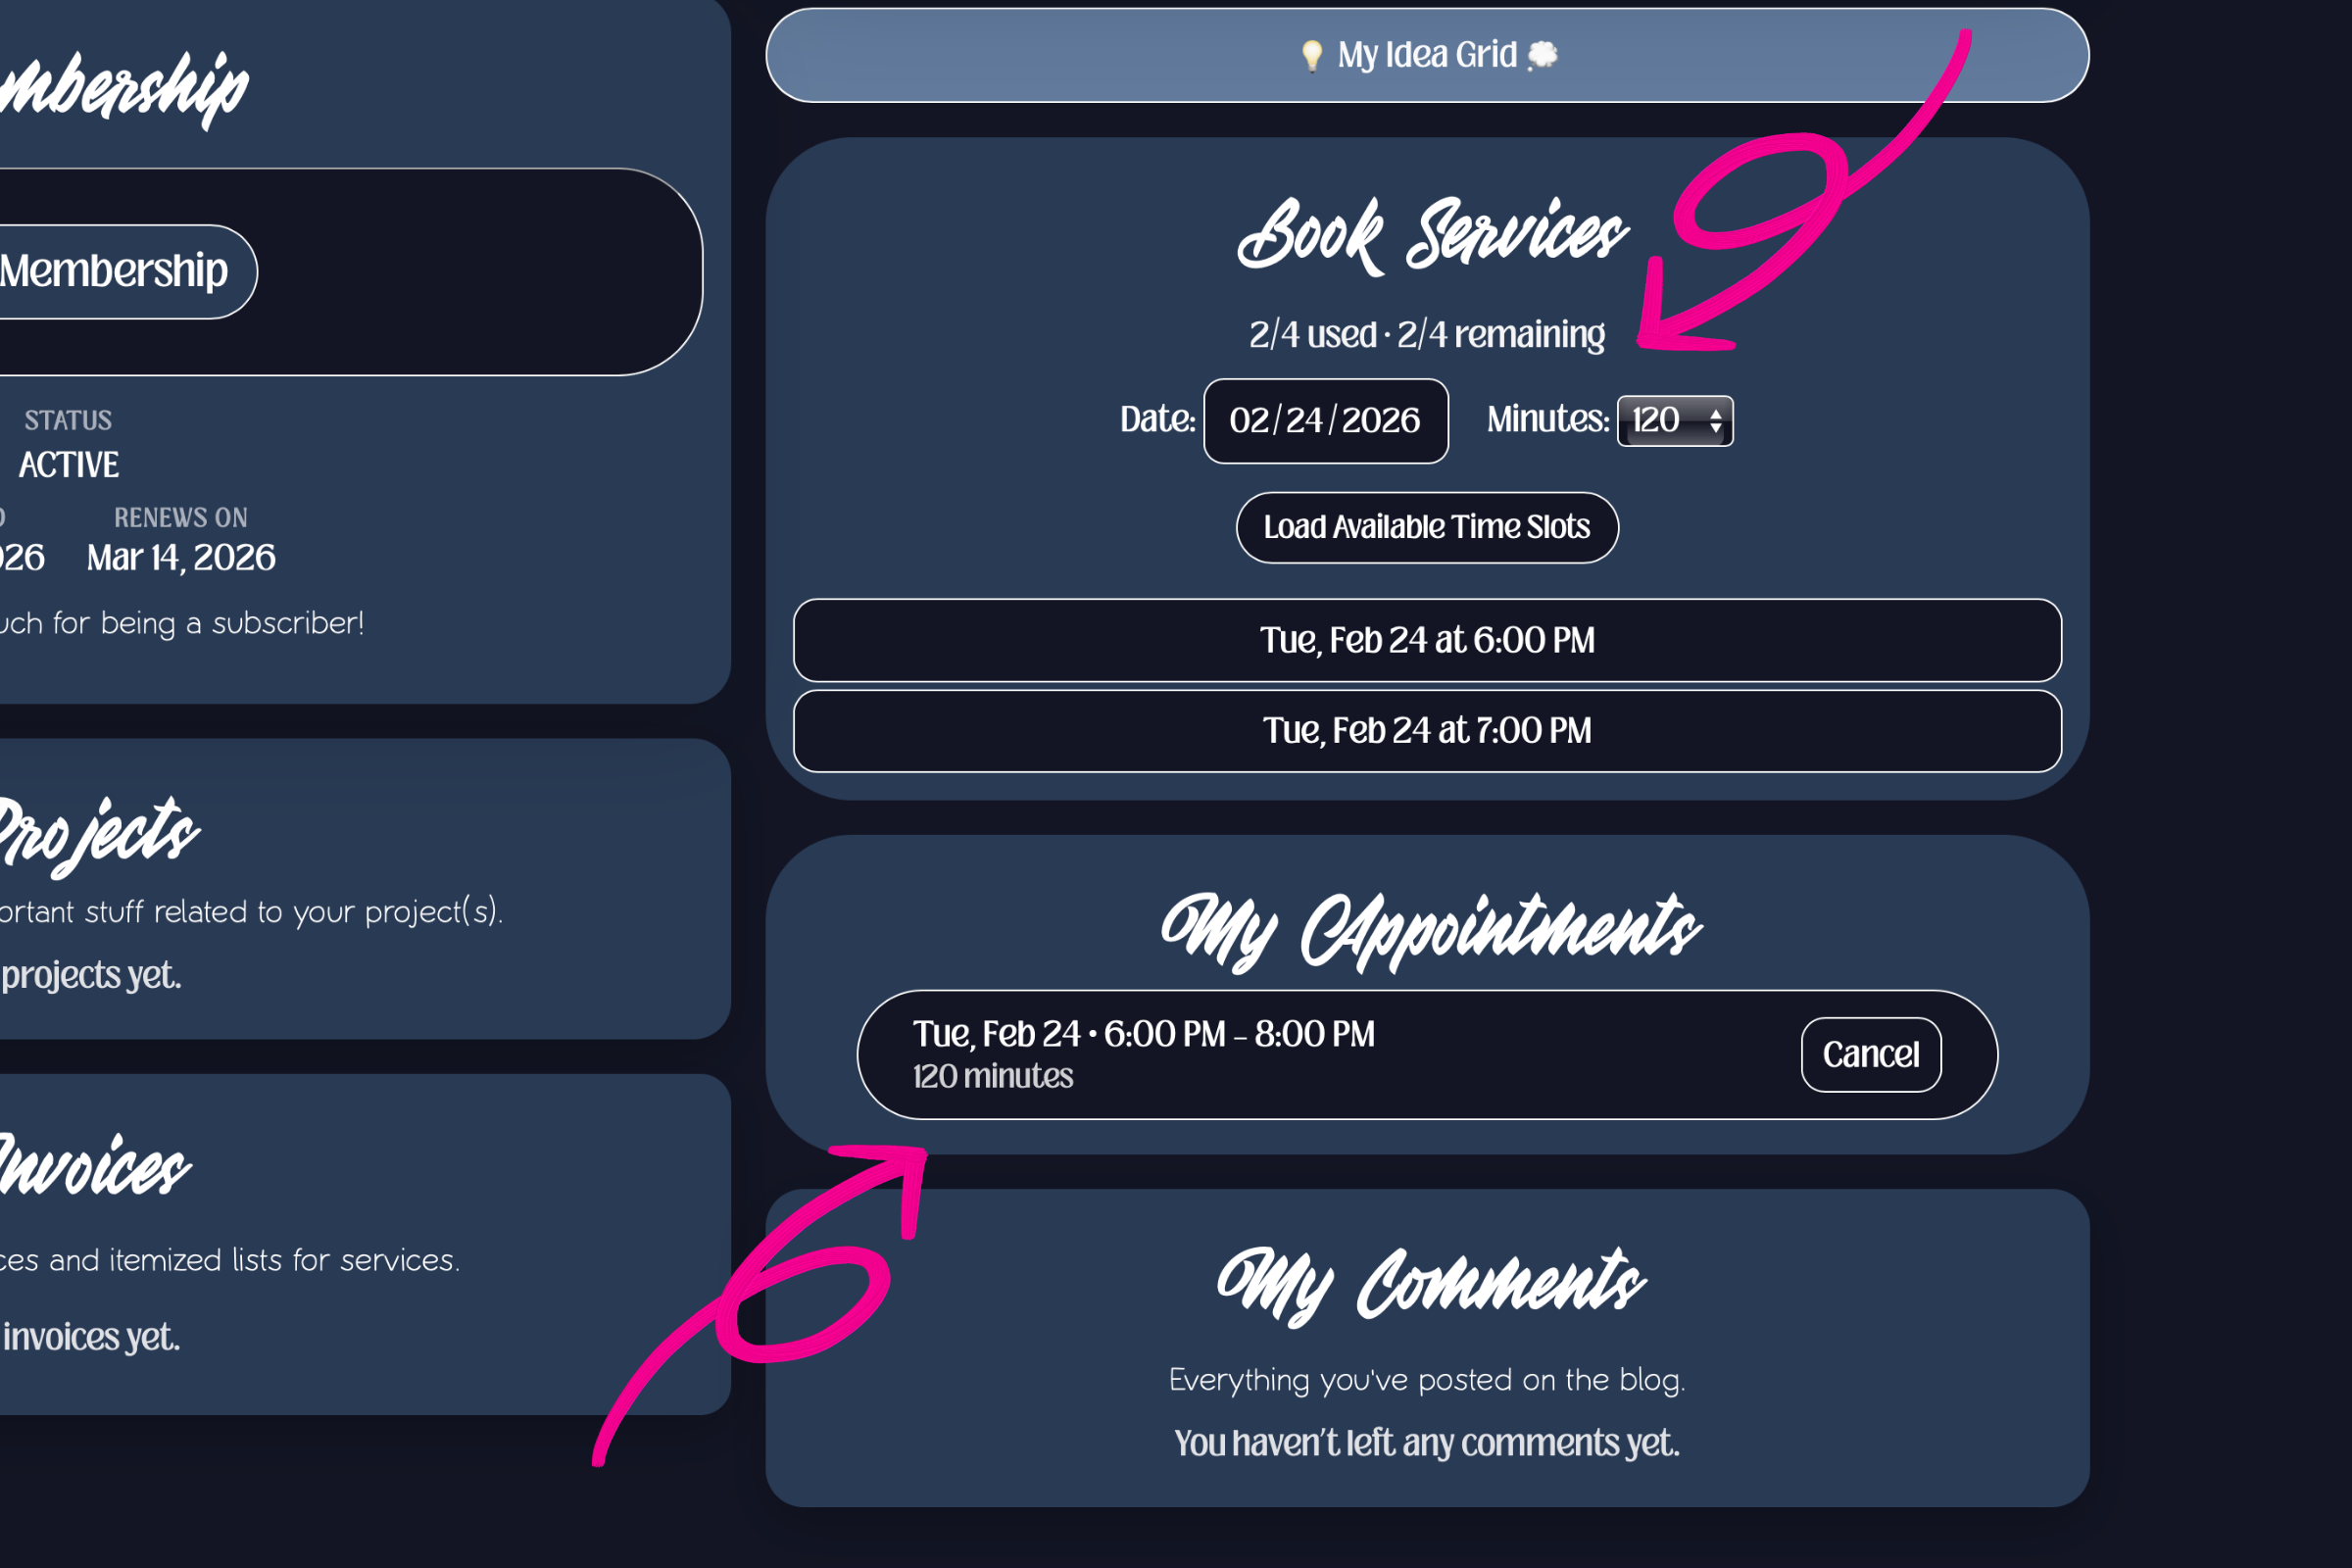
After all the details are sent, the appointment is added to the users "my appointments" section, and the option to cancel an appointment is provided. The total number of booking credits, which was determined by the length of the appointment, has been added to the total number of used credits, and subtracted from the total remaining credits.
The user can now book another appointment for the same length as before (worth another two booking credits), or they may book two separate appointments for 60 minutes each (worth one booking credit each). However, they are not able to book a longer appointment as it would fall outside of their subscription benefits. They are also not able to book appointments outside of their current subscription period.
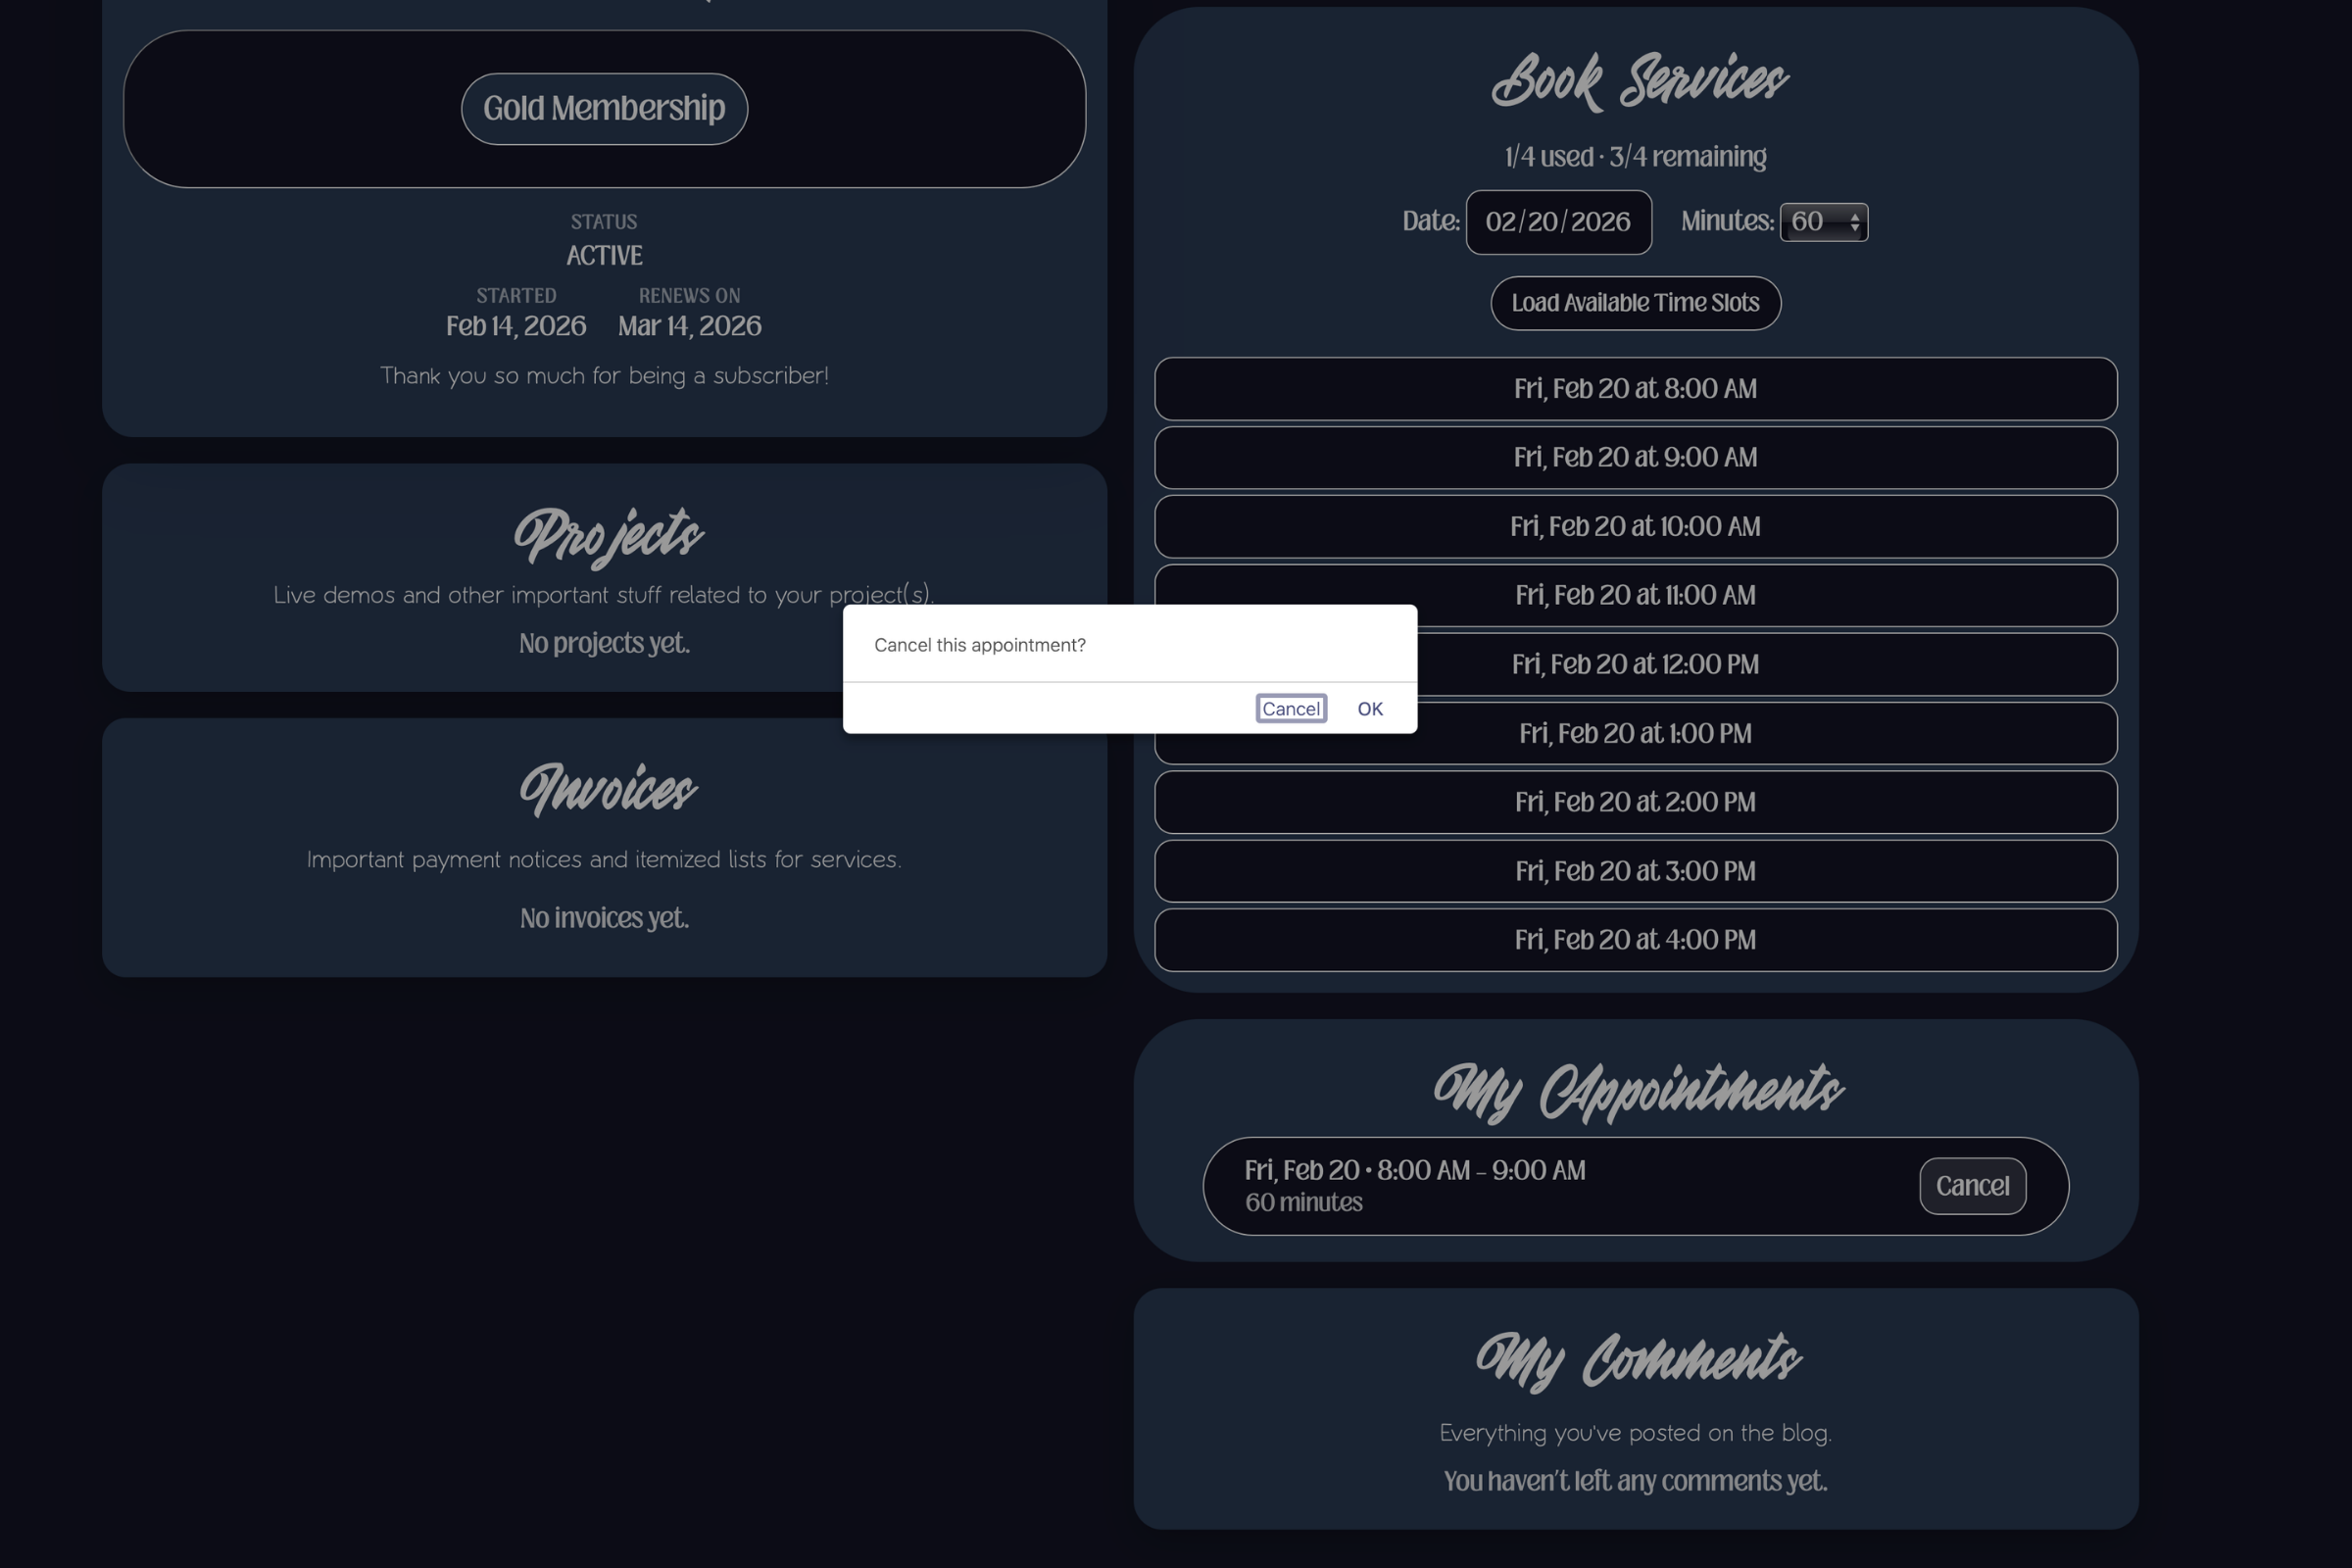
If the user goes to cancel their appointment, the booking credits are updated once more and added back to the user's total amount remaining.
This automated flow allows users to schedule their own service times and manage their appointments if changes arise while accounting for their subscription membership benefits!
The Calendar
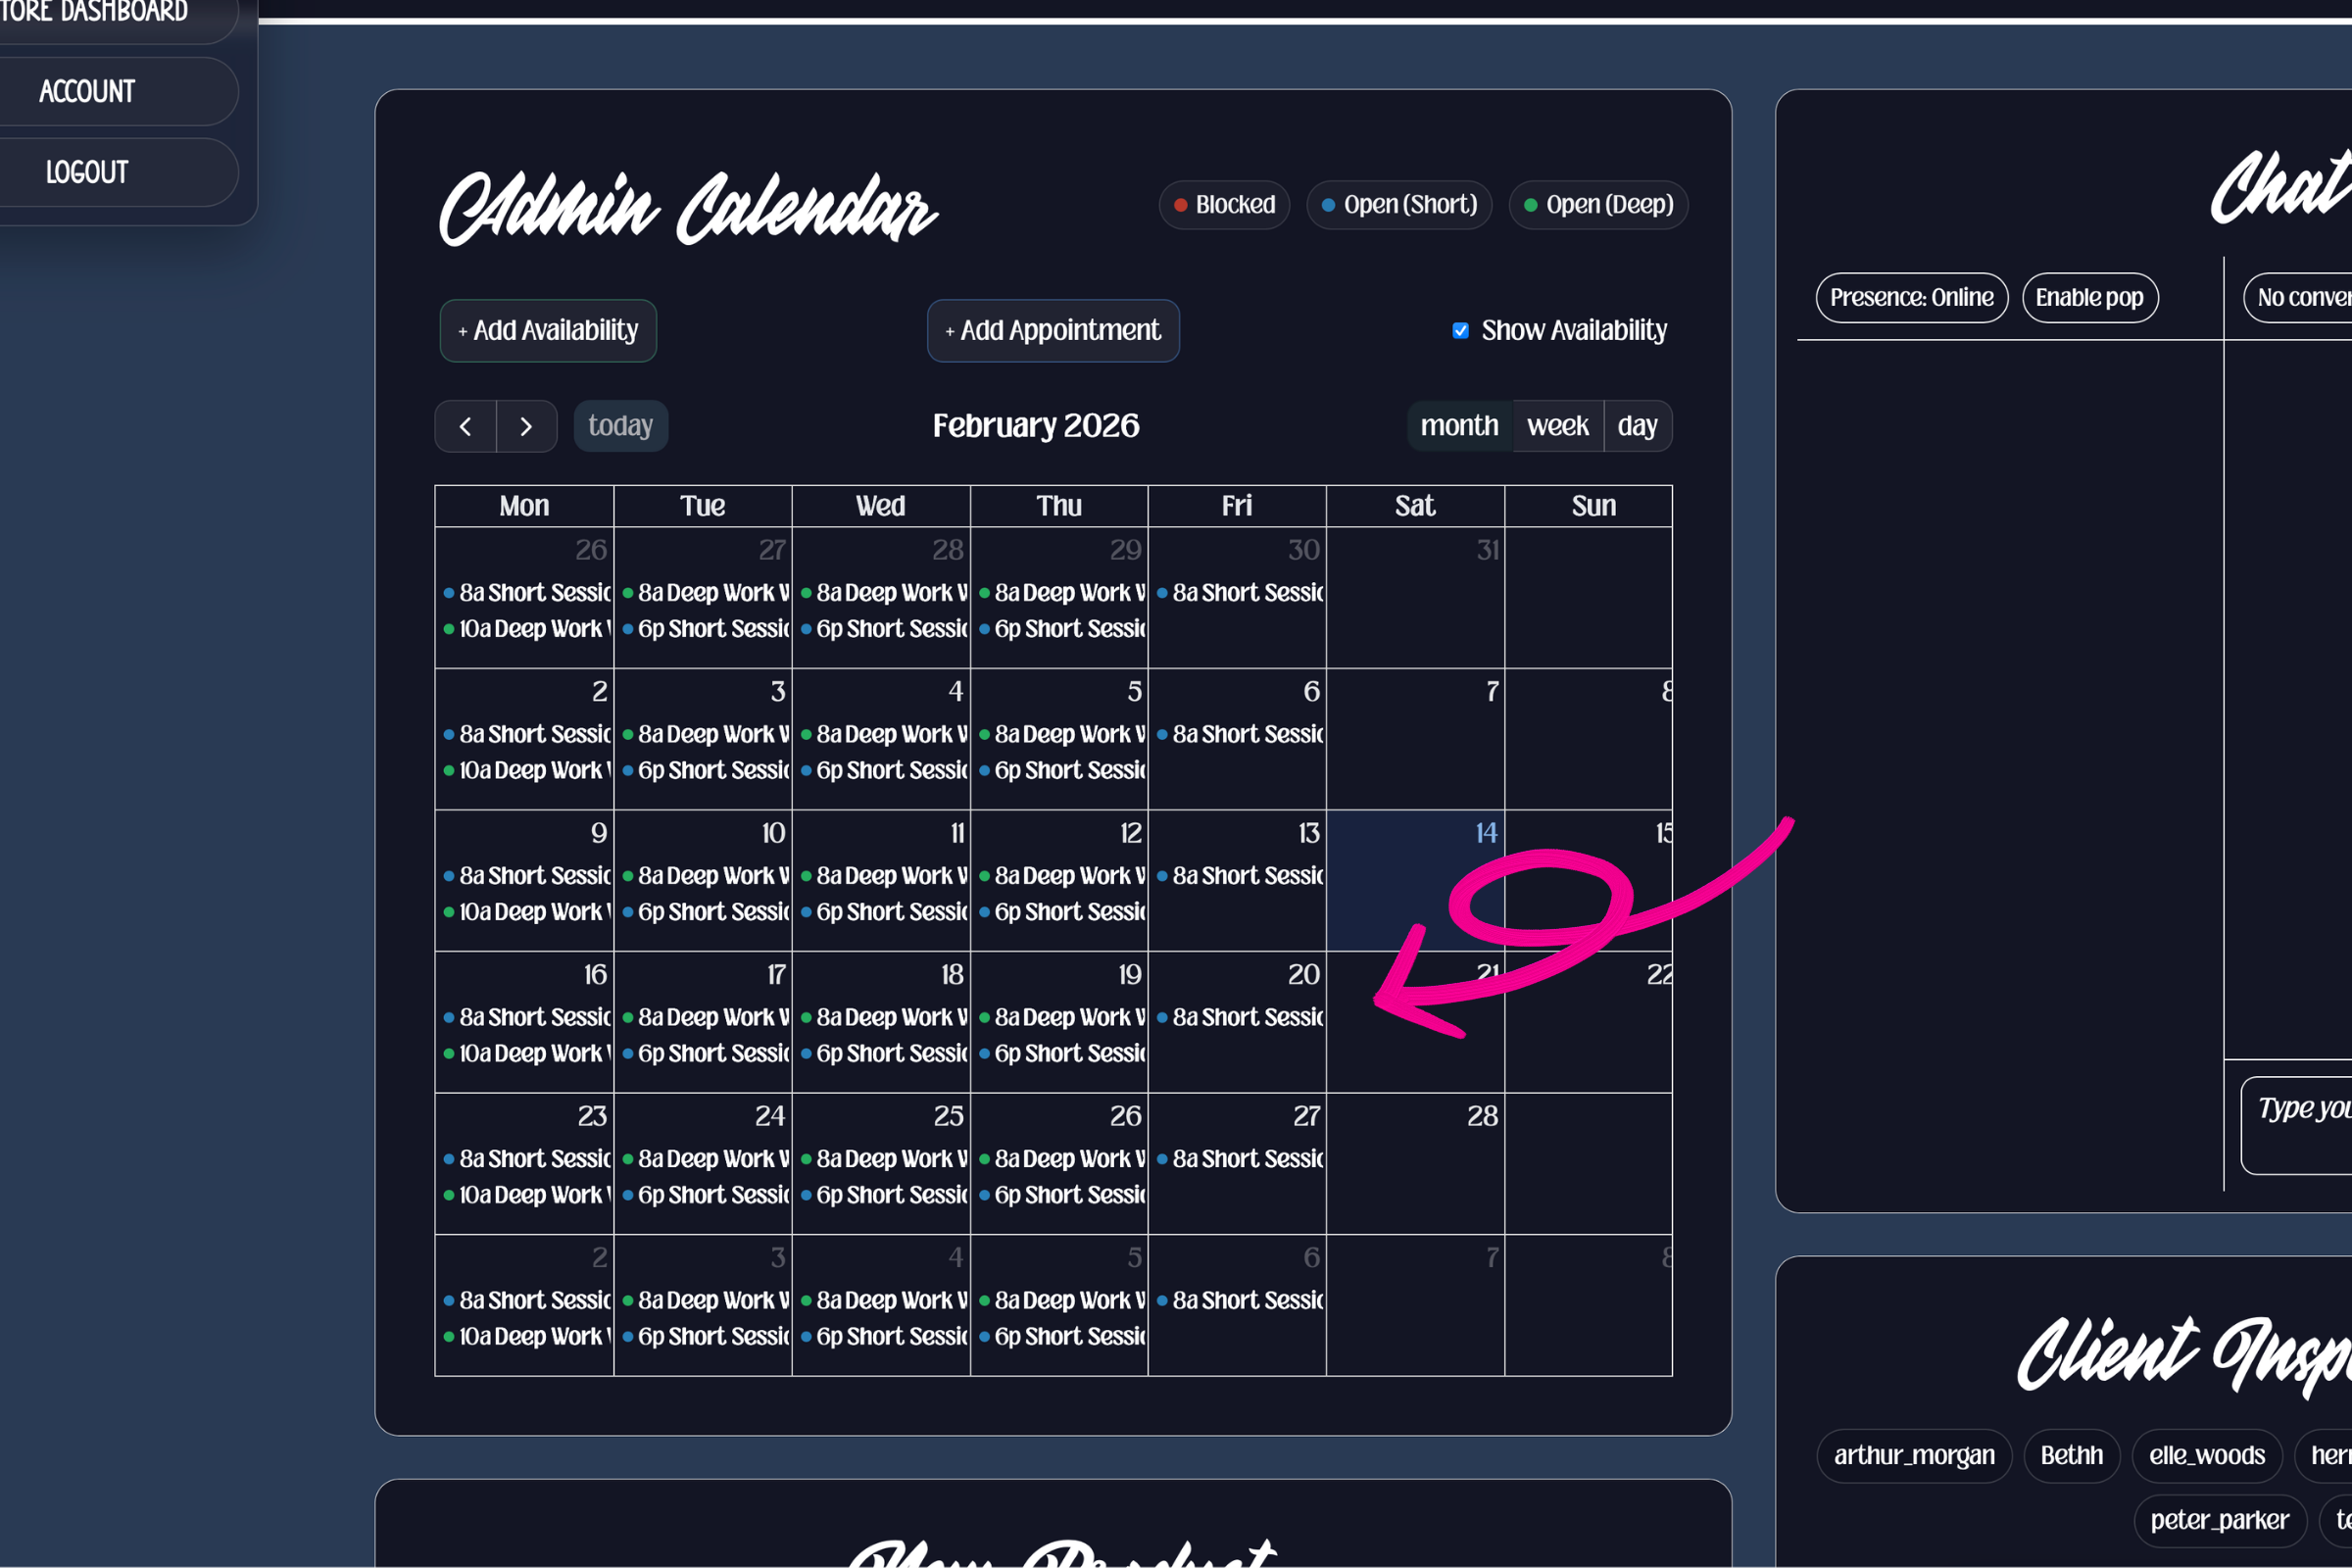
The logic behind this entire system is derived inside my calendar. From my admin dashboard, I am able to manage my calendar by setting availability, blocking out sections of time for certain types of projects, and scheduling in 30-minute block intervals.
In the image below, you can see what it looks like on my end when I am adding availability. I have divided my available time into two different types: short and deep.
This is important because it lets me set availability for only specific lengths of time. For example, I can say that I am only available for "short" jobs (two hours or less) or "deep work" (4 hours or more). This makes for a more robust scheduling system that accommodates different life events.
This is what my full calendar availability looks like. This screen can be toggled on and off, so it is not immediately visible but you can navigate to it.
For times when I need to make an appointment for a client, or block off any period of time that I will be unavailable, I can do so by adding an appointment to my calendar. The time slot will then become unavailable for clients who self-book.
The details that the client added when they booked their appointment display inside my calendar when I click on the appointment.
In the future, I would love to update it so that it automatically creates and sends a link for a video call. I would also like to allow clients to edit their appointment details, and further improve the aesthetics of the user interfaces.
That is all for this one! I hope you enjoyed learning more about my custom build. If this interested you, you have questions, or want to work with me, please, drop a comment in the comment section! I would love to hear from you!
Stay tuned for the next one, where will I talk about how I:
Updated my chatbot so that when I am online, it connects the user directly to me and allows us to chat in real time. When I am offline, it goes into "chatbot" mode, and acts as a virtual assistant that talks to the user and delivers their message to me through email
Built custom tools in my admin panel that allow me to create projects for clients, bill invoices, view information provided by clients, and seewhen somebody has posted a review or commented.
Created a dedicated account settings page with the option to change account details, set an avatar, and cancel subscriptions.

 This automated flow allows users to schedule their own service times and manage their appointments if changes arise while accounting for their subscription membership benefits
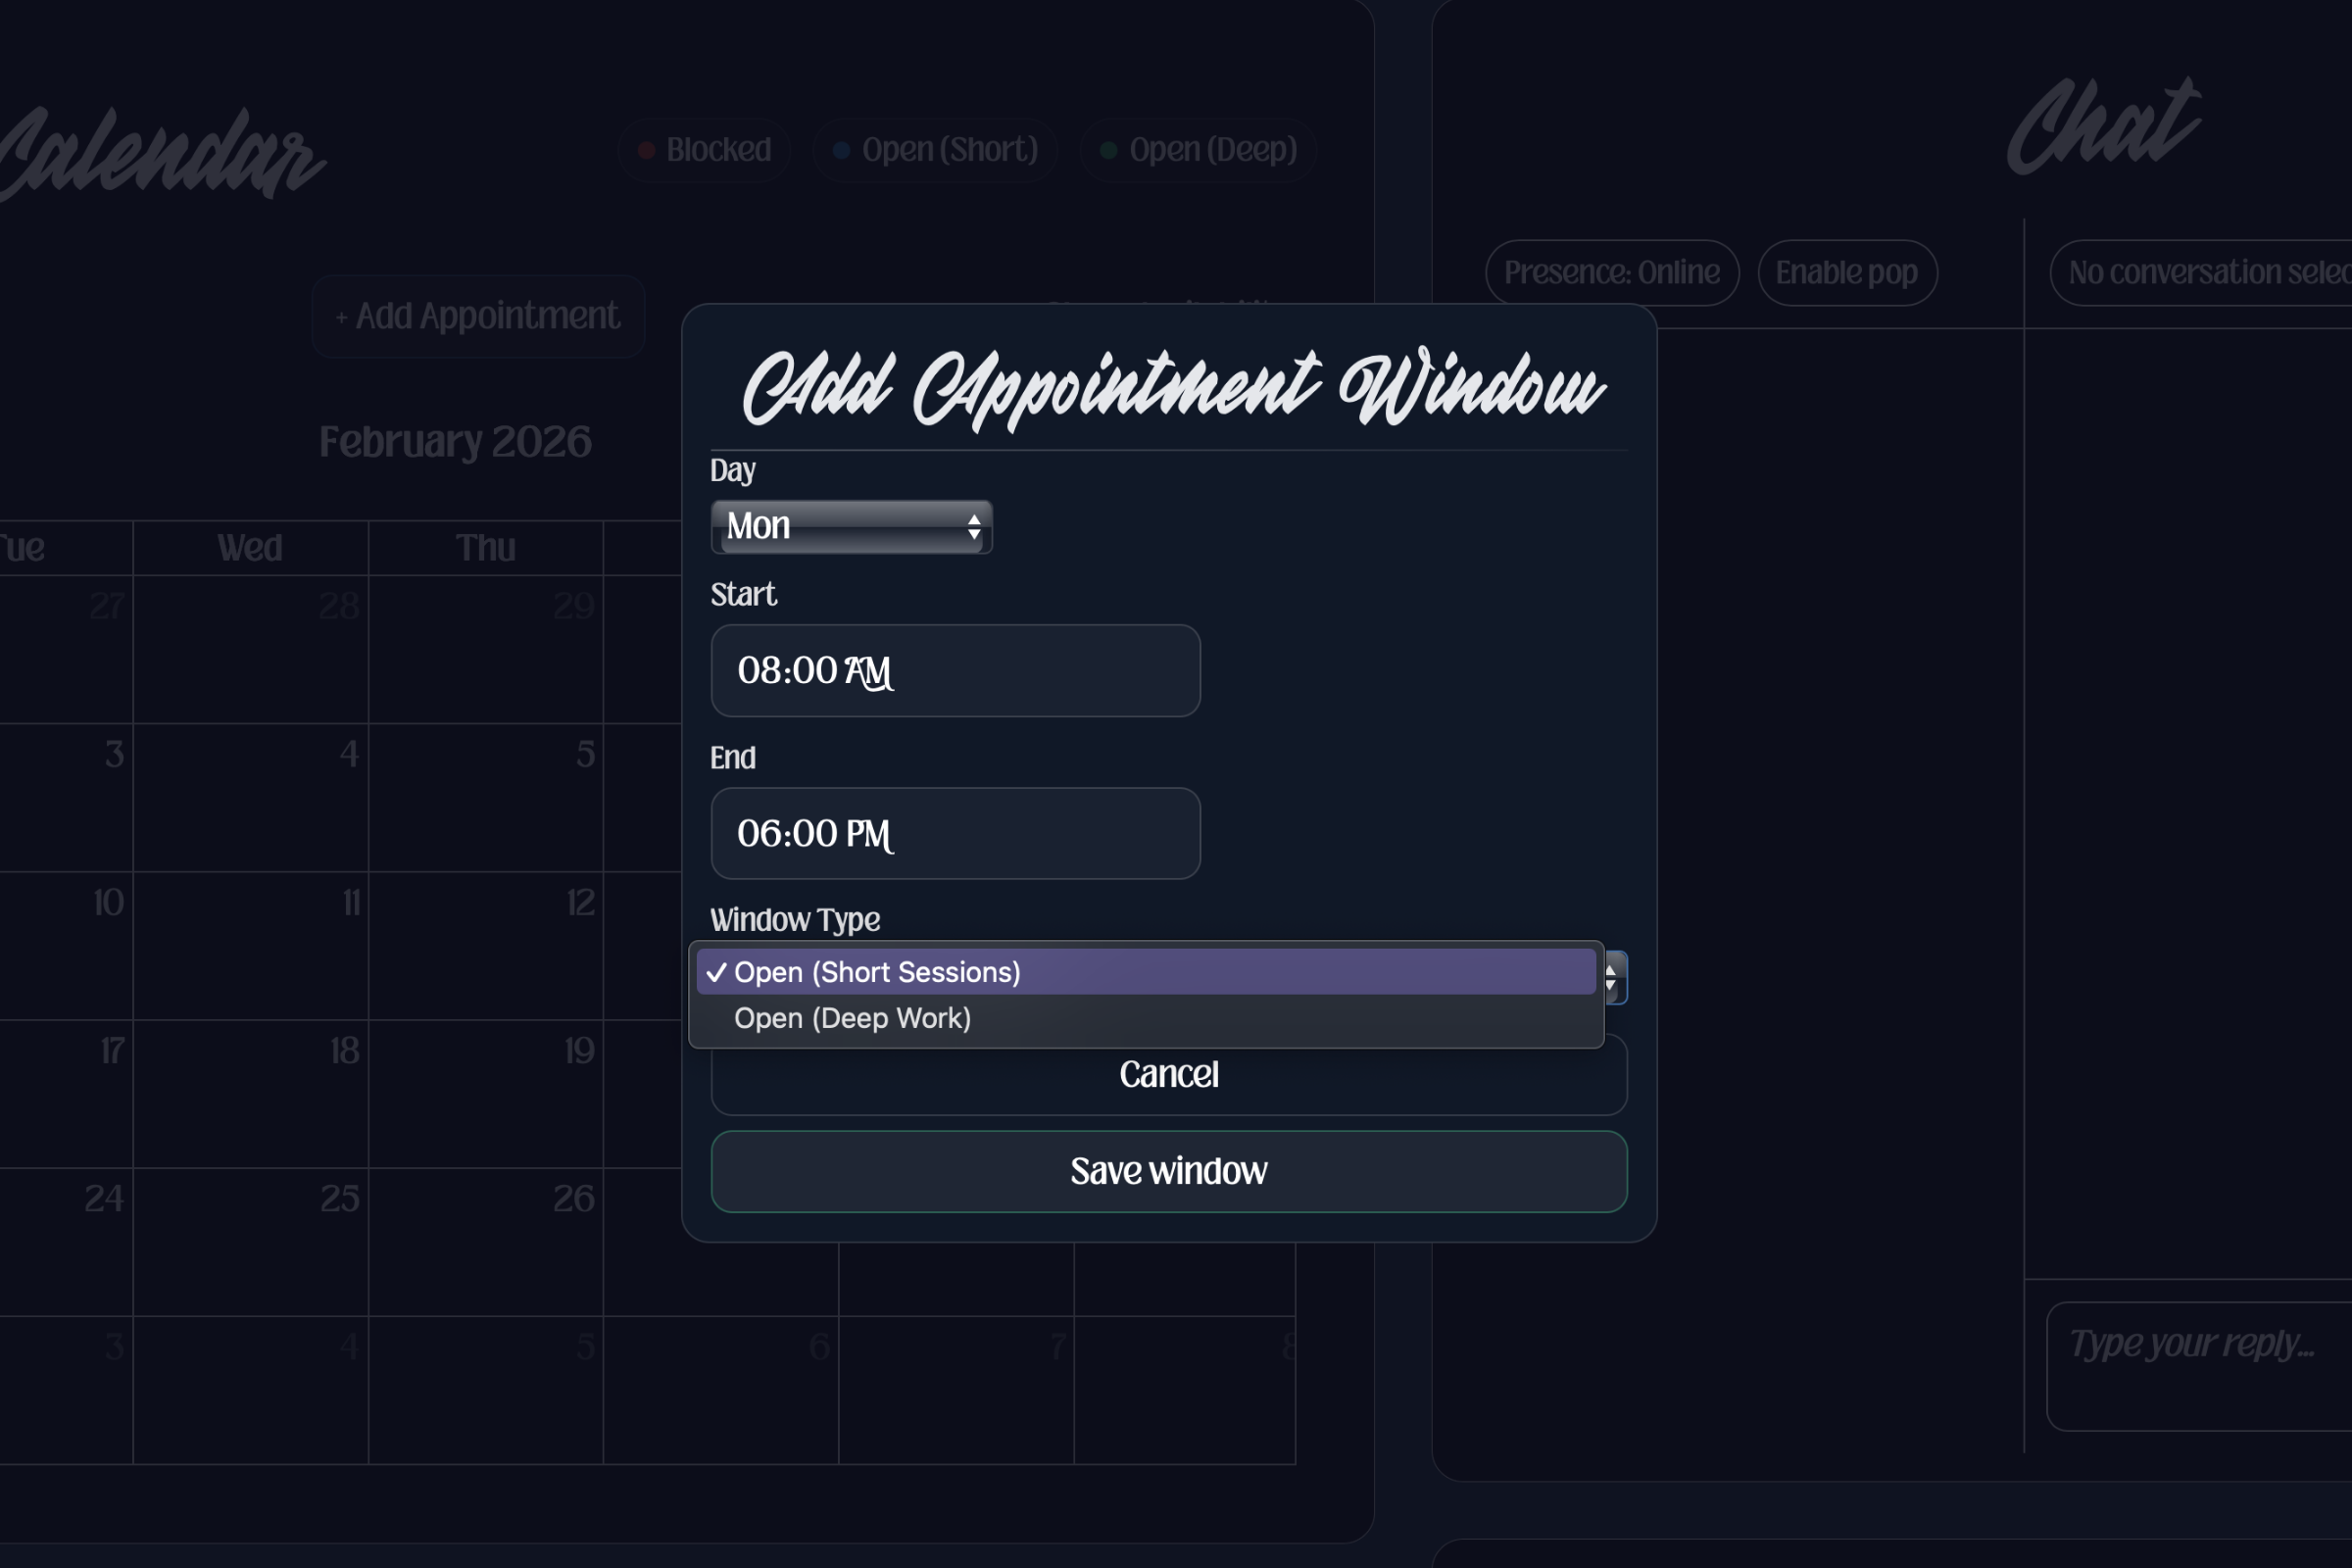
 For times when I need to make an appointment for a client, or block off any period of time that I will be unavailable, I can do so by adding an appointment to my calendar. The time slot will then become unavailable for clients who self-book.
 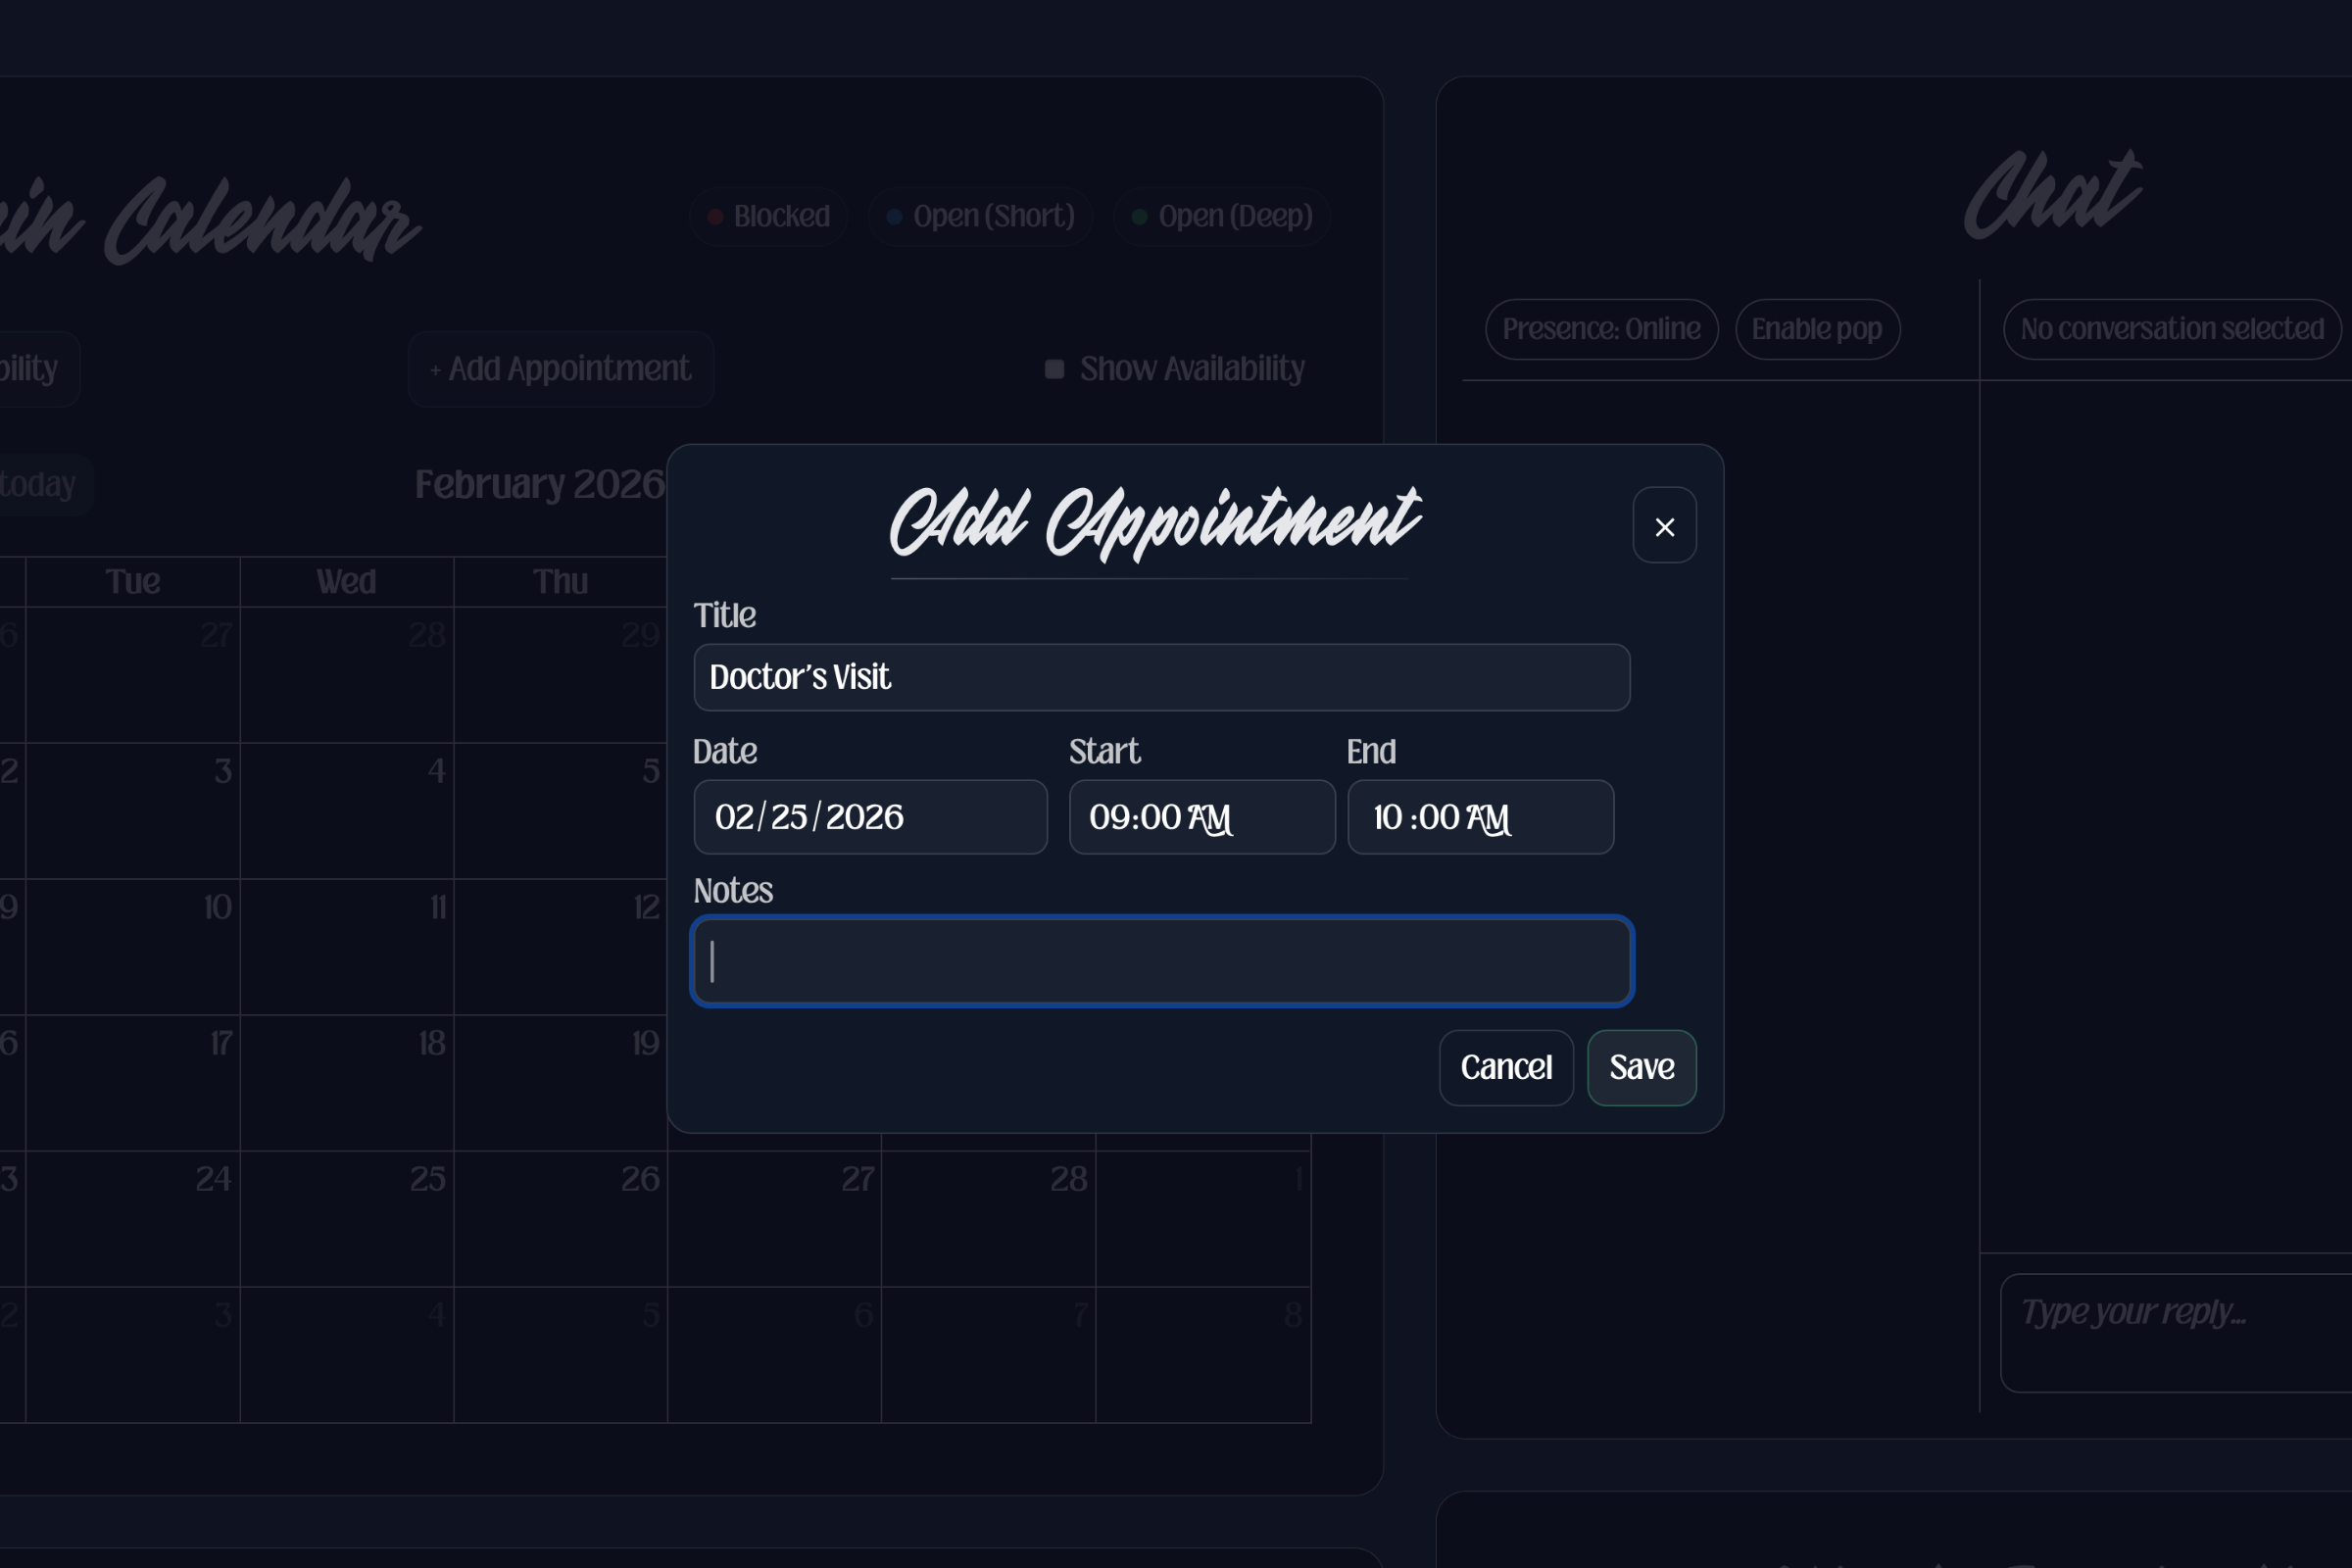 The details that the client added when they booked their appointment display inside my calendar when I click on the appointment.
 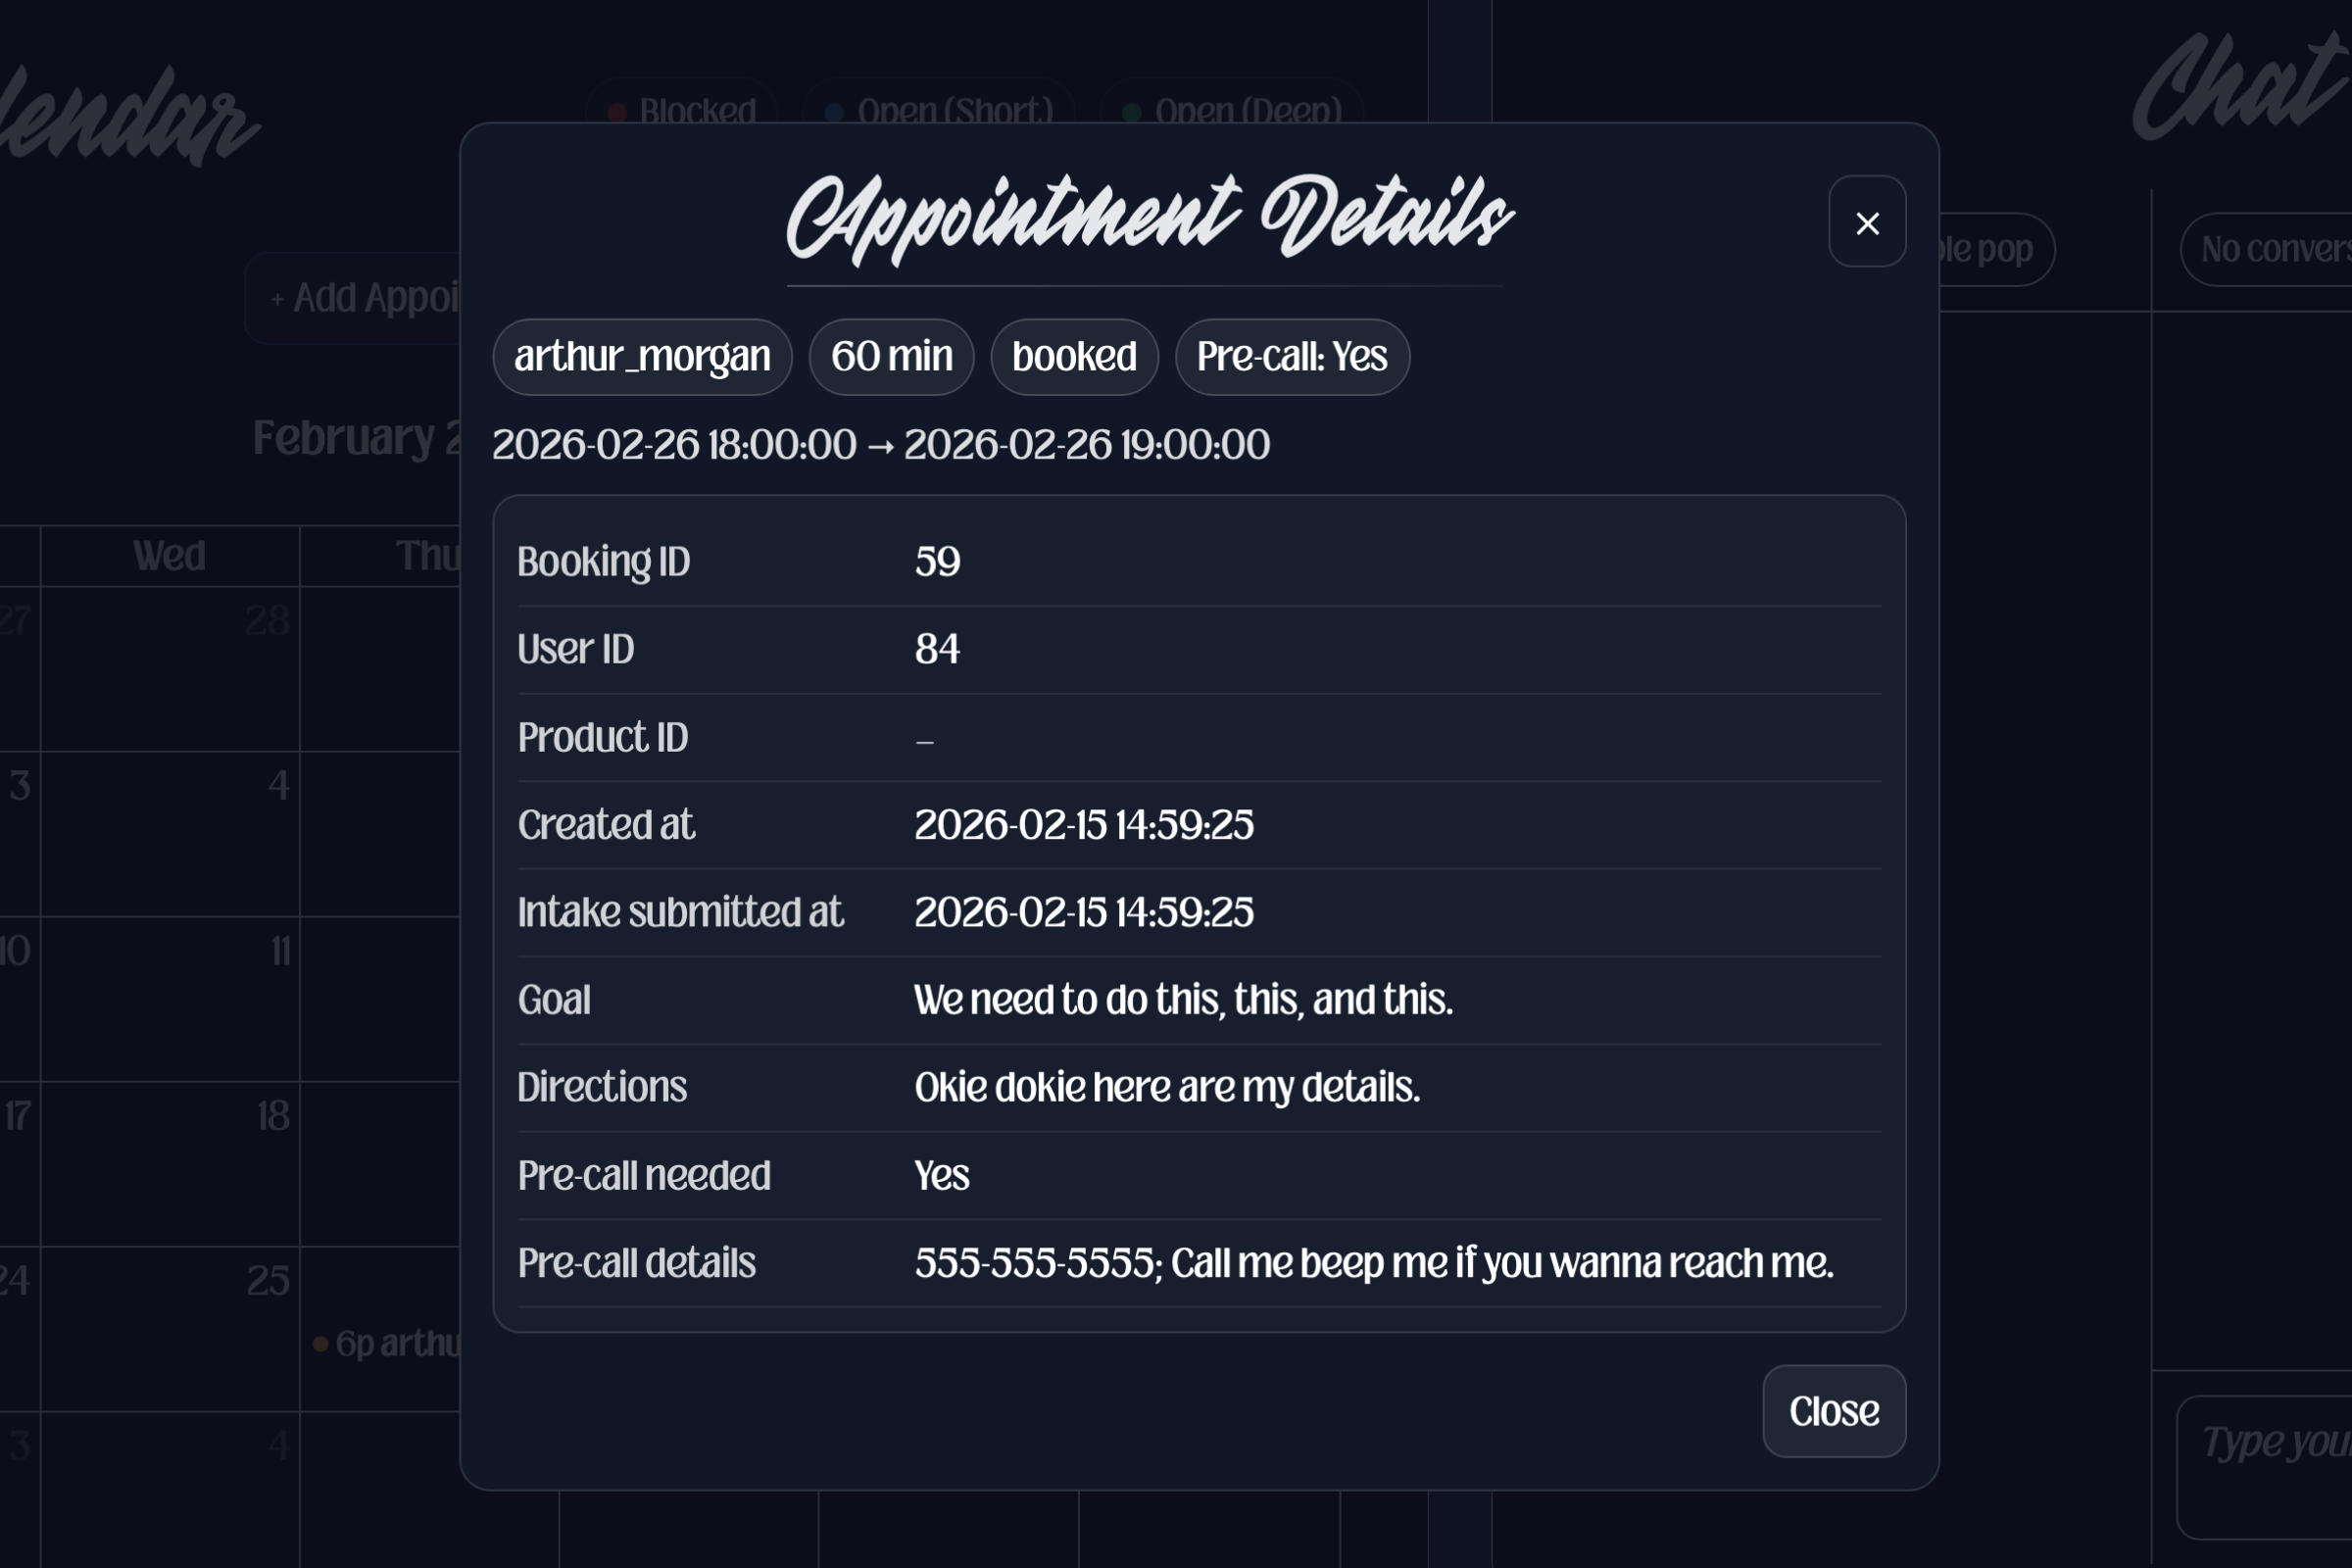 In the future, I would love to update it so that it automatically creates and sends a link for a video call. I would also like to allow clients to edit their appointment details, and further improve the aesthetics of the user interfaces.